How to Change Bike Pedals without a Pedal Wrench: Step-by-Step Guide

Changing bike pedals may seem like a daunting task at first, especially if you don’t have a pedal wrench. However, with a few simple tools and a little know-how, you can easily replace your bike pedals without the need for a specialized wrench. In this step-by-step guide, we will walk you through the process of changing your bike pedals using everyday household tools.
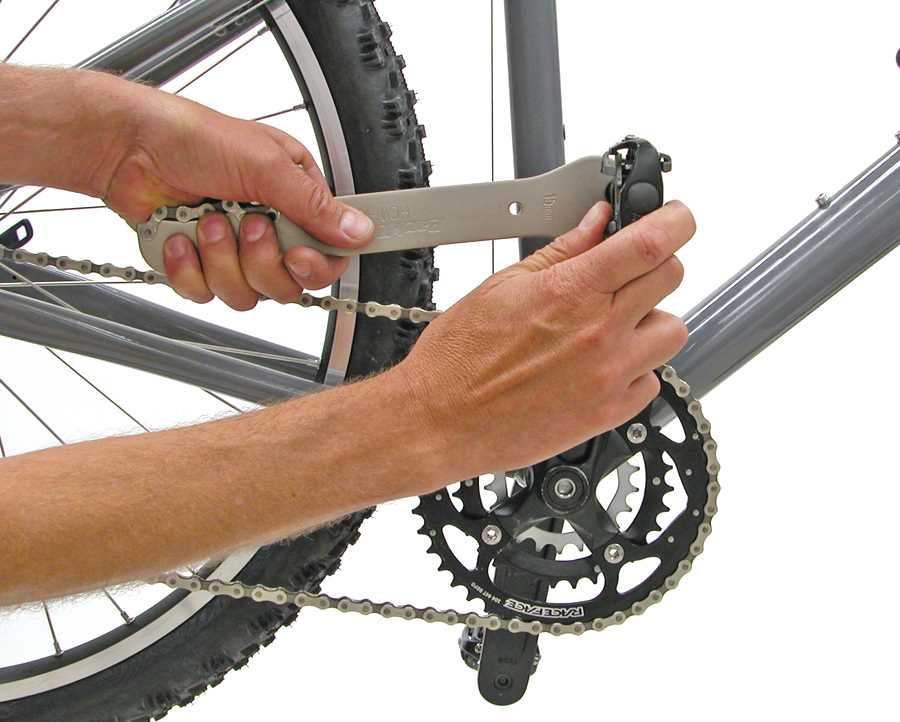
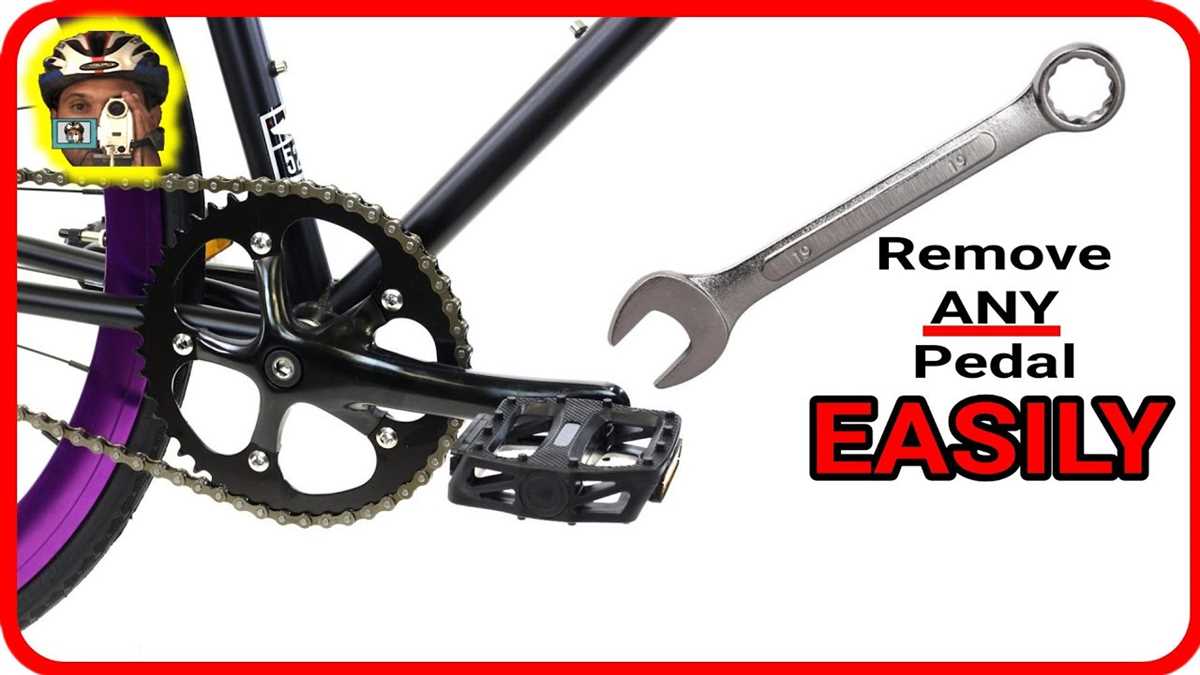
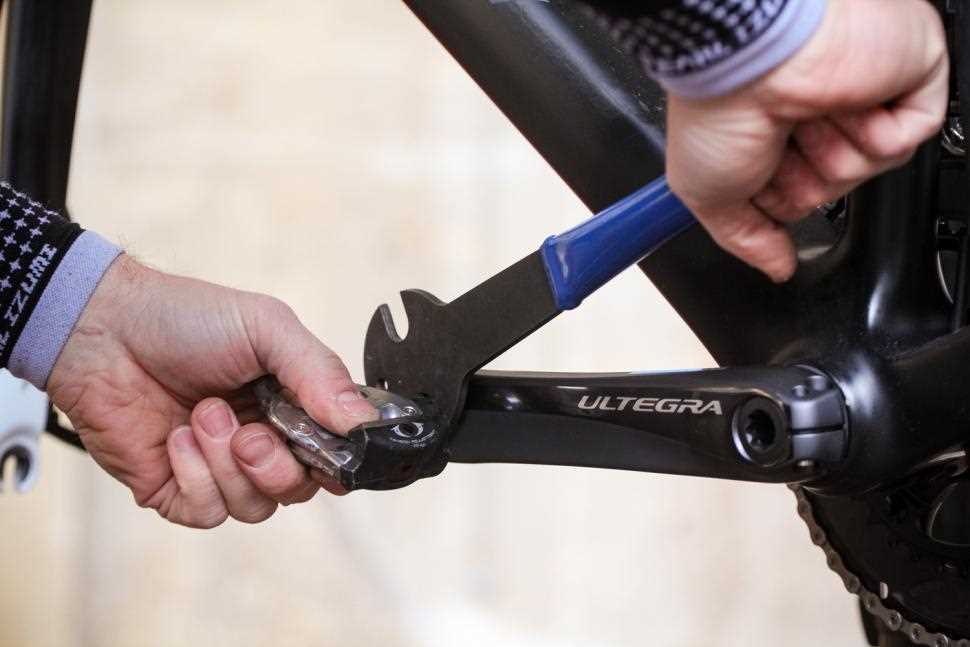
Firstly, it is important to note that not all bike pedals require a pedal wrench for removal. Many modern bike pedals have a 15mm flat wrench flat on the spindle, which can be easily turned with a regular wrench or adjustable wrench. However, if your pedals do require a pedal wrench and you don’t have one, don’t worry – there are alternative methods you can use.
One of the most common methods for removing bike pedals without a pedal wrench is using a long-handled wrench or an adjustable wrench. Begin by placing the wrench on the flat part of the pedal spindle, making sure it is securely clamped. Then, using steady force and leverage, turn the wrench counterclockwise to loosen the pedal. Once the pedal is loose enough, you can unscrew it by hand and remove it from the crank arm.
Tip: If the pedal is stuck and difficult to remove, you can try applying a lubricant, such as WD-40, to loosen it. Allow the lubricant to sit for a few minutes before attempting to remove the pedal again.
If you don’t have access to a wrench, another option is to use a pair of pliers or vice grips. Carefully position the pliers or vice grips on the pedal spindle, making sure not to damage the threads. Apply steady force and turn the pliers or vice grips counterclockwise to loosen the pedal. Once the pedal is loose enough, you can unscrew it by hand and remove it from the crank arm.
Remember to always tighten the new pedals securely when installing them. You can use the same methods described above to tighten the pedals, using a wrench or pliers with a firm grip. Ensure the pedals are tightly secured to the crank arm to avoid any accidents or damage while riding.

By following these steps, you can change your bike pedals without a pedal wrench and get back on the road in no time. Remember to always exercise caution and use the appropriate tools for the job. Happy cycling!
Gather the necessary tools
Before you begin changing your bike pedals, make sure you have the following tools:
- A pedal wrench
- A regular wrench or an adjustable wrench (optional)
- A rag or towel
The most important tool you will need is a pedal wrench. This specialized wrench is specifically designed for removing and installing bike pedals. It has a long handle and a thin, open-ended wrench at one end.
In addition to a pedal wrench, having a regular wrench or an adjustable wrench can be helpful for certain types of pedals that may require additional tools for removal.

Lastly, having a rag or towel handy will help you clean any dirt or grease off the pedals and crank arms as you work.
Remove the old pedals
To remove the old pedals from your bike without a pedal wrench, follow these steps:
- Start by placing your bike on a stable surface or in a bike stand to ensure stability.
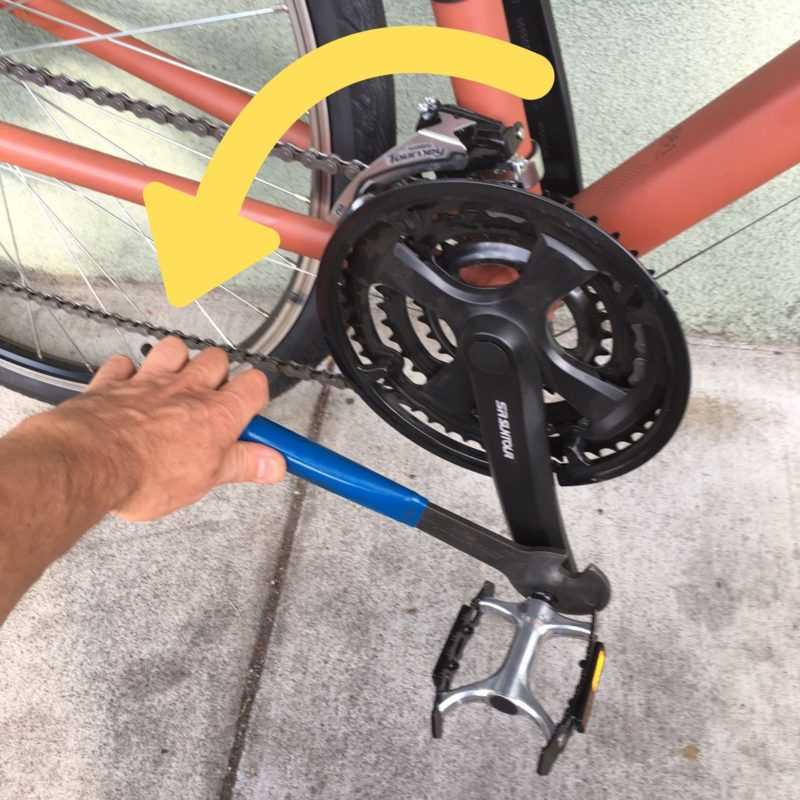
- Identify the right pedal and the left pedal. The right pedal typically has a normal thread, so it unscrews in a clockwise direction, while the left pedal has a reverse thread and unscrews in a counterclockwise direction.
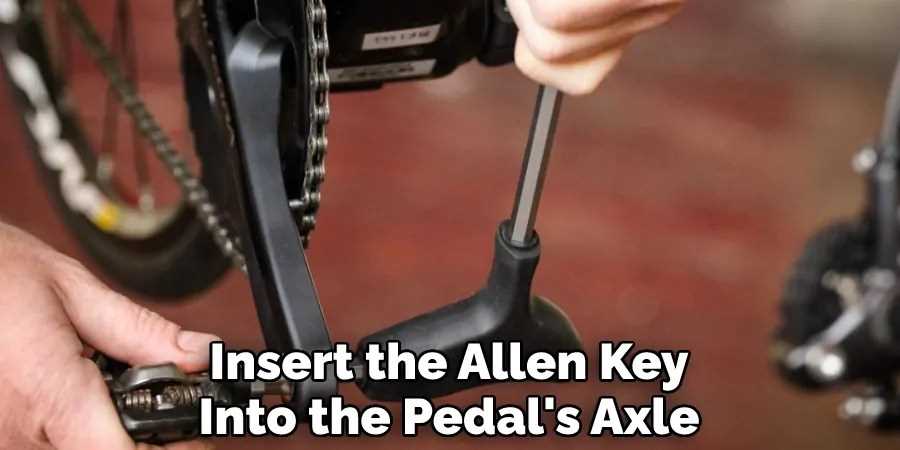
- Use a flat-head screwdriver or a 15mm wrench to hold the pedal axle in place. Insert the screwdriver or wrench into the outer edge of the pedal axle.
- With your other hand, use an adjustable wrench or pliers to turn the pedal spindle counterclockwise for the right pedal or clockwise for the left pedal. Apply firm pressure to loosen the pedal.
- Once the pedal is loose, you can remove it by unscrewing it the rest of the way by hand.
- Repeat the process for the other pedal.
Note: It is essential to remember that the left pedal has a reverse thread, so you need to turn it clockwise to loosen it. Turning it counterclockwise can lead to the pedal tightening.
Inspect the pedals and cranks

Before attempting to change bike pedals, it is important to inspect the pedals and cranks to ensure they are in good condition and functioning properly. This will help prevent any issues during the pedal removal and installation process.
Here are some steps to inspect the pedals and cranks:
- Check for any visible damage or wear on the pedals. Look for cracks, dents, or loose components.
- Ensure that the pedals are securely attached to the cranks. Give them a gentle tug to make sure they are not loose.
- Check the threads on both the pedals and crank arms. Make sure they are in good condition and not stripped.
- Inspect the crank arms for any signs of damage or wear. Look for cracks, dents, or loose fittings.
- If you have a pedal wrench or adjustable wrench, use it to ensure that the pedals can be easily loosened and tightened. If there are any difficulties, it may be necessary to use alternative methods to remove the pedals.
By thoroughly inspecting the pedals and cranks, you can identify any potential issues before attempting to change the bike pedals. This will help ensure a smoother and safer pedal replacement process.
Prepare the new pedals
Before installing the new bike pedals, there are a few preparations that need to be made:

- Check compatibility: Make sure the new pedals are compatible with your bike’s crankset. Check the pedal thread and the type of pedal system (such as platform or clipless) to ensure they will fit properly.
- Gather the necessary tools: Although a pedal wrench is not needed for this method, you will still need some basic tools. Gather a 15mm open-end wrench or an adjustable wrench, as well as any additional tools required for the specific pedal system you are using.
- Inspect the new pedals: Before installation, visually inspect the new pedals for any defects or damage. Pay attention to the pedal body, axle, and bearings, ensuring they are in good condition.
- Clean and lubricate the pedal threads: Using a cloth or brush, clean the threads on the pedal axle. Apply a small amount of grease or anti-seize compound to the threads to prevent them from seizing or rusting over time.
- Tighten any components: Before attaching the new pedals, double-check that any other components on the crankset, such as dust caps or spacers, are properly tightened and in good condition.
Once you have completed these preparations, you are ready to install the new pedals onto your bike.
Apply grease to the threads
Before installing the new bike pedals, it is important to apply grease to the threads. This will help prevent the pedals from getting stuck or seizing in the crank arms.
To apply grease to the threads:
- Start by cleaning any dirt or debris from the crank arms and pedal threads using a rag or brush.
- Take a small amount of bike grease and apply it directly to the threads of the pedals.
- Spread the grease evenly over the threads, making sure to cover the entire surface.
- Use your fingers or a clean cloth to twist the pedals and work the grease into the threads.
- Make sure to apply enough grease to create a thin, even layer on the threads.
By applying grease to the threads, you are ensuring smooth installation and future removal of the pedals.
Install the new pedals
Once you have successfully removed the old pedals, it’s time to install the new ones. Follow these steps:
- Start by inspecting the threads on the crank arms and the threads on the new pedals. Make sure they are clean and in good condition.
- Apply a small amount of grease to the threads of the new pedals. This will help prevent them from seizing and make future removal easier.
- Align the pedal with the corresponding crank arm. The right pedal should be installed on the right crank arm and the left pedal on the left crank arm. Remember that the right pedal has right-hand threads (turn counterclockwise to tighten) and the left pedal has left-hand threads (turn clockwise to tighten).
- Start threading the pedal into the crank arm by hand. Make sure it goes in smoothly and straight. If you encounter resistance, stop and check the alignment.
- Once the pedal is threaded in about halfway, switch to using a pedal wrench or an adjustable wrench to tighten it further. Hold the crank arm steady with one hand while you use the wrench to turn the pedal axle clockwise (for the right pedal) or counterclockwise (for the left pedal).
- Tighten the pedal until it is fully seated and secure. Be careful not to over-tighten as this may damage the crank arm or the pedal.
- Repeat the process for the other pedal, following the same steps.
After installing the new pedals, give them a quick test by spinning the cranks forward. Ensure that both pedals rotate smoothly without any wobbling or grinding noises.
Note: If you have clipless pedals, remember to attach your cycling shoes to the pedals before taking your bike for a ride.
Now that you have successfully installed the new pedals, you’re ready to hit the road or trails with confidence!
Tighten the pedals securely
After you have installed your new pedals, it is important to tighten them securely to ensure they do not come loose while you are riding. Follow these steps to tighten the pedals:
- Use a pedal wrench or an appropriate size wrench to tighten the pedals. Make sure the wrench is securely tightened around the flats on the pedal axle.
- Hold the crankarm with one hand to prevent it from moving while you tighten the pedal with the wrench. Apply firm pressure to tighten the pedal in a clockwise direction.
- Check the tightness of the pedal by trying to move it in both directions. It should not move or have any play. If it does, repeat the tightening process.
- Repeat the steps for the other pedal.
It’s important to note that over-tightening the pedals can cause damage, so make sure to tighten them securely without going too far. If you are unsure of the correct tightness, consult a professional or refer to the manufacturer’s guidelines.
Test the pedals for proper installation
Once you have successfully installed the new pedals on your bike, it is important to test them to ensure they are properly secured. Here are a few steps to follow:
- Visual Inspection: Start by visually inspecting the pedals to ensure they are tightened securely onto the crank arms. Check for any signs of looseness or wobbling.
- Hand Test: Next, give the pedals a gentle shake using your hands. They should feel solid and not move or rattle. If you notice any movement or noise, there may be a problem with the installation.
- Functional Test: Take your bike for a short test ride to check if the pedals function properly while in use. Pay attention to any unusual noises, vibrations, or difficulty in pedaling. If anything seems off, it could indicate an issue with the installation.
If you encounter any problems during the testing phase, it may be necessary to re-install the pedals or seek professional assistance. Properly installed pedals should provide a secure and smooth riding experience.
FAQ
What is a pedal wrench and why is it important for changing bike pedals?
A pedal wrench is a special tool designed for removing and installing bike pedals. It has a thin and long handle that allows you to apply sufficient force to tighten or loosen the pedals. It is important to use a pedal wrench because it ensures a tight and secure fit, preventing the pedals from becoming loose during rides.
Can I change bike pedals without a pedal wrench?
Yes, you can change bike pedals without a pedal wrench. There are alternative methods you can use, such as using an adjustable wrench or a 15mm wrench. These tools can be used to grip the flats of the pedal axle and rotate it to remove or install the pedals. However, it is important to note that using the correct tool, such as a pedal wrench, provides better leverage and makes the task easier.
Video

How to spell louis

Harrison Clayton
Meet Harrison Clayton, a distinguished author and home remodeling enthusiast whose expertise in the realm of renovation is second to none. With a passion for transforming houses into inviting homes, Harrison's writing at https://thehuts-eastbourne.co.uk/ brings a breath of fresh inspiration to the world of home improvement. Whether you're looking to revamp a small corner of your abode or embark on a complete home transformation, Harrison's articles provide the essential expertise and creative flair to turn your visions into reality. So, dive into the captivating world of home remodeling with Harrison Clayton and unlock the full potential of your living space with every word he writes.


