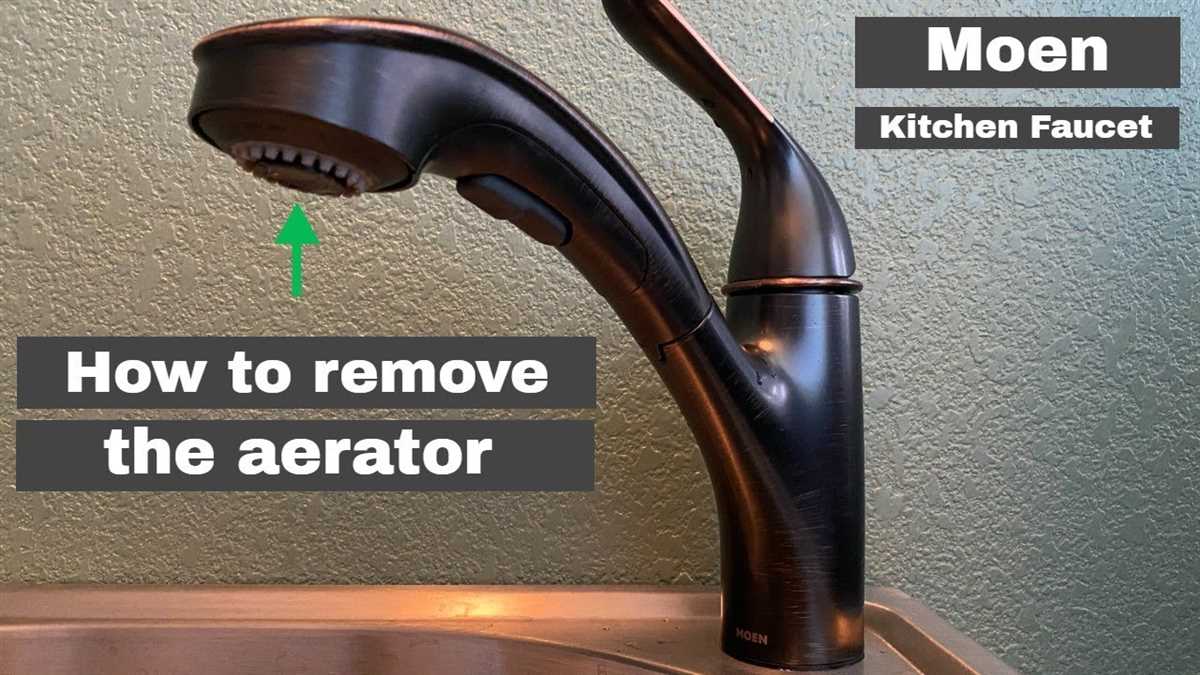
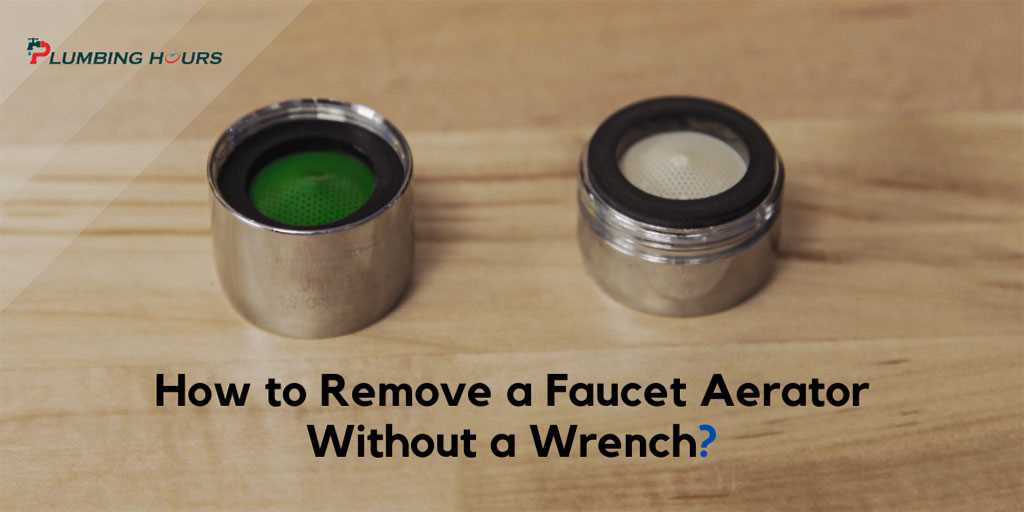
Easy Methods for Removing a Faucet Aerator without a Wrench

If you find yourself in a situation where you need to remove a faucet aerator but don’t have a wrench on hand, don’t worry. There are several easy methods you can use to remove the aerator without a wrench. Whether you’re dealing with a stubborn aerator or you simply don’t have the right tools, these methods will help you get the job done.
One method you can try is using a pair of pliers. Start by wrapping a cloth or rubberband around the aerator to protect it from damage. Then, grip the aerator firmly with the pliers and twist counterclockwise to loosen it. Be careful not to apply too much force as this may cause the aerator to break.
Another method is to use a coin or a flathead screwdriver. Insert the coin or screwdriver into one of the slots on the aerator and turn it counterclockwise to loosen it. This method may be a bit more challenging if the aerator is tightly secured, but with some patience and perseverance, you should be able to remove it.
If none of these methods work, you can try using vinegar. Fill a plastic bag with vinegar and secure it around the aerator using a rubberband. Let it sit for a few hours to allow the vinegar to dissolve any mineral deposits that may be causing the aerator to stick. Afterward, use a coin or screwdriver to try and loosen the aerator. The vinegar should have made it easier to remove.
Remember, it’s important to be patient and gentle when removing a faucet aerator without a wrench. Take your time and try these methods until you find one that works best for you. With a little bit of effort, you’ll have your aerator removed in no time.

Methods for Removing a Faucet Aerator
Removing a faucet aerator can sometimes be a challenging task, especially if you don’t have a wrench handy. However, there are several easy methods you can try to remove the aerator without a wrench. Here are a few methods you can use:
1. Using Pliers

One of the easiest ways to remove a faucet aerator without a wrench is by using a pair of pliers. Start by wrapping a cloth or towel around the aerator to protect it from scratches. Then, grip the aerator firmly with the pliers and turn it counterclockwise to loosen it. Once it’s loosened, you should be able to unscrew it by hand.
2. Using a Rubber Band
If you don’t have pliers, you can try using a rubber band to remove the aerator. Place a rubber band around the aerator and try to grip it tightly. The rubber band will provide additional grip and leverage, making it easier to turn the aerator counterclockwise and remove it.
3. Using a Coin
In some cases, a coin can also be used to remove a faucet aerator. Choose a coin that fits snugly into the aerator’s grooves, such as a quarter or a dime. Insert the coin into the grooves and use it as leverage to turn the aerator counterclockwise. The coin should help you loosen the aerator and remove it.

4. Using a Screwdriver
If you have a flathead screwdriver handy, you can also use it to remove the aerator. Place the screwdriver into one of the aerator’s grooves and use it as leverage to turn the aerator counterclockwise. Apply steady pressure and the aerator should start to loosen. Once it’s loosened, you can unscrew it by hand.
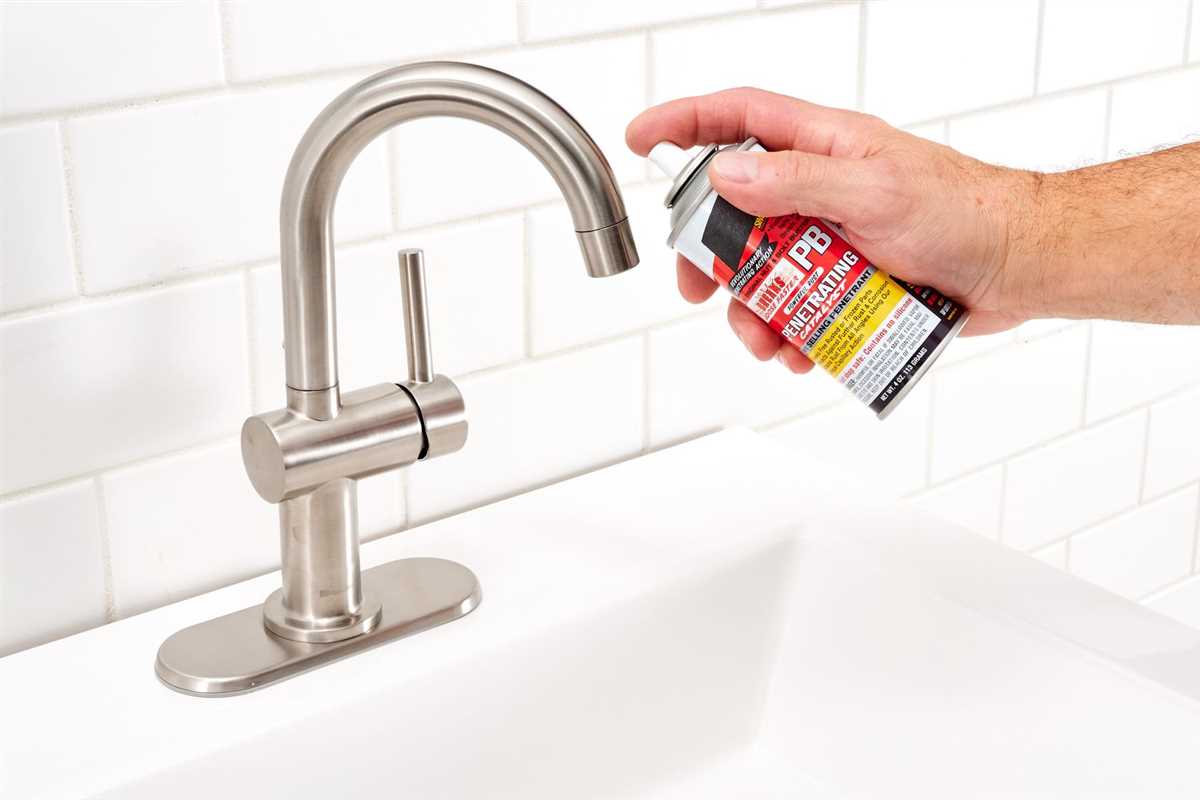
5. Using WD-40
If the aerator is stuck and none of the above methods work, you can try using WD-40 or a similar lubricant to loosen it. Spray some WD-40 onto the aerator and let it sit for a few minutes to penetrate the threads. Then, try using pliers, a rubber band, a coin, or a screwdriver to remove the aerator. The lubricant should make it easier to loosen and remove the aerator.
Remember to use caution when attempting to remove a faucet aerator without a wrench, as excessive force can cause damage to the aerator or the faucet itself. If you’re unsure or uncomfortable with removing the aerator, it’s best to consult a professional plumber for assistance.
Easy Ways to Remove a Faucet Aerator without a Wrench
1. Using a pair of pliers
If you don’t have a wrench handy, you can use a pair of pliers to remove the faucet aerator. First, wrap a cloth or rag around the aerator to protect it from getting scratched. Then, grip the aerator firmly with the pliers and turn it counterclockwise to unscrew it from the faucet.
2. Using a coin or a flathead screwdriver

If you don’t have pliers either, you can try using a coin or a flathead screwdriver to remove the aerator. Insert the coin or screwdriver into one of the notches on the aerator and turn it counterclockwise to loosen it. Once it’s loose enough, you should be able to unscrew it by hand.
3. Soaking the aerator in vinegar
If the aerator is stuck and won’t budge, you can try soaking it in vinegar to loosen any mineral deposits that might be causing it to stick. Fill a bowl with vinegar and submerge the aerator in the vinegar for a few hours or overnight. After soaking, use pliers, a wrench, or a coin to unscrew the aerator.
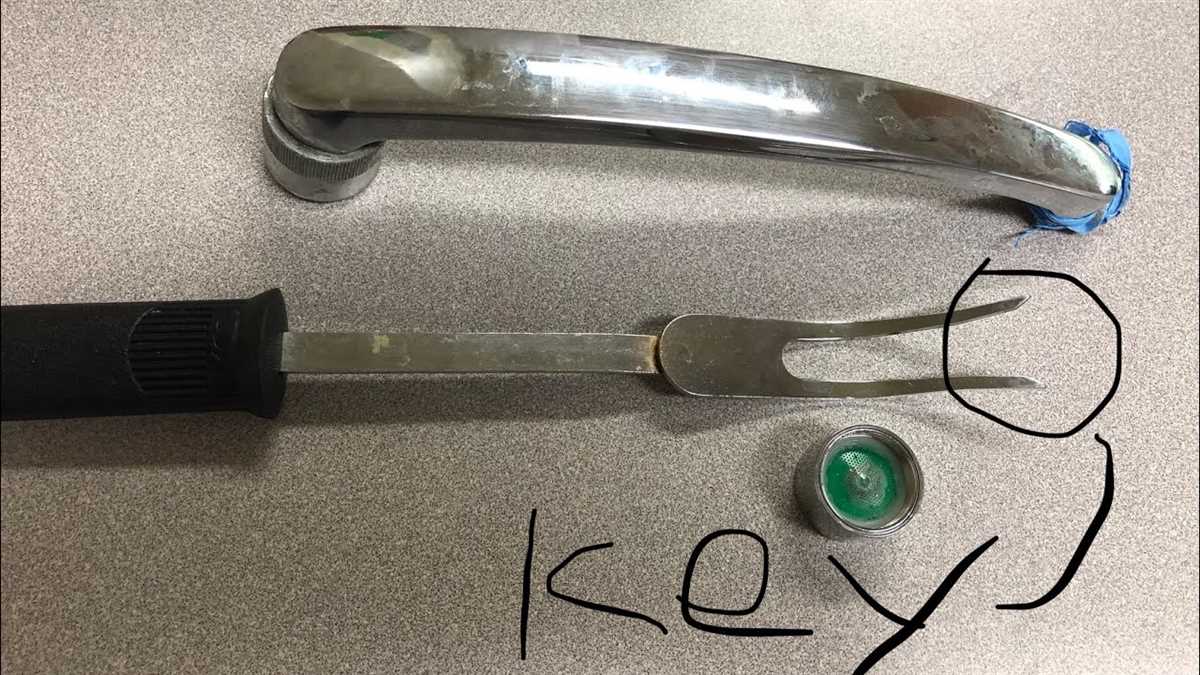
4. Using a strap wrench or rubber band
If you have a strap wrench or a rubber band, you can use it to grip and unscrew the aerator. Wrap the strap wrench or rubber band tightly around the aerator and turn it counterclockwise to loosen it. Once it’s loose enough, you can unscrew it by hand.
5. Seeking professional help
If none of the above methods work, it might be best to seek professional help. A plumber will have the necessary tools and experience to safely remove the faucet aerator without causing any damage.
Remember to be cautious when applying force to the aerator to avoid damaging the faucet or hurting yourself. If you’re unsure about any of the steps, it’s best to consult a professional.

Using a Pair of Pliers to Remove a Faucet Aerator
If you do not have a wrench or need an alternative method for removing a faucet aerator, you can use a pair of pliers as a handy tool. Here’s a step-by-step guide on how to do it:
- Start by turning off the water supply to the faucet. This step is important to prevent any water leakage or splashing during the removal process.
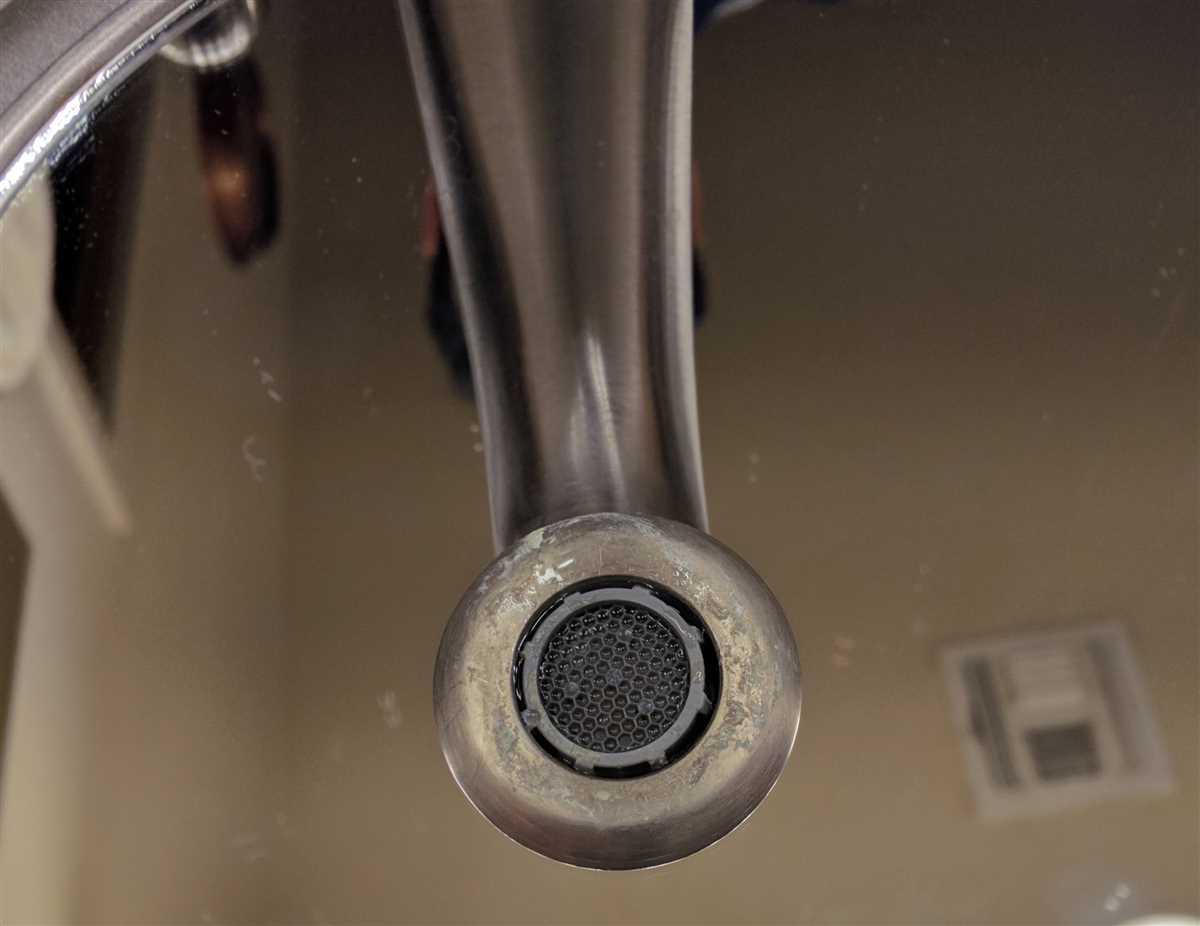
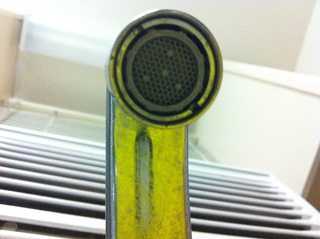
- Locate the faucet aerator on the tip of the faucet head. The aerator is usually a small metal mesh cap that attaches to the end of the faucet, allowing water to flow in a controlled manner.
- Use a dry towel or cloth to grip the aerator securely. This will prevent the pliers from scratching or damaging the metal surface of the aerator.
- Position the jaws of the pliers around the aerator cap. Make sure the pliers have a secure grip on the cap before turning it counterclockwise to loosen it.
- Apply moderate pressure with the pliers while turning the aerator cap counterclockwise. Be cautious not to apply too much pressure, as it can cause the pliers to slip and potentially damage the aerator or faucet.
- Continue turning the aerator cap until it loosens enough to be removed by hand. If it is tightly screwed in, you might need to apply a bit more pressure or use a cloth to enhance your grip on the aerator cap.
- Once the aerator cap is loose, you can gently unscrew it the rest of the way by hand. Be careful not to drop it into the sink or drain.
- After removing the aerator cap, you can clean it by soaking it in vinegar to remove any mineral deposits or debris that may have accumulated.
- When you’re ready to reassemble the aerator, make sure to screw it back onto the faucet head in a clockwise direction. Ensure that it is tightened securely but not overly tightened.
- Finally, turn on the water supply and check for any leaking or irregular water flow. If everything looks fine, your faucet aerator removal is complete!
Using a pair of pliers is a simple and effective alternative to removing a faucet aerator without a wrench. It allows you to safely and securely loosen the aerator cap, enabling you to clean or replace the aerator as needed.
Removing a Faucet Aerator with a Screwdriver
If you don’t have a wrench or pliers available, you can still remove a faucet aerator by using a screwdriver. While this method may require a little more effort, it is a viable option if you don’t have the right tools on hand.
- Gather the necessary tools: To remove the aerator with a screwdriver, you will need a flathead screwdriver with a thin and narrow blade. Make sure the screwdriver is long enough to reach the aerator’s inner parts.
- Identify the aerator: The aerator is usually located at the end of the faucet nozzle and typically has a rounded shape with small holes. It is responsible for mixing air with water, reducing splashing, and conserving water usage.
- Prepare the faucet: Before attempting to remove the aerator, make sure you turn off the water supply by closing the shut-off valve under the sink. This step will help prevent any accidental water leakage.
- Insert the screwdriver: Carefully insert the flathead screwdriver into one of the aerator’s small holes. Make sure the screwdriver fits snugly and is secured in the hole.
- Turn counterclockwise: With a firm grip on the screwdriver, begin turning it counterclockwise to unscrew the aerator. Apply gradual pressure and make sure to keep the screwdriver securely in place throughout the process.
- Remove the aerator: Once the aerator is unscrewed, you can use your fingers to finish removing it from the faucet nozzle. If it is stuck or difficult to remove, you can try using pliers or gently tap it with a small hammer to loosen it.
- Clean or replace: After removing the aerator, take the opportunity to clean it by removing any debris or mineral buildup. If the aerator is damaged or beyond repair, consider replacing it with a new one.
Removing a faucet aerator with a screwdriver may require more patience and effort, but it is an effective method if you don’t have the proper tools available. Just remember to be cautious and gentle while working with the screwdriver to avoid damaging the faucet or hurting yourself.

How to Remove a Faucet Aerator with a Towel

Step 1: Gather the necessary materials
In order to remove a faucet aerator without a wrench, you will need a few simple materials:
- A small towel or cloth
- A pair of pliers or adjustable wrench (if available)
Step 2: Turn off the water supply
Before attempting to remove the faucet aerator, it’s important to turn off the water supply to prevent any leaks or spills.
- Locate the shut-off valves under your sink or near the main water supply.
- Turn the valves clockwise to shut off the water flow.
Step 3: Wrap the aerator with a towel
To protect the finish of your faucet and provide grip, wrap the faucet aerator with a small towel or cloth.
Step 4: Grip the aerator with the towel
Using your hand or a pair of pliers, grip the towel-wrapped aerator tightly. Make sure to hold it firmly to prevent slippage.
Step 5: Twist and remove
With a firm grip on the towel-wrapped aerator, twist it counterclockwise to loosen and remove it. Apply steady pressure if necessary, but be careful not to use too much force as it can damage the faucet or surrounding fixtures.
Step 6: Clean and reassemble
Once the aerator is removed, clean it by soaking it in vinegar or using a brush to remove any built-up mineral deposits. Rinse it thoroughly and reassemble the aerator by screwing it back onto the faucet.
Following these steps, you should be able to remove a faucet aerator without a wrench using just a towel or cloth. It’s important to be gentle and take your time to avoid any damage to the faucet or surrounding fixtures. If you encounter any difficulties or are unsure, it’s recommended to consult a professional plumber.
Removing a Stuck Faucet Aerator with WD-40
If you find yourself with a stuck faucet aerator and don’t have a wrench on hand, one effective method to remove it is by using WD-40. WD-40 is a widely available lubricant and penetrating oil that can help loosen the stuck aerator and make it easier to remove.
What You Will Need
- WD-40 lubricant
- Plastic bag or cloth
- Gloves
Instructions
Step 1: Put on gloves to protect your hands from any potential sharp edges or debris.
Step 2: Spray WD-40 around the base of the faucet aerator, ensuring that it penetrates into the small crevices. Allow the lubricant to sit for a few minutes to work its magic.
Step 3: If the aerator has a removable rubber gasket or screen, gently remove it, as it may obstruct the removal process. Set it aside in a safe place.
Step 4: Take a plastic bag or cloth and wrap it around the aerator to provide an extra layer of grip. This will help you get a better grip on the aerator, especially if it is stuck tightly.
Step 5: Use your hand or pliers covered by the bag or cloth to grip the aerator and try to unscrew it counterclockwise. Apply gentle but firm pressure to loosen the aerator. If it doesn’t budge, you can try using pliers for a firmer grip.
Step 6: Once the aerator starts to rotate, continue unscrewing it by hand until it is entirely loosened. Be careful not to force it too much, as this may cause damage to the faucet or aerator.
Step 7: Once the aerator is removed, take the opportunity to clean it thoroughly. Remove any debris or mineral buildup that may have accumulated over time.
Step 8: Reattach the rubber gasket or screen, if necessary, and screw the aerator back onto the faucet in a clockwise direction. Use your hand to tighten it securely, but avoid overtightening.
By using WD-40 and following these steps, you should be able to remove a stuck faucet aerator without a wrench. Remember to exercise caution and patience during the process to avoid any damage to the aerator or faucet.
Removing a Faucet Aerator with Vinegar
Removing a faucet aerator can be challenging if you don’t have the right tools. However, there are a few easy methods you can try before resorting to calling a plumber. One such method is using vinegar, a common household item that can help loosen the aerator and make it easier to remove.
Materials Needed:
- Vinegar
- Plastic bag or small container
- Adjustable wrench or pliers (optional)
Steps:
- Before starting, ensure that your water supply is turned off. This will prevent any accidents or water damage while removing the aerator.
- Fill a small container or plastic bag with vinegar. Make sure there is enough vinegar to completely submerge the aerator.
- If possible, remove the aerator from the faucet using your hands. If it’s too tight to remove by hand, you can use an adjustable wrench or pliers to grip and turn the aerator counterclockwise.
- Place the aerator in the container or bag filled with vinegar. Make sure it is fully submerged and leave it to soak for at least one hour. The vinegar will help dissolve any mineral deposits or corrosion that may be holding the aerator in place.
- After soaking, remove the aerator from the vinegar and inspect it. If there are still some stubborn deposits, you can use a toothbrush or a small brush to gently scrub the aerator to remove them.
- Rinse the aerator with water to remove any vinegar residue.
- Attempt to unscrew the aerator from the faucet again. If it is still difficult to remove, you can use an adjustable wrench or pliers to grip the aerator and turn it counterclockwise.
Using vinegar to remove a faucet aerator is a simple and cost-effective method that can be done at home. However, if you are still unable to remove the aerator or encounter any difficulties, it’s best to seek the help of a professional plumber to avoid causing further damage to your faucet.
How to Remove a Faucet Aerator with Boiling Water
Removing a faucet aerator can sometimes be a challenging task, especially if you don’t have the right tools. However, there is a simple and effective method that you can try using boiling water. This method requires minimal effort and can help you remove the aerator easily.
Here are the steps to remove a faucet aerator with boiling water:
- Prepare the materials: To begin, gather the necessary materials. You will need a pot or kettle, water, a towel or heat-resistant gloves to protect your hands.
- Boil the water: Fill the pot or kettle with water and bring it to a boil on the stove or using an electric kettle.
- Turn off the water supply: Before attempting to remove the aerator, make sure to turn off the water supply to the faucet. This will prevent any water from spilling out during the removal process.
- Let the water cool slightly: Once the water has boiled, let it cool for a minute or two. You want the water to be hot, but not boiling, as boiling water can be dangerous.
- Pour the hot water: Carefully pour the hot water over the aerator. Make sure to cover the entire aerator with the hot water.
- Wait for a few minutes: Allow the hot water to sit on the aerator for a few minutes. The heat will help loosen any mineral deposits or other debris that may be causing the aerator to stick.
- Remove the aerator: After a few minutes, use a towel or heat-resistant gloves to grip the aerator firmly and twist it counterclockwise to remove it. The hot water should have loosened the aerator enough to make it easier to remove.
That’s it! By using boiling water, you can easily remove a faucet aerator without the need for a wrench or other tools. Remember to exercise caution when handling boiling water, and always protect your hands and surfaces from potential burns. This method is particularly useful if the aerator is stuck due to mineral buildup or sediment accumulation.
Cautionary Tips for Removing a Faucet Aerator
1. Turn Off the Water
Before you begin removing the aerator, make sure to turn off the water supply to your faucet. This will prevent any accidental water leakage or splashing while you work.
2. Gather the Right Tools
Although this method doesn’t require a wrench, you’ll still need some basic tools to remove the aerator. Grab a pair of pliers or adjustable wrench, a clean cloth or rag, and a bucket or container to catch any excess water.
3. Protect the Faucet Finish
Wrap the jaws of the pliers or adjustable wrench with a layer of duct tape or cloth to prevent any scratches on the faucet finish. This will ensure that your faucet looks its best even after the aerator is removed.
4. Use Gentle Pressure
Apply gentle and even pressure when turning the pliers or wrench to remove the aerator. Avoid using excessive force, as this could damage or break the aerator or the faucet itself.
5. Don’t Forget to Clean
Once the aerator is removed, take the opportunity to clean it thoroughly. Use a brush or toothbrush to remove any debris or mineral buildup. This will help improve the water flow and prevent future clogging.
6. Reassemble the Aerator Properly
When reinstalling the aerator, make sure to align the threads correctly and tighten it securely. This will prevent any leaks and ensure that the aerator functions properly.
7. Test the Water Flow
After reassembling the aerator, turn on the water supply and check if the flow is smooth and free from any obstructions. If there are still issues, you may need to clean or replace the aerator.
8. Seek Professional Help if Needed
If you encounter any difficulties or are unsure about removing the aerator, it’s best to seek professional assistance. Plumbers or experienced technicians can provide expert guidance and ensure that the job is done correctly.
By following these cautionary tips, you can safely remove a faucet aerator without a wrench and maintain the integrity of your faucet.
FAQ
How can I remove a faucet aerator without using a wrench?
There are a few easy methods for removing a faucet aerator without using a wrench. One method is to use a pair of pliers to unscrew the aerator by gripping it tightly and rotating it counterclockwise. Another method is to use a rubber jar opener to grip the aerator and turn it counterclockwise. You can also try using a cloth or towel to provide extra grip and unscrew the aerator by hand. Finally, if all else fails, you can try using a flathead screwdriver to pry off the aerator. Just insert the screwdriver into one of the aerator’s slots and twist it counterclockwise.
Is it possible to remove a faucet aerator without any tools?
Yes, it is possible to remove a faucet aerator without any tools. One method is to wrap a rubber band tightly around the aerator and use it for extra grip to unscrew the aerator counterclockwise. Another method is to use a pair of rubber gloves to grip the aerator and twist it counterclockwise. The added friction from the rubber gloves will make it easier to remove the aerator by hand. Additionally, you can try running hot water over the aerator to loosen it before attempting to unscrew it with your hands.
What can I do if the faucet aerator is stuck and won’t budge?
If the faucet aerator is stuck and won’t budge, there are a few things you can try. First, you can try using a lubricant, such as WD-40, to loosen the aerator. Spray the lubricant around the threads of the aerator and let it sit for a few minutes before attempting to unscrew it. You can also try applying heat to the aerator with a hairdryer or heat gun, as the expansion caused by heat can help loosen the aerator. Finally, if all else fails, you may need to use a wrench or pliers to grip the aerator and unscrew it.
Can I use a different tool to remove a faucet aerator if I don’t have a wrench?
Yes, if you don’t have a wrench, there are a few other tools you can use to remove a faucet aerator. One option is to use a pair of adjustable pliers. Simply grip the aerator tightly with the pliers and rotate it counterclockwise to loosen and remove it. Another tool you can use is a strap wrench. Wrap the strap wrench around the aerator, making sure it is securely in place, and turn it counterclockwise to remove the aerator. If you don’t have a strap wrench, you can also try using a large adjustable wrench or a pipe wrench to loosen and remove the aerator.
Video


Meet Harrison Clayton, a distinguished author and home remodeling enthusiast whose expertise in the realm of renovation is second to none. With a passion for transforming houses into inviting homes, Harrison's writing at https://thehuts-eastbourne.co.uk/ brings a breath of fresh inspiration to the world of home improvement. Whether you're looking to revamp a small corner of your abode or embark on a complete home transformation, Harrison's articles provide the essential expertise and creative flair to turn your visions into reality. So, dive into the captivating world of home remodeling with Harrison Clayton and unlock the full potential of your living space with every word he writes.


