6 Steps to Adjust Torque Wrench Calibration | Easy Guide

A torque wrench is an essential tool for any mechanic or technician. It allows for precision tightening of bolts and nuts, ensuring that they are securely fastened without being over-tightened. However, even the most accurate torque wrenches can become out of calibration over time, leading to incorrect torque settings and potential accidents or damage. To prevent this, it is important to regularly check and adjust the calibration of your torque wrench. In this easy guide, we will walk you through the 6 simple steps to adjust torque wrench calibration.
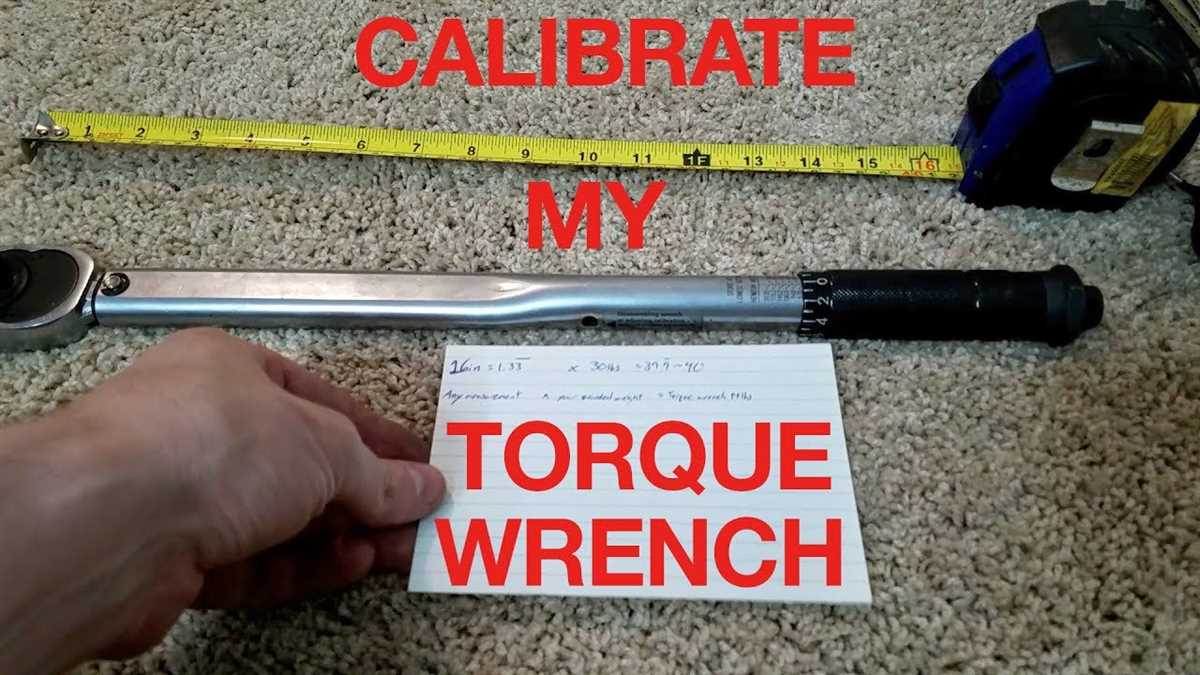
Step 1: First, you will need a calibration tool. This can be a torque tester, which is specifically designed for this purpose, or a known accurate torque wrench that has been recently calibrated. Make sure the calibration tool is suitable for the torque range of your wrench.
Step 2: Prior to adjusting the calibration, it is important to check and ensure that your torque wrench is at room temperature. Temperature variations can affect the accuracy of the measurements. Allow your wrench to adjust to the room temperature for at least 30 minutes.
Step 3: Once your torque wrench is at room temperature, set it to the lowest torque setting. This will allow you to easily adjust the calibration for higher torque settings later on.
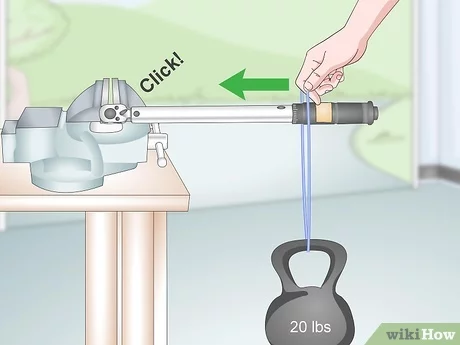
Step 4: Now, using the calibration tool, apply torque to the torque wrench in the same direction as you would when tightening a bolt or nut. Apply the torque steadily and smoothly until the torque wrench clicks or signals that the desired torque has been reached.

Step 5: Compare the reading on the calibration tool with the torque setting on your torque wrench. If there is a discrepancy, you will need to adjust the calibration. Refer to the manufacturer’s instructions on how to adjust the calibration on your specific torque wrench model.
Step 6: Once you have adjusted the calibration, repeat the process from step 4 to verify that the torque wrench is now calibrated correctly. It may take a few adjustments until you achieve the desired accuracy.
In conclusion, adjusting torque wrench calibration is a simple yet crucial task that should be performed regularly to maintain the accuracy and safety of your torque wrench. By following these 6 easy steps, you can ensure that your torque wrench is calibrated correctly and gives you reliable and accurate torque measurements every time.
Step 1: Gather Necessary Tools
- Torque wrench: Make sure you have a torque wrench that needs calibration. Check if it’s in good working condition and doesn’t have any damages.
- Calibration equipment: You will need a calibration equipment, such as a torque tester or a torque analyzer, to measure the accuracy of your torque wrench.
- Reference tool: A reference tool, like a known accurate torque wrench, is essential to compare and adjust your torque wrench’s calibration.
- Manufacturer’s manual: Gather the manufacturer’s manual of your torque wrench. It will provide specific information about the calibration process and recommended adjustments.
- Protective gloves: It’s important to wear protective gloves while handling the torque wrench and calibration equipment to ensure safety.
- Workspace: Set up a clean and well-lit workspace where you can perform the torque wrench calibration without any distractions.
Having all these necessary tools ready before starting the calibration process will make it easier for you to adjust the torque wrench calibration accurately and effectively.
Step 2: Check Wrench Accuracy
Once you have completed the first step of cleaning and lubricating your torque wrench, it is important to verify its accuracy before use. Checking the accuracy of your wrench ensures that it is providing accurate torque readings, which is crucial for any application.
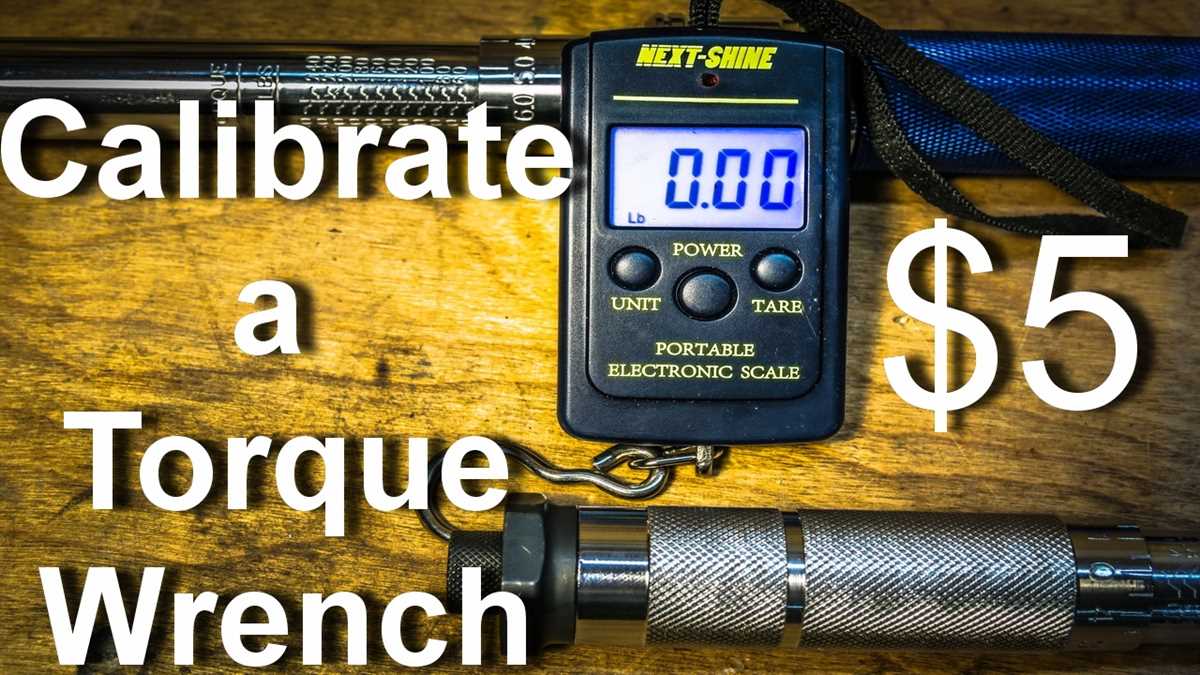
1. Test the wrench on a known torque value
To check the accuracy of your wrench, you will need a torque tester or a torque calibration tool. This tool will provide a known torque value that you can use to compare with the torque reading from your wrench. Apply the known torque value to the tester and record the reading.

2. Compare the readings
With the known torque value recorded, now it’s time to compare it with the reading from your wrench. Apply the same torque value to your wrench, ensuring that it is properly engaged with the fastener. Note the torque reading displayed on the wrench.
If the torque reading on your wrench is within the acceptable tolerance range (usually indicated by the manufacturer), then it is considered accurate. However, if the reading deviates significantly from the known torque value, your wrench may be out of calibration and should be adjusted or calibrated.
3. Adjust or calibrate the wrench if necessary
If your torque wrench is not within the acceptable tolerance range, it may need to be adjusted or calibrated. Some torque wrenches have a calibration feature that allows you to adjust the torque setting manually. Follow the instructions provided by the manufacturer to make the necessary adjustments.

If your wrench does not have a calibration feature or if the adjustment does not bring it within the acceptable tolerance range, it may need to be sent to a professional calibration service. These services have the equipment and expertise to accurately calibrate your wrench and ensure its accuracy.
Regularly checking and calibrating your torque wrench is important to maintain its accuracy and reliability. This step should be performed periodically or whenever you suspect that the wrench is providing inaccurate torque readings.
Step 3: Adjust Wrench Calibration
After determining whether your torque wrench needs calibration and conducting a pre-adjustment test, it’s time to make the necessary adjustments.
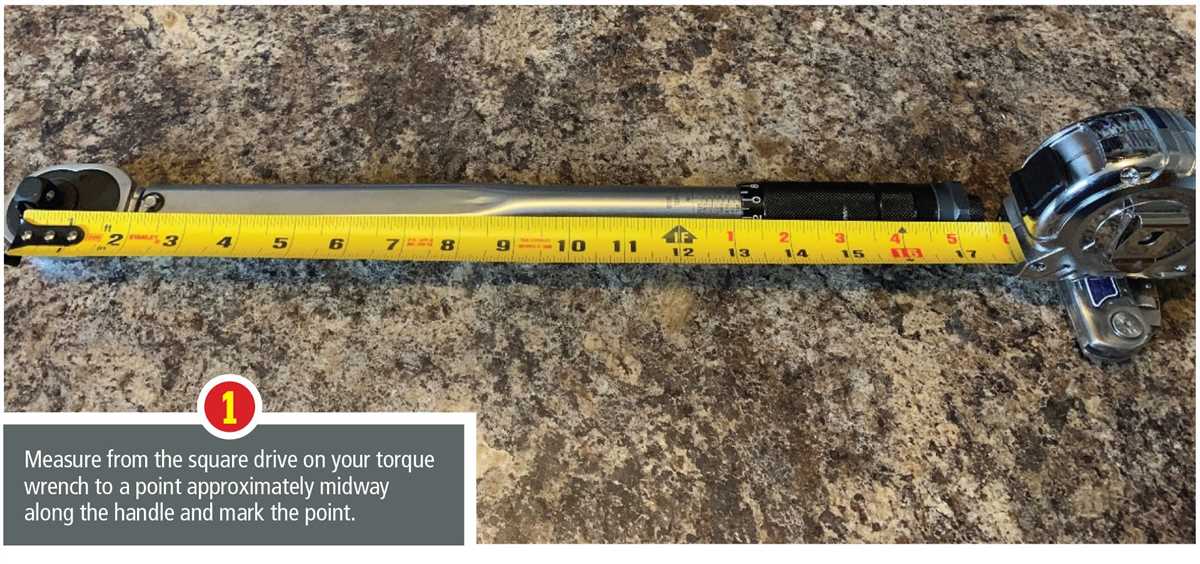
1. Locate the Adjustment Knob
Each torque wrench model may have a different design, but most of them will have an adjustment knob or collar located near the handle. This knob is used to adjust the torque setting.
2. Refer to the User Manual
Before making any adjustments, it is essential to consult the user manual that came with your torque wrench. The manual will provide specific instructions on how to adjust the calibration for your particular model.

3. Set the Desired Torque Value
Using the adjustment knob, set the torque value according to the desired measurement specified in your user manual or the specific requirements of your job.
4. Verify the Calibration
Once you have adjusted the torque setting, it is important to verify the calibration of the wrench. Use a torque tester or a calibrated torque wrench to determine if the adjusted wrench is now reading the correct torque value.
5. Repeat the Adjustment Process if Necessary
If the torque wrench still does not read the correct torque value after making the initial adjustment, repeat the process of adjusting the calibration knob until the desired value is achieved.
6. Document the Adjustment
After successfully adjusting the torque wrench calibration, it is crucial to document the date, torque value, and any other relevant information regarding the calibration adjustment. This documentation will help you keep track of the wrench’s calibration history and ensure its accuracy.

Step 4: Set Desired Torque Value
Once you have verified that your torque wrench is in the proper calibration, you can proceed to set the desired torque value. This step is crucial to ensure that you achieve accurate and consistent results when using your torque wrench.
To set the desired torque value, follow these steps:
- Refer to the user manual of your torque wrench to find out how to adjust the torque setting. Different torque wrenches may have different mechanisms for adjusting the torque value.
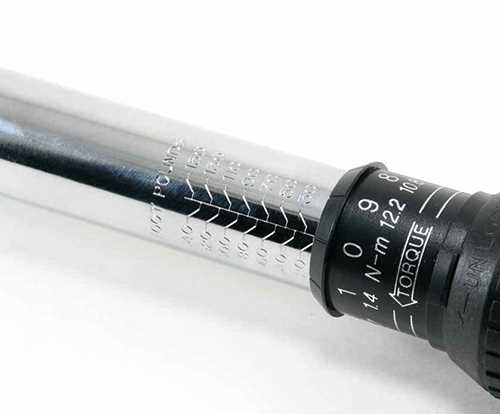
- Locate the torque adjustment knob or dial on your torque wrench. This knob or dial is typically located on the handle of the torque wrench.
- Rotate the torque adjustment knob or dial in the direction specified in the user manual to increase or decrease the torque value. Some torque wrenches may have a lock mechanism that needs to be released before the torque setting can be adjusted.
- Keep turning the torque adjustment knob or dial until the desired torque value is displayed on the scale or digital display of the torque wrench.
- Ensure that the torque adjustment knob or dial is securely locked in place to prevent any unintentional changes to the torque setting while using the torque wrench.
Once you have set the desired torque value, you can move on to the next step of using your torque wrench, which is applying the torque to the fastener you are working on. It is important to note that you should always follow the manufacturer’s instructions and recommendations when using a torque wrench to ensure accurate and safe results.
Step 5: Test Wrench Accuracy
Once you have adjusted the calibration of your torque wrench, it is important to test its accuracy before using it for any critical applications. Testing the accuracy of your wrench ensures that it is delivering the correct amount of torque and will provide reliable results.
To test the accuracy of your torque wrench, you will need a calibration tool or device. This can be in the form of a torque tester or a torque analyzer. These tools are designed to measure the amount of torque being applied by your wrench.
Follow these steps to test the accuracy of your torque wrench:
- Attach the calibration tool to your torque wrench according to the manufacturer’s instructions.
- Select a torque value on your wrench that is within the range of the calibration tool.
- Apply the torque to the calibration tool using your wrench.
- Observe the reading displayed on the calibration tool. It should match the torque value you selected on your wrench.
- If the reading differs from the selected torque value, note the variance and adjust the calibration of your wrench accordingly.
- Repeat the test with different torque values to ensure the accuracy of your wrench across its entire range.
It is important to perform regular checks of your torque wrench’s accuracy, especially if it is frequently used or subjected to heavy loads. This will help ensure that your wrench continues to provide accurate and reliable torque measurements.
Keep in mind that if your torque wrench cannot be adjusted or calibrated, it may be time to consider replacing it with a new one to ensure accurate torque measurements.
By following these steps to test the accuracy of your torque wrench, you can be confident in its performance and rely on it for precise torque applications.
Step 6: Finalize Calibration
Once you have completed the calibration process, it is important to finalize the calibration to ensure the accuracy and reliability of your torque wrench.
1. Verify the Settings
Before finalizing the calibration, double-check all the settings of your torque wrench. Make sure that the torque setting matches the desired value and the units are correct.
2. Perform a Test Torque
Next, perform a test torque to confirm that the wrench is calibrated accurately. Choose a test bolt or nut and apply the desired torque using your calibrated wrench. Verify that the wrench clicks or signals when it reaches the set torque.
3. Record the Results
Note down the results of the test torque, particularly if there is any deviation from the desired torque. If the deviation is significant, you may need to repeat the calibration process or seek professional assistance to correct the calibration.
4. Apply Calibration Seal
To indicate that the torque wrench has been calibrated and finalized, apply a calibration seal to the wrench. The seal should clearly state the date of calibration, the person or facility that performed the calibration, and any other relevant information.
5. Update Calibrations Records
Finally, make sure to update your calibration records with the details of the calibration process, including the date, torque settings, test results, and any adjustments or repairs made during the calibration.
By following these steps and finalizing the calibration of your torque wrench, you can ensure that it is accurate and reliable for all your torque applications.
FAQ
Why is it important to calibrate a torque wrench?
Calibrating a torque wrench ensures that it is providing accurate torque readings. This is important because using an inaccurate torque wrench can lead to under-tightened or over-tightened bolts, which can cause equipment failure or unsafe working conditions.
How often should a torque wrench be calibrated?
The frequency of torque wrench calibration depends on how often the wrench is used and the specific requirements of the industry or job. In general, it is recommended to calibrate a torque wrench at least once a year. However, some industries may require more frequent calibration, such as every 3-6 months. It is best to consult the manufacturer’s guidelines and industry standards for specific calibration recommendations.
What are the signs that a torque wrench may be out of calibration?
There are several signs that a torque wrench may be out of calibration. These include inconsistent torque readings, a noticeable difference in torque applied compared to the wrench setting, and the wrench not clicking or indicating when the set torque value is reached. If you notice any of these signs, it is important to have the torque wrench calibrated as soon as possible to ensure accurate torque application.
Can I calibrate a torque wrench myself?
While it is possible to calibrate a torque wrench yourself, it is recommended to have it calibrated by a professional calibration service or manufacturer. They have the necessary equipment and expertise to ensure accurate calibration. If you do decide to calibrate the wrench yourself, it is important to follow the manufacturer’s guidelines and use a calibrated torque tester for accurate results.
Video


Meet Harrison Clayton, a distinguished author and home remodeling enthusiast whose expertise in the realm of renovation is second to none. With a passion for transforming houses into inviting homes, Harrison's writing at https://thehuts-eastbourne.co.uk/ brings a breath of fresh inspiration to the world of home improvement. Whether you're looking to revamp a small corner of your abode or embark on a complete home transformation, Harrison's articles provide the essential expertise and creative flair to turn your visions into reality. So, dive into the captivating world of home remodeling with Harrison Clayton and unlock the full potential of your living space with every word he writes.