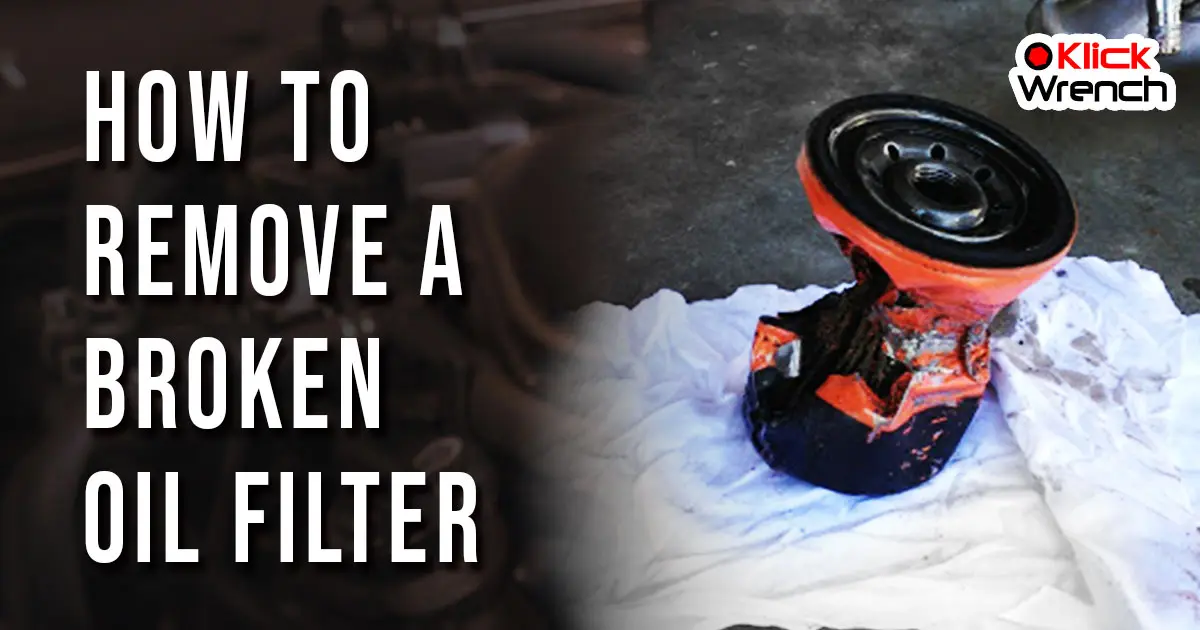
5 Easy Ways to Remove a Toyota Oil Filter Without a Wrench

Changing the oil in your Toyota vehicle is an important part of regular maintenance. However, removing the oil filter can sometimes be a challenge, especially if you don’t have a wrench on hand. Fortunately, there are several easy ways to remove a Toyota oil filter without a wrench.
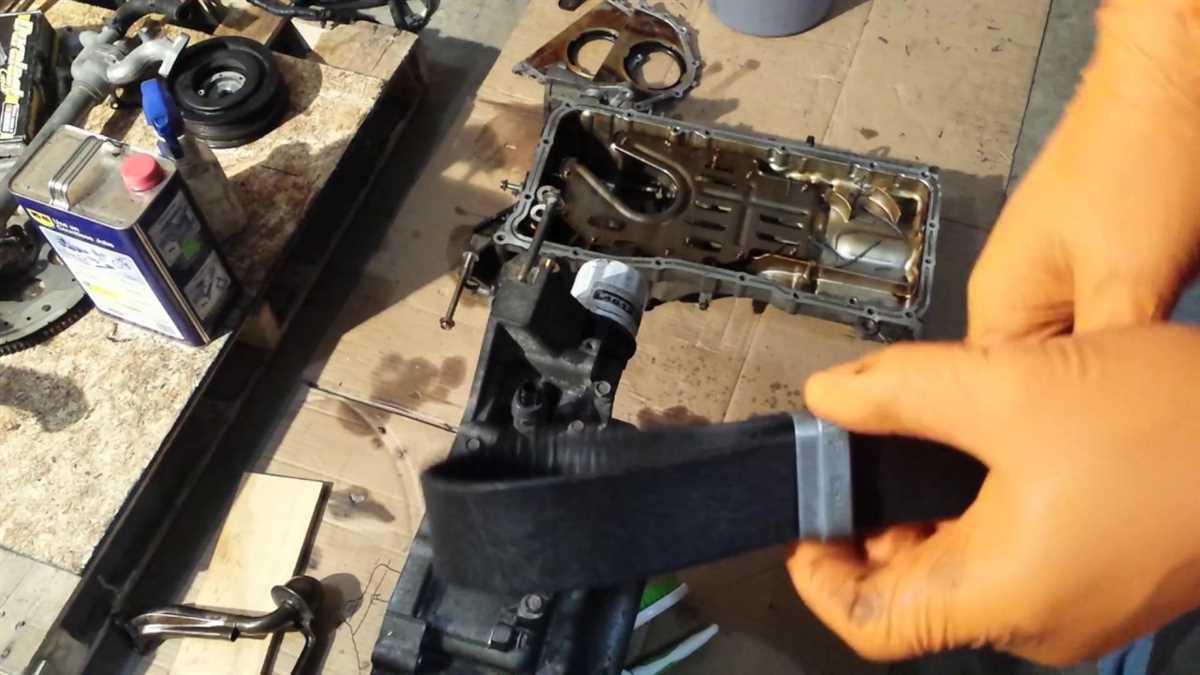
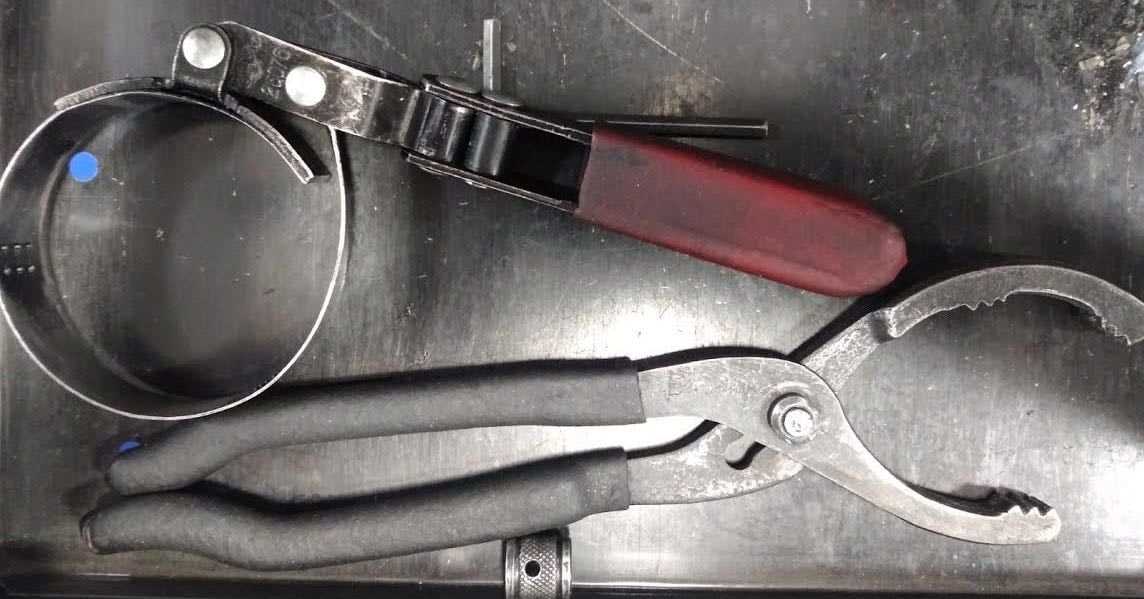
One method is to use a rubber strap wrench. This tool can grip the oil filter tightly and provide the leverage needed to twist it off. Simply wrap the strap around the filter, adjust it to fit snugly, and then twist counterclockwise to loosen and remove the filter. This method is especially useful if the filter is difficult to reach or if it has become stuck.
Another option is to use a pair of channel lock pliers. These pliers have a long, adjustable handle and serrated jaws that can grip the filter tight enough to twist it off. To use this method, position the pliers around the edge of the filter and squeeze the handles together to secure the grip. Then, turn the pliers counterclockwise to loosen and remove the filter.
If you don’t have a rubber strap wrench or channel lock pliers available, you can try using a screwdriver and a hammer. First, place the end of the screwdriver against the edge of the filter and tap it gently with the hammer to create a small dent. This dent will give the screwdriver a better grip on the filter. Then, use the screwdriver as a lever to turn the filter counterclockwise and remove it.
For those who are feeling more adventurous, you can also try using a pair of vice grips to remove the oil filter. Position the vice grips around the oil filter and tighten them securely. Then, use the vice grips as a lever to twist the filter counterclockwise and remove it. Keep in mind that this method may damage the filter or the surrounding components, so it’s best to use caution and have a replacement filter on hand just in case.

Finally, if none of these methods work or you don’t feel comfortable attempting them, it’s always best to consult a professional mechanic. They will have the tools and experience needed to safely and efficiently remove the oil filter without causing any damage to your Toyota vehicle.
Why Remove a Toyota Oil Filter Without a Wrench?
There may be situations when you need to remove a Toyota oil filter without a wrench. While using a wrench is the most common method, there are several reasons why you might not have one on hand or prefer not to use it:
- No wrench available: You may not have access to a wrench at the moment or simply don’t own one. In such cases, it is helpful to know alternative methods for removing an oil filter.
- Avoiding damage: Using a wrench can sometimes lead to damaging the oil filter or the surrounding parts. In certain circumstances, you might want to remove the filter without the risk of accidentally causing harm.
- Ease and convenience: Removing a Toyota oil filter without a wrench can be easier and more convenient in certain situations. If you’re in a hurry or don’t have the time to search for a wrench, using an alternative method can save you time and effort.
Overall, while using a wrench is the recommended method for removing a Toyota oil filter, having knowledge of alternative methods can be helpful in various scenarios. Whether it’s due to the unavailability of a wrench, the desire to avoid potential damage, or the need for a quick and easy removal, knowing how to remove an oil filter without a wrench is a useful skill for any Toyota vehicle owner.
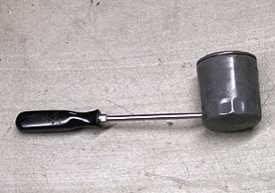
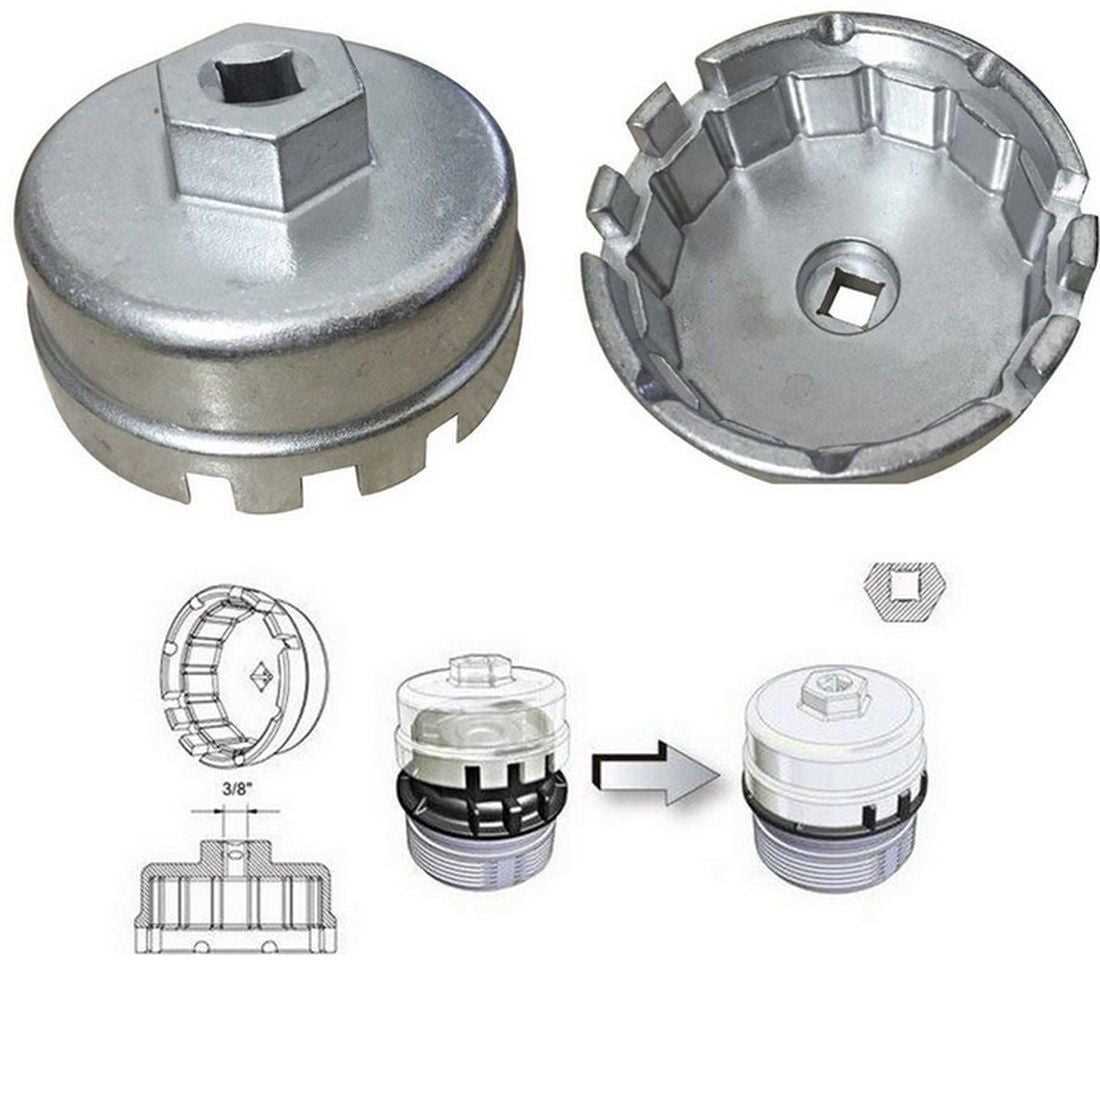
Method 1 – Using an Oil Filter Wrench
If you don’t have a special tool or if you want to use a method that does not require any additional tools, you can use an oil filter wrench to remove the oil filter on your Toyota vehicle. Here are the steps:
- Identify the oil filter location on your Toyota vehicle. It is usually located on the side or underside of the engine.
- Prepare the necessary tools. You will need an oil filter wrench that is designed to fit your specific Toyota model.
- Slide the oil filter wrench onto the oil filter. Make sure it is securely attached.
- Use the oil filter wrench to loosen the oil filter by turning it counterclockwise. Apply steady pressure in a clockwise direction to loosen the filter.
- Once the oil filter is loose, remove it by hand. Be careful as it may still contain hot oil.
- Dispose of the old oil filter properly according to local regulations.
Using an oil filter wrench is a convenient and effective method to remove the oil filter from your Toyota vehicle. It allows you to get a firm grip on the filter and apply the necessary force to loosen and remove it. Make sure to choose the right size and type of oil filter wrench for your specific Toyota model to ensure a successful removal.

Step-by-Step Guide to Using an Oil Filter Wrench
1. Gather the necessary tools and materials
Before starting the oil filter wrench removal process, make sure you have all the necessary tools and materials. You will need an oil filter wrench, a socket set, a drain pan, and a new oil filter.
2. Locate the oil filter
The oil filter is usually located on the side or bottom of the engine. It may be covered by a plastic shield or have other components around it. Take a good look at the engine to find the oil filter.
3. Prepare the engine
Before removing the oil filter, it is important to prepare the engine. Start by turning off the engine and allowing it to cool down. Place the drain pan underneath the oil filter to catch any oil that may spill during the removal process.
4. Position the oil filter wrench
Take the oil filter wrench and adjust it to fit the size of the oil filter. Position the wrench securely around the oil filter, making sure it is tight and properly aligned.

5. Turn the oil filter wrench
Using a socket set or a wrench, apply force in a counterclockwise direction to loosen the oil filter. Be careful not to use excessive force as it may damage the oil filter or other engine components.
6. Remove the oil filter
Once the oil filter is loosened, continue turning it by hand until it is completely separated from the engine. Be prepared for some oil to spill out, so make sure the drain pan is properly positioned.
7. Clean the oil filter housing
Before installing a new oil filter, it is important to clean the oil filter housing. Use a clean cloth or paper towel to remove any dirt or debris from the housing. This will ensure a proper seal when installing the new filter.
8. Install the new oil filter
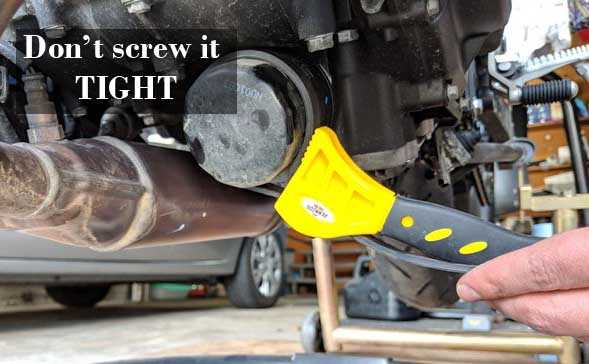
Apply a small amount of oil to the rubber gasket on the new oil filter. This will help create a better seal. Screw the new oil filter onto the engine by hand, ensuring it is properly aligned and tightened.
9. Clean up and dispose of the old oil filter
Clean up any oil spills or drips using a clean cloth or paper towel. Properly dispose of the old oil filter according to local regulations and guidelines.

10. Check the oil level
After replacing the oil filter, check the oil level on the dipstick and add oil if necessary. Start the engine and let it run for a few minutes, then check for any leaks.
11. Properly dispose of the old oil
Finally, properly dispose of the old oil by taking it to a recycling facility or an auto parts store that accepts used oil.
Following these steps will help you safely and effectively remove your Toyota oil filter using an oil filter wrench.
Method 2 – Using a Strap Wrench
If you don’t have a specialized oil filter wrench, don’t worry! You can still remove the oil filter using a strap wrench. A strap wrench is a versatile tool that can be used for various applications, including removing oil filters.

Follow these simple steps to remove the oil filter using a strap wrench:
- Before you begin, make sure the engine is cool to avoid burns or injuries.
- Locate the oil filter. It is usually located on the side or underneath the engine.
- Wrap the strap of the wrench around the oil filter, making sure it is tight and secure.
- Hold the handle of the wrench and turn it counterclockwise to loosen the oil filter.
- Continue turning the wrench until the oil filter is completely loose.
- Once the oil filter is loose, carefully unscrew it by hand, making sure to hold it upright to prevent oil spillage.
Using a strap wrench may require a bit more effort compared to using a specialized oil filter wrench, but it is an effective alternative that can get the job done. Just remember to be careful and take your time when using the strap wrench to avoid any accidents or damage.
Step-by-Step Guide to Using a Strap Wrench
1. Gather the necessary tools
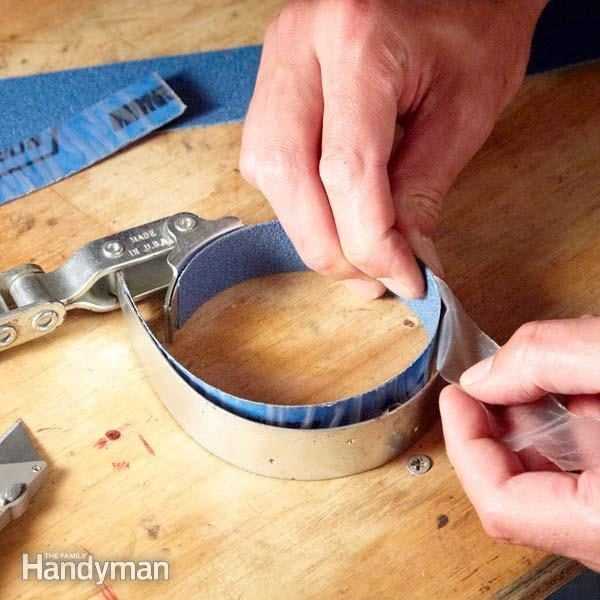
Before you begin, make sure you have all the necessary tools. For this method, you will need a strap wrench, which is a specialized tool designed to grip and turn objects with a strap or belt-like material. You can purchase a strap wrench at an auto parts store or online.
2. Locate the oil filter
The oil filter is usually located under the vehicle, near the engine. You may need to jack up your vehicle or use a ramp to access the oil filter. Refer to your vehicle’s manual if you are unsure of the exact location.
3. Position the strap wrench
Wrap the strap around the oil filter, ensuring that it is tight and secure. Position the strap wrench in a way that allows you to turn it counterclockwise to loosen the filter. The strap should be placed closer to the end of the filter, where you have the most leverage.
4. Apply pressure and turn
With the strap wrench in position, apply pressure by pulling the strap in the opposite direction of the filter. This will create tension and grip the oil filter. Slowly begin to turn the strap wrench counterclockwise to loosen the filter. Be sure to apply steady and even pressure to prevent slipping or damaging the filter.
5. Remove the oil filter
Continue to turn the strap wrench counterclockwise until the oil filter is fully loosened. Once the filter is loosened, you can remove it by hand. Be careful as the filter may still contain hot oil. Use caution and have a cloth or container ready to catch any oil that may spill.
6. Clean the area
After the oil filter is removed, it’s a good idea to clean the area around the filter housing. Wipe away any dirt or debris that may have accumulated to ensure a clean surface for the new filter.
7. Install a new oil filter
Once the area is clean, you can install a new oil filter. Apply a small amount of oil to the rubber gasket on the new filter to ensure a proper seal. Screw the new filter onto the filter housing by hand, making sure it is tight but not overly tightened.

8. Check for leaks
After the new filter is installed, start the engine and let it run for a few minutes. Check for any signs of leaks around the filter housing. If you notice any leaks, turn off the engine and reposition the filter or tighten it slightly until the leaks stop.
9. Dispose of the old filter
Properly dispose of the old oil filter in accordance with your local regulations. Many auto parts stores and recycling centers accept used oil filters for proper disposal.
10. Clean up
Finally, clean up any spilled oil or debris and properly dispose of any used rags or containers.
By following these steps, you can easily remove a Toyota oil filter without using a wrench. The strap wrench provides a secure and effective grip, allowing you to loosen and remove the oil filter with ease.
Method 3 – Using a Screwdriver and Hammer
If you don’t have access to an oil filter wrench, you can still remove the Toyota oil filter using a screwdriver and hammer. This method requires a bit more force and caution, but it can get the job done in a pinch.
- Gather the necessary tools: To remove the oil filter using this method, you will need a flathead screwdriver and a hammer.
- Prepare the area: Make sure you are working on a flat and stable surface to avoid any accidents.
- Locate the oil filter: The oil filter is typically located on the lower side of the engine. Refer to your vehicle’s owner’s manual or consult a mechanic if you are unsure about its location.
- Puncture the oil filter: Insert the flathead screwdriver into the oil filter and use the hammer to gently tap the screwdriver into the filter. The goal is to create a small hole in the filter to release the pressure.
- Turn the oil filter: Once the pressure is released, use the screwdriver as a lever to turn the oil filter counterclockwise. Be cautious and apply steady pressure to avoid damaging the filter or any surrounding components.
- Remove the oil filter: Continue turning the oil filter until it comes loose from the engine. Use caution when removing it to avoid spilling any oil.
- Clean the area: After removing the oil filter, clean the area around it to remove any oil residue or debris.
- Install a new oil filter: Once the area is clean, install a new oil filter following the manufacturer’s instructions. Make sure to lubricate the rubber gasket on the filter with a bit of fresh oil.
- Tighten the oil filter: Use your hands to screw the new oil filter onto the engine until it is snug. Do not overtighten.
- Dispose of the old oil filter: Properly dispose of the old oil filter by taking it to a recycling center or an automotive store that accepts used filters.
While using a screwdriver and hammer can be effective for removing a stubborn oil filter, it is recommended to have an oil filter wrench for easier and safer removal. If you plan on changing your vehicle’s oil regularly, investing in an oil filter wrench is a worthwhile purchase.
Step-by-Step Guide to Using a Screwdriver and Hammer
Removing a Toyota oil filter without a wrench can be challenging, but here’s a simple method using a screwdriver and hammer:
Step 1: Gather the necessary tools
Before starting, make sure you have the following tools:
- Screwdriver
- Hammer
- Shop rag
Step 2: Locate the oil filter
Find the oil filter under the hood of your Toyota vehicle. It is usually located near the front of the engine.
Step 3: Prepare the area
Lay a shop rag or towel around the oil filter to catch any oil that may spill during the process.
Step 4: Loosen the oil filter
- Place the screwdriver through the top of the oil filter, ensuring it is snug.
- Tap the end of the screwdriver with the hammer in a counterclockwise direction to loosen the oil filter.
Step 5: Remove the oil filter
Once the oil filter is loosened, use your hand to twist it off the engine. Be careful as it may still have some oil in it.
Step 6: Clean the area
Before installing the new oil filter, clean the area around the oil filter with a shop rag to remove any debris or dirt.
Step 7: Install the new oil filter
Screw the new oil filter onto the engine by hand. Ensure it is tightened securely, but be careful not to overtighten.
Step 8: Finish the oil change
Continue with your regular oil change procedure, such as draining the old oil and adding new oil.
Using a screwdriver and hammer to remove a Toyota oil filter can be a simple and effective method when you don’t have a wrench available. Just follow these steps carefully, and you’ll be able to remove the oil filter without any difficulty.
Method 4 – Using a Rubber Glove
If you don’t have access to a wrench or any special tools, you can try using a rubber glove to remove the oil filter. This method can provide you with a good grip and make it easier to twist and unscrew the filter.
Here’s how you can remove a Toyota oil filter using a rubber glove:
- Put on a rubber glove to improve your grip and protect your hand.
- Locate the oil filter on your Toyota vehicle. It is typically located near the engine, underneath the car.
- Wrap the rubber glove around the oil filter. Make sure to cover the entire filter with the glove.
- Apply firm pressure and turn the filter counterclockwise. The rubber glove will provide you with extra grip, making it easier to remove the filter.
- Continue turning the filter until it comes loose. Be cautious as some oil may leak out when the filter is removed.
- Once the filter is completely loose, carefully unscrew it the rest of the way by hand. Make sure to keep the filter upright to prevent any remaining oil from spilling.
- Dispose of the old filter properly and wipe off any excess oil from the filter housing.
Remember to always consult your vehicle’s owner manual for specific instructions on how to remove the oil filter. This method is a handy alternative if you don’t have access to a wrench or if the filter is not too tight.
Step-by-Step Guide to Using a Rubber Glove
- Put on a rubber glove: Start by putting on a clean rubber glove that fits snugly over your hand. Make sure the glove is free of any holes or tears.
- Locate the oil filter: Once you have the glove on, locate the oil filter on your Toyota vehicle. The filter is usually located on the side or bottom of the engine.
- Grab the oil filter with the glove: With the rubber glove on, reach down and firmly grip the oil filter. The glove will provide extra traction and help you get a good grip on the filter.
- Turn the filter counterclockwise: Apply force in a counterclockwise direction to loosen the oil filter. The rubber glove will provide extra grip and make it easier to turn the filter.
- Remove the filter by hand: Once you have loosened the filter, you should be able to remove it by hand. Carefully pull the filter away from the engine and set it aside.
Using a rubber glove can be a convenient way to remove a Toyota oil filter without a wrench. The glove provides extra grip and allows you to easily loosen and remove the filter by hand. Remember to dispose of the old filter properly and replace it with a new one before adding fresh oil to your vehicle.
Method 5 – Using a Filter Pliers
If you don’t have a wrench or a strap wrench handy, you can still remove a Toyota oil filter using filter pliers. Filter pliers are a type of tool specifically designed to grip and twist oil filters for easy removal. Here’s how you can use filter pliers to remove a Toyota oil filter:
- Start by positioning the filter pliers around the body of the oil filter. Make sure you have a firm grip on the filter.
- Twist the filter pliers counterclockwise to loosen the oil filter. Apply steady pressure to ensure a secure grip on the filter.
- Continue twisting the filter pliers until the oil filter is fully loosened. It may take a few rotations to completely detach the filter from the engine.
- Once the filter is loose, carefully remove it from the engine. Be cautious of any oil that may spill out of the filter as you remove it.
Using filter pliers is an effective method for removing a Toyota oil filter without a wrench. However, it’s important to note that filter pliers may not be as readily available as other tools, so it’s a good idea to have alternative methods in mind.
FAQ
Is it possible to remove a Toyota oil filter without a wrench?
Yes, it is possible to remove a Toyota oil filter without a wrench. There are alternative methods that can be used, such as using a rubber strap wrench, a screwdriver, or even pliers.
What is a rubber strap wrench and how does it work?
A rubber strap wrench is a tool that can be used to grip and turn objects, such as an oil filter. It has a rubber strap that can be adjusted to fit around the filter, providing a tight grip. By applying pressure and turning, the rubber strap wrench can loosen and remove the oil filter.
Can a screwdriver be used to remove a Toyota oil filter?
Yes, a screwdriver can be used to remove a Toyota oil filter. It can be inserted through the oil filter and used as a leverage to loosen and remove the filter. However, it is important to be cautious when using this method to avoid damaging the filter or surrounding components.
Are pliers a good tool to remove a Toyota oil filter?
Pliers can be used as an alternative tool to remove a Toyota oil filter. They can provide a strong grip on the filter and be used to twist it loose. However, caution must be exercised to avoid damaging the filter or causing any leaks.
Are there any other methods to remove a Toyota oil filter without a wrench?
Yes, apart from using a rubber strap wrench, a screwdriver, or pliers, there are other methods that can be used to remove a Toyota oil filter without a wrench. These include using a cloth or towel for added grip, or even utilizing a filter removal tool specifically designed for oil filters.
Video

How to say hello in punjabi

Meet Harrison Clayton, a distinguished author and home remodeling enthusiast whose expertise in the realm of renovation is second to none. With a passion for transforming houses into inviting homes, Harrison's writing at https://thehuts-eastbourne.co.uk/ brings a breath of fresh inspiration to the world of home improvement. Whether you're looking to revamp a small corner of your abode or embark on a complete home transformation, Harrison's articles provide the essential expertise and creative flair to turn your visions into reality. So, dive into the captivating world of home remodeling with Harrison Clayton and unlock the full potential of your living space with every word he writes.


