How to work a tommee tippee steriliser

Welcome to our guide on how to work a Tommee Tippee steriliser! Tommee Tippee sterilisers are a popular choice for parents looking for a reliable and efficient way to sterilise their baby’s bottles, nipples, and other feeding accessories.
Step 1: Clean Everything Thoroughly
Before using the steriliser, it’s important to clean all the bottles, nipples, and other accessories thoroughly. Use warm, soapy water to wash everything, and rinse them well to remove any soap residue. It’s important to make sure everything is clean before sterilising to ensure the best results.
Step 2: Assemble the Steriliser
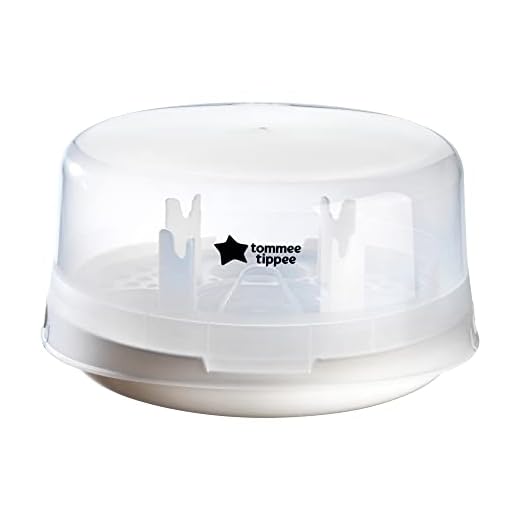
Next, assemble the Tommee Tippee steriliser according to the instructions provided with the product. Make sure to place the water in the steriliser base, and then carefully arrange the bottles and accessories on the steriliser rack. It’s essential to follow the instructions to ensure proper functioning of the steriliser.
Step 3: Plug In and Turn On the Steriliser
Once everything is properly set up in the steriliser, plug it into a socket and turn it on. You should see a light indicating that the steriliser is working. It will typically take between 5 and 7 minutes for the sterilisation process to complete, depending on the model of the steriliser.
Step 4: Wait and Let it Cool Down
After the sterilisation process is complete, it’s important to wait for the steriliser to cool down before removing the bottles and accessories. This usually takes a few minutes. Avoid touching any hot areas of the steriliser to prevent any burns.
Following these simple steps will help you effectively sterilise your baby’s bottles and feeding accessories using a Tommee Tippee steriliser. Always remember to read the product instructions and consult the manufacturer’s website for any specific details or safety precautions.

Learn how to use a Tommee Tippee steriliser effectively
Tommee Tippee sterilisers are easy to use and provide a convenient way to keep your baby’s feeding accessories clean and safe. To ensure effective sterilisation, follow the steps below:
1. Wash your hands thoroughly before handling the steriliser and its contents.
2. Wash all the feeding accessories, such as bottles, teats, and breast pumps, using warm, soapy water. Rinse them thoroughly with clean water.
3. Assemble the steriliser according to the instructions provided by the manufacturer. Make sure all the parts are properly connected.
4. Pour the recommended amount of water into the steriliser. Be careful not to exceed the maximum water level indicated.

5. Place the washed and rinsed feeding accessories inside the steriliser. Make sure they are arranged in a way that allows steam to circulate freely around each item.
6. Carefully close the steriliser’s lid, making sure it is properly secured. If your steriliser has a latch or locking mechanism, engage it to prevent accidental opening during the sterilisation cycle.
7. Plug in the steriliser and turn it on, following the manufacturer’s instructions. Most modern Tommee Tippee sterilisers have an automatic sterilisation cycle that typically takes around 5 minutes.
8. Once the sterilisation cycle is complete, wait for the steriliser to cool down before opening it. This will prevent any burns caused by residual heat.
9. Remove the sterilised accessories from the steriliser using clean, dry tongs or hands that have been thoroughly washed. Shake off any excess water and let the items air dry on a clean, disinfected surface.

10. Store the sterilised feeding accessories in a clean, dry place until they are ready to be used.
By following these simple steps, you can effectively sterilise your baby’s feeding accessories and provide them with a safe and hygienic feeding experience.
Choosing the right Tommee Tippee steriliser
When it comes to choosing a Tommee Tippee steriliser, there are a few factors to consider. One of the first things to think about is the size. Depending on your needs and available space, you may opt for a compact or a larger steriliser.
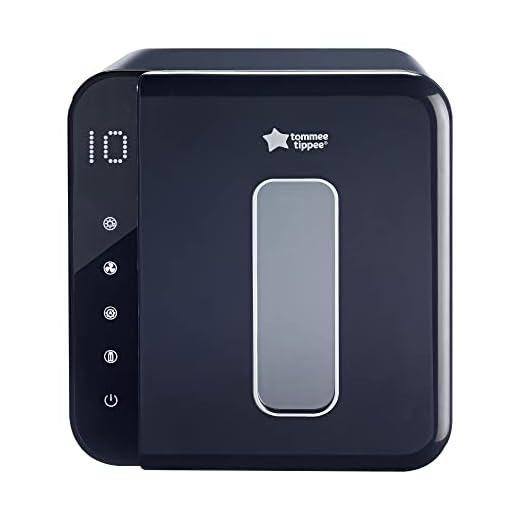
Another important consideration is the type of steriliser. Tommee Tippee offers electric steam sterilisers, microwave steam sterilisers, and cold water sterilisers. Electric steam sterilisers are convenient and often feature additional features such as drying or storage functions. Microwave steam sterilisers are a great option for those who need a portable and quick method of sterilising. Cold water sterilisers are suitable for travel and can be used in areas where electricity or microwave is not readily available.
It’s also essential to ensure that the steriliser is compatible with the bottles and accessories you intend to use. Tommee Tippee sterilisers are designed to work best with Tommee Tippee bottles and teats, but they can typically accommodate various bottle sizes and brands.

Lastly, consider your budget and any special features you may need. Some Tommee Tippee sterilisers come with additional features such as a digital display or an automatic shut-off function for added convenience.
By considering these factors, you can choose the right Tommee Tippee steriliser that perfectly suits your needs and preferences, ensuring that your baby’s feeding equipment stays clean and safe.
Tips for preparing bottles for sterilisation
Keeping your baby’s bottles clean and sterilised is essential for their health and wellbeing. Here are some tips for preparing bottles for sterilisation with the Tommee Tippee steriliser:
1. Pre-wash the bottles
Before sterilising the bottles, it’s important to pre-wash them. Use warm soapy water and a bottle brush to thoroughly clean the bottles, teats, and lids. Rinse them well with clean water to remove any soap residue.
2. Check for damage
Before sterilisation, carefully inspect the bottle, teat, and lid for any cracks, scratches, or discolouration. If you find any damage, it’s best to replace them as they may not be able to withstand the sterilisation process properly and could pose a safety risk.
3. Disassemble the bottles
Take apart the bottles by removing the teats and lids. This will ensure that all parts of the bottles are thoroughly cleaned and sterilised. Be sure to follow the manufacturer’s instructions for disassembling the specific type of bottle you have.
4. Use the right amount of water
When filling the steriliser with water, be sure to follow the instructions and use the correct amount. Using too much water can cause the steriliser to overflow, while using too little may not ensure effective sterilisation. It’s important to achieve the right balance.
5. Arrange the bottles correctly
When placing the bottles in the steriliser, make sure they are arranged in a way that allows the steam to reach all surfaces. Avoid overcrowding the steriliser, as this can prevent proper sterilisation of the bottles. Give them enough space to ensure efficient sterilisation.
6. Be mindful of timing
Always set a timer or keep an eye on the sterilisation process to avoid over or under-sterilising the bottles. Too short a time may not kill all harmful bacteria, while too long may cause damage to the bottles. Follow the recommended sterilisation time for your specific model.
By following these tips, you can ensure that your baby’s bottles are properly prepared for sterilisation, providing them with a clean and safe feeding experience.

Step-by-step guide to using a Tommee Tippee steriliser
Using a Tommee Tippee steriliser is an easy and efficient way to ensure that your baby’s bottles are clean and safe. Follow these simple steps to use the steriliser effectively:
Step 1: Wash your hands
Before handling the steriliser and the baby bottles, it is important to wash your hands thoroughly with soap and water. This step helps to reduce the risk of contamination.
Step 2: Prepare the steriliser
First, make sure that the steriliser is in a clean and dry condition. Start by removing the lid and check for any signs of damage or wear. If everything looks good, place the steriliser on a flat and stable surface near a power socket.
Step 3: Arrange the bottles
Next, disassemble the baby bottles and place them in the steriliser’s racks. Make sure to separate the bottle parts, such as the bottle, teats, lids, and caps, to ensure proper sterilisation. Do not overcrowd the racks, as it may prevent the steam from reaching all the items.
Step 4: Add water
Fill the steriliser’s base with the recommended amount of water, according to the manufacturer’s instructions. Avoid overfilling as it can result in water leakage during the sterilisation process.
Step 5: Start the sterilisation process
Once the bottles are arranged and the water is added, place the steriliser’s lid securely on top. Plug in the steriliser and turn it on, following the specific instructions provided in the user manual. The sterilisation process typically takes around 5-10 minutes, depending on the model.
During the process, the steriliser will produce steam that kills bacteria and sterilises the baby bottles. This steam will also serve to keep the bottles sterile for up to 24 hours if the lid remains closed.
Step 6: Allow the steriliser to cool down
After the sterilisation cycle is complete, wait for the steriliser to cool down before opening the lid. This can take a few minutes, so be patient. Opening the steriliser while it’s still hot can cause steam burns or damage to the bottles.
Step 7: Remove and store the bottles
Once the steriliser is cool, carefully remove the bottles from the racks. It’s essential to handle them with clean hands to avoid any potential contamination. Either use them immediately or store them in a clean, dry place with the lids on until needed.
Step 8: Clean and maintain the steriliser
Regularly clean and descale the steriliser to prevent the buildup of limescale or any residue from affecting its functionality. Follow the manufacturer’s guidelines regarding cleaning and maintenance.
Following this step-by-step guide will help you utilise a Tommee Tippee steriliser effectively and maintain a clean and safe environment for your baby’s bottles.
Proper Care and Maintenance for Your Steriliser
Proper care and maintenance are essential to ensure the longevity and effectiveness of your Tommee Tippee steriliser. By following these simple steps, you can keep your steriliser in top condition and ensure that your baby’s bottles and accessories are always safe and clean.
Cleaning
To clean your steriliser, follow these steps:
- Unplug the steriliser and allow it to cool down before cleaning.
- Wipe the inside of the steriliser with a damp cloth to remove any residue or build-up.
- Use a bottle brush or small dish brush to clean the heating plate and other hard-to-reach areas.
- Rinse all parts thoroughly with warm water to remove any cleaning solution.
- Allow the steriliser to air dry before reassembling.
Descaling
Over time, mineral deposits can build up inside your steriliser, which can affect its performance. To descale your steriliser, follow these steps:
- Fill the steriliser with equal parts white vinegar and water.
- Allow the solution to sit for 15 minutes to dissolve any mineral deposits.
- Rinse the steriliser thoroughly with warm water to remove the vinegar solution.
- Wipe the heating plate and other parts with a clean cloth to remove any remaining residue.
- Allow the steriliser to air dry before use.
Regular Check-ups
It is important to regularly check your steriliser for any signs of damage or wear. Inspect the cord for fraying or exposed wires and ensure that all components are in good condition. If any parts are damaged, contact the manufacturer for replacements.
| Component | Frequency of Replacement |
|---|---|
| Bottle basket | Every 6-8 months |
| Heating plate | As needed, if discolouration or damage occurs |
| Clips and fittings | Inspect regularly for wear and replace as needed |
By following these care and maintenance tips, you can ensure that your Tommee Tippee steriliser continues to effectively sterilise your baby’s bottles and accessories, providing added peace of mind and keeping your little one safe and healthy.
Additional uses of a Tommee Tippee steriliser
While the primary purpose of a Tommee Tippee steriliser is to clean and sterilise baby bottles and accessories, there are other creative ways you can use it around the house. Here are a few additional uses for your Tommee Tippee steriliser:
- Pacifiers: You can use the Tommee Tippee steriliser to clean and sterilise pacifiers. Simply place them in the steriliser with water and follow the instructions for steam sterilisation.
- Pump parts: If you are a breastfeeding mother, you can sterilise breast pump parts in the Tommee Tippee steriliser. This ensures that all components are clean and safe for use.
- Sippy cups: Sippy cups can also be sterilised using the Tommee Tippee steriliser. remove the lids and place them in the steriliser with water to ensure cleanliness and hygiene.
- Teething toys: Teething toys often end up in a baby’s mouth, making it important to keep them clean. Use the steriliser to keep teething toys free from germs.
- Cutlery and utensils: You can easily sterilise small, baby-sized cutlery and utensils in the Tommee Tippee steriliser. It’s perfect for keeping these items germ-free and safe for your little one.
Remember to always refer to the manufacturer’s instructions for the specific product model you own when using the steriliser for anything other than its primary function. And make sure to clean and descale your steriliser regularly to maintain its effectiveness.
By exploring additional uses for your Tommee Tippee steriliser, you can make the most of this versatile and convenient appliance. Happy sterilising!


Meet Harrison Clayton, a distinguished author and home remodeling enthusiast whose expertise in the realm of renovation is second to none. With a passion for transforming houses into inviting homes, Harrison's writing at https://thehuts-eastbourne.co.uk/ brings a breath of fresh inspiration to the world of home improvement. Whether you're looking to revamp a small corner of your abode or embark on a complete home transformation, Harrison's articles provide the essential expertise and creative flair to turn your visions into reality. So, dive into the captivating world of home remodeling with Harrison Clayton and unlock the full potential of your living space with every word he writes.


