How to wire an immersion heater
Do you need a reliable and efficient way to heat your water? Look no further than an immersion heater! This handy device is perfect for providing hot water on-demand, whether it’s for your home or business. But how do you wire an immersion heater to ensure safe and proper operation?
Before you get started, it’s important to understand the basics: an immersion heater consists of a heating element that is submerged in water, which heats up when electricity is supplied to it. The heated water is then ready to use for your shower, washing machine, or dishwasher.
So, let’s get down to business: to wire an immersion heater, you will need a few tools and materials including electrical cable, a circuit breaker, a junction box, and of course, the immersion heater itself. It’s recommended to always consult the manufacturer’s instructions beforehand, as the specific wiring process may vary.
First and foremost: ensure that the power is turned off at the main circuit breaker or fuse box. Safety is paramount when working with electricity, so take extra precautions and don’t rush through the process. Once that’s done, you can begin by connecting the electrical cable to the immersion heater using a proper connector or terminal block.
What is an immersion heater?
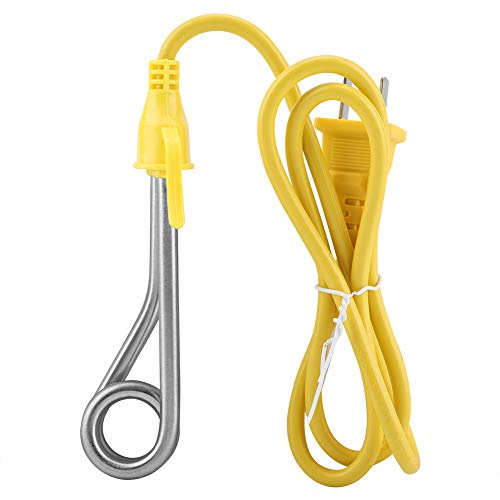
An immersion heater is a device used to heat water in a container, such as a water tank or a bathtub. It consists of a heating element that is immersed in the water and heats it to the desired temperature. The heating element is usually made of a metal alloy or stainless steel, which is resistant to corrosion and can withstand high temperatures.

Immersion heaters are commonly used in homes and commercial establishments to heat water for various purposes, such as bathing, washing dishes, and space heating. They are relatively easy to install and provide an efficient and cost-effective way to heat water. Immersion heaters are available in different sizes and power ratings to suit different needs and requirements.
When using an immersion heater, it is important to ensure proper installation and safety precautions. The heater should be connected to a dedicated circuit and controlled by a thermostat to regulate the water temperature. Regular maintenance and inspection of the immersion heater are also necessary to ensure its proper functioning and avoid any potential hazards.
Overall, an immersion heater is a practical and convenient solution for heating water, providing a reliable source of hot water for everyday activities. Whether you need to take a hot shower, wash dishes, or simply enjoy a warm bath, an immersion heater can make your life more comfortable and convenient.
Components of an immersion heater
An immersion heater is a device used for heating water, particularly in domestic settings. It consists of several components, each serving a specific purpose.
1. Heating elements
The heating elements are the heart of an immersion heater and are responsible for generating heat. They are typically made of a conductive material, such as copper or stainless steel, and are coiled or tubular in shape. These elements are placed inside the water container and generate heat when an electric current passes through them. The number and wattage of the heating elements determine the rate at which the water is heated.

2. Thermostat
A thermostat is a temperature-sensitive device that ensures the water remains at the desired temperature. It monitors the temperature of the water and activates or deactivates the heating elements accordingly. The thermostat is typically adjustable, allowing the user to set the desired temperature. It is important to prevent the water from overheating or not reaching the desired temperature, which can be achieved by properly calibrating the thermostat.
3. Control switch
A control switch is used to turn the immersion heater on and off. It is usually located on the exterior of the heater and can be manually operated. The control switch allows the user to easily control the heating process, turning the heater on when needed and off when not in use. Some immersion heaters may also have additional switches for adjusting the temperature or activating specific heating elements.
4. Safety features
Immersion heaters often incorporate various safety features to ensure safe and efficient operation. These may include an overheat protection device that automatically shuts off the power if the water temperature exceeds a certain limit. Some models also have a low water level sensor to prevent the heater from running when there is insufficient water in the container. These safety features are crucial for preventing accidents and extending the lifespan of the immersion heater.
| Component | Function |
|---|---|
| Heating elements | Generate heat |
| Thermostat | Regulates temperature |
| Control switch | Turns the heater on/off |
| Safety features | Prevents accidents, maintains efficiency |
Tools required for wiring an immersion heater
When it comes to wiring an immersion heater, you will need the following tools:
| Tool | Description |
|---|---|
| Wire stripper | A wire stripper is used to remove the insulation from the wires before connecting them. |
| Screwdriver | A screwdriver, preferably a flathead one, is needed to secure the wires and terminals correctly. |
| Multimeter | A multimeter is used to measure voltage, current, and resistance during the wiring process. It helps ensure the connections are made correctly. |
| Electrical tape | Electrical tape is used to insulate the connections to prevent any risk of electrical shocks or short circuits. |
| Wire connectors | Wire connectors, such as wire nuts or crimp connectors, are used to join the wires together securely. |
| Circuit tester | A circuit tester is helpful to check if the circuit is properly grounded and functioning correctly before connecting the immersion heater. |
| Safety goggles | Safety goggles are essential to protect your eyes from any potential hazards or accidents during the wiring process. |
| Gloves | Wearing gloves will protect your hands from any electrical shocks or heat while handling the wires or immersion heater. |
Make sure you have all these tools handy before starting to wire an immersion heater. Having the right tools will ensure a smooth and safe electrical installation process.

Step-by-step guide to wiring an immersion heater
Wiring an immersion heater is a relatively simple process that can be done by following a few essential steps. This guide will provide you with all the necessary information to complete the wiring of your immersion heater safely and effectively.
Step 1: Safety first
Before starting the wiring process, ensure that the power supply to the immersion heater is completely switched off. This will minimize the risk of electric shock and other accidents during the installation process.
Step 2: Gaining access to the immersion heater
Locate the immersion heater, typically found in the hot water cylinder, and ensure that there is enough space and clearance to work safely. Remove the access cover or plate to expose the wiring and thermostat connections.

Step 3: Identifying the wiring connections
You will typically find three wires connected to the immersion heater – live, neutral, and earth. The live wire is usually brown, the neutral wire is blue, and the earth wire is green and yellow. Identify these wires before proceeding further.
Step 4: Wiring the live and neutral connections
Using a screwdriver or appropriate electrical connectors, connect the live wire to the corresponding terminal on the immersion heater. Repeat the process for the neutral wire, ensuring that the connections are secure and tight.
Step 5: Ensuring earth connection

Connect the earth wire to the appropriate earth terminal, usually marked with the Earth symbol or the letters “E” or “Earth”. This connection is crucial for safety purposes, as it grounds any potential electrical faults.
Step 6: Insulating the connections
After completing the wiring connections, carefully insulate and cover them with electrical tape or suitable insulation material to provide protection against accidental contact and short circuits.
Step 7: Testing the connections
Once the wiring is complete and properly insulated, carefully restore the power supply to the immersion heater. Test the connections by turning on the water heating system and checking for any issues or abnormalities. If everything appears to be functioning correctly, you have successfully wired the immersion heater.

Note: It is always recommended to consult a qualified electrician or professional, especially if you are unsure about any aspect of wiring an immersion heater. Safety should be your top priority.
Safety precautions when wiring an immersion heater
When working with electricity and wiring, it is important to prioritize safety to prevent any accidents or injuries. Here are some key safety precautions to consider when wiring an immersion heater:
1. Shut off the power supply
Before starting any work on the immersion heater, make sure to turn off the power supply at the main circuit breaker. This ensures that no electricity is flowing through the system and reduces the risk of electric shock.
2. Allow the immersion heater to cool down
Prior to wiring, ensure that the immersion heater has been switched off and left to cool down completely. This prevents any potential burns or other injuries caused by hot water or heated elements.
3. Wear appropriate protective gear
When working on the immersion heater, always wear safety gloves, goggles, and other necessary protective equipment. This protects you from electric shocks, burns, or injuries from tools or materials.

4. Use proper tools
Make sure to use the right tools for the job, such as wire strippers, pliers, and insulated screwdrivers. Using improper tools or damaged equipment can increase the risk of accidents, including electrocution.
5. Check for moisture and leaks
Inspect the immersion heater and surrounding area for any signs of moisture or leaks. Water and electricity do not mix well and can cause serious safety hazards. If you notice any issues, it is important to address them before proceeding with the wiring.
6. Follow manufacturer’s instructions and local codes
Always follow the manufacturer’s instructions and any local electrical codes when wiring an immersion heater. This ensures that the installation is done correctly and meets safety standards.
7. Double-check all connections
Before restoring the power supply, double-check all connections to ensure they are secure and properly insulated. Loose or faulty connections can lead to electrical malfunctions or fires.
By following these safety precautions, you can minimize the risk of accidents and ensure a safe and successful wiring of your immersion heater.
Common problems and troubleshooting for immersion heaters
Immersion heaters can encounter various problems that can affect their functionality and efficiency. If you are facing issues with your immersion heater, troubleshooting the problem can help you identify the issue and potentially resolve it.
Inadequate heat produced
- Check if the thermostat on the immersion heater is set at the desired temperature. Adjust it if necessary.
- Ensure that the power supply to the immersion heater is not interrupted.
- If the heater is producing some heat but not enough, it could be due to heating elements that are covered in limescale buildup. Cleaning or replacing the heating elements may be needed.
No hot water
- Inspect if the circuit breaker or fuse related to the immersion heater is tripped or blown. Reset or replace them if necessary.
- Verify that the electrical connection to the immersion heater is secure and not damaged.
- If the immersion heater uses a switch, check if it’s functioning properly. Replace it if needed.
- A faulty thermostat might be preventing the water from heating. Consider testing and replacing it if required.
Water leaking
- Inspect the connections of the immersion heater and ensure they are tight and free from leaks.
- Check the heating elements for any signs of leaks or cracks. Replace them if necessary.
- If there is a leaking pressure relief valve, replacing it might fix the issue.
- Excessive pressure in the tank can cause leaks, so check and adjust the pressure if needed.
If the troubleshooting steps do not resolve the problem, it is recommended to contact a qualified electrician or a professional heating engineer to further diagnose and fix the issue with your immersion heater.


Meet Harrison Clayton, a distinguished author and home remodeling enthusiast whose expertise in the realm of renovation is second to none. With a passion for transforming houses into inviting homes, Harrison's writing at https://thehuts-eastbourne.co.uk/ brings a breath of fresh inspiration to the world of home improvement. Whether you're looking to revamp a small corner of your abode or embark on a complete home transformation, Harrison's articles provide the essential expertise and creative flair to turn your visions into reality. So, dive into the captivating world of home remodeling with Harrison Clayton and unlock the full potential of your living space with every word he writes.


