How to wire a dimmer switch
Dimmer switches are a great way to control the lighting in your home, allowing you to adjust the brightness to suit your needs or mood. Whether you’re replacing an existing switch or installing a new one, wiring a dimmer switch is a straightforward process that can be done by anyone with basic electrical knowledge.
Before you begin, it’s important to ensure that you have the necessary tools and materials. You will need a voltage tester, wire strippers, a screwdriver, electrical tape, and of course, the dimmer switch itself. It’s also a good idea to turn off the power to the circuit you’ll be working on at the circuit breaker to avoid any potential accidents.
Once you have everything ready, the first step is to remove the existing switch from the wall. Start by turning off the power and using the screwdriver to unscrew the cover plate. Next, unscrew the switch from the electrical box and gently pull it out, being careful not to disconnect any wires. Use the voltage tester to double-check that the power is indeed off.
What is a Dimmer Switch
A dimmer switch is a type of electrical switch that allows you to control the intensity of a light fixture. It gives you the ability to adjust the brightness of the light in a room to create the desired ambience or to suit your specific needs.
Traditional light switches have simple on/off functionality, while a dimmer switch allows you to dim or brighten the lights by adjusting the electrical current flowing to the fixtures. This is achieved by using a rheostat, which is a device that controls the amount of current passing through an electrical circuit.

Dimmer switches are commonly installed in dining rooms, living rooms, and bedrooms, where adjustable lighting can enhance comfort and create different moods. They are also used in commercial settings, such as restaurants and hotels, to provide customizable lighting options for different occasions or events.
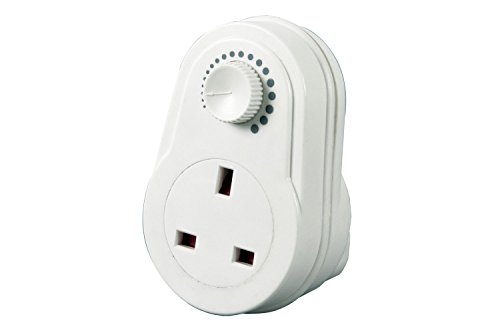
Most dimmer switches have a small control knob or slider that allows you to adjust the light output manually. Some advanced dimmer switches also offer remote control capabilities or built-in timers for added convenience.
Benefits of Dimmer Switches
1. Energy Savings: Dimmer switches can help to save energy and reduce electricity bills by allowing you to lower the brightness of the lights when full illumination is not required.
2. Extended Light Bulb Life: By reducing the voltage supplied to the light fixtures, dimmer switches can prolong the lifespan of light bulbs, saving you money on frequent replacements.
3. Personalized Lighting: Dimmer switches give you the flexibility to set the right lighting level for various activities or moods, whether it’s bright lighting for studying or relaxed, soft lighting for a romantic dinner.

Overall, installing a dimmer switch gives you more control over your lighting, allowing you to create a comfortable and inviting environment in any room.
Learn about this electrical device
A dimmer switch is an electrical device that allows you to control the brightness level of a light fixture. It replaces a regular on/off light switch and adds the functionality of adjusting the amount of light emitted by a bulb.
Dimmer switches are commonly used in living rooms, bedrooms, and dining rooms, where the level of lighting can influence the ambiance and mood of the space. By adjusting the dimmer switch, you can create a dimmer, more relaxing atmosphere or increase the brightness for tasks that require more light.
Dimmer switches typically have a dial or a sliding mechanism to adjust the light level. The dial or slider is connected to a variable resistor, also known as a rheostat, that controls the flow of electricity to the light fixture. When the dial is turned or the slider is moved, the resistance changes, which affects the amount of voltage reaching the bulb.
There are different types of dimmer switches available, including those compatible with incandescent, LED, and CFL bulbs. Some dimmer switches also have additional features such as timers and the ability to remember your preferred light level.

It is important to follow proper safety procedures when installing and using a dimmer switch. Always turn off the power before installation to avoid electrical accidents. Make sure to choose a dimmer switch that is compatible with the type of bulb you are using, and check that the switch is properly grounded.
Overall, dimmer switches are a convenient and effective way to adjust the lighting in your home. They offer flexibility in creating the desired atmosphere and can help save energy by reducing the amount of electricity used by the lights.
Choosing the Right Dimmer Switch
When it comes to choosing the right dimmer switch for your lighting needs, there are a few important factors to consider. From the type of bulbs you have installed to the style and controls of the switch, these decisions can greatly affect the functionality and appearance of your lights.
Type of Bulbs
The first step in choosing a dimmer switch is determining the type of bulbs you are using. Dimmer switches are designed to work with specific types of bulbs, such as incandescent, LED, or compact fluorescent bulbs. Make sure to check the packaging or specifications to ensure compatibility.
Single-pole or Multi-location
Next, consider whether you need a single-pole or multi-location dimmer switch. Single-pole switches are the most common and control a single light fixture from one location. Multi-location switches, on the other hand, allow you to control the same light fixture from two or more locations. This is particularly useful for long hallways or large rooms with multiple entrances.

Style and Controls
The style and controls of the dimmer switch are also important considerations. Dimmer switches come in a variety of styles, from traditional toggle switches to modern touch-sensitive or slider controls. Some switches also offer additional features such as timers or remote control access. Consider your personal preferences and the decor of your space when choosing the style of your dimmer switch.
| Style | Pros | Cons |
|---|---|---|
| Toggle Switch | Classic look, easy to use | Limited control options |
| Slider Control | Smooth, precise control | Potential for accidental adjustment |
| Touch-sensitive | Sleek, modern design | May require a specific touch to adjust |
Once you have considered these factors, you can confidently choose the right dimmer switch for your needs. By carefully selecting the type of bulbs, determining the number of locations, and choosing a style and control option that matches your preferences, you can create the perfect lighting atmosphere for any room in your home.
Selecting the best option for your needs
When it comes to selecting a dimmer switch for your needs, there are a few important factors to consider. The right dimmer switch can enhance the mood and ambiance of a room, while also providing energy savings and increased convenience.
Determine the type of dimmer switch
First, you’ll want to determine the type of dimmer switch that will work best for your lighting setup. There are three main types of dimmer switches to choose from:
1. Incandescent dimmer switches: These switches are suitable for use with traditional incandescent and halogen bulbs. They can handle a variety of bulb wattages but may not work with other types of bulbs, so make sure to check compatibility.

2. LED and CFL dimmer switches: If you’re using energy-efficient LED or CFL bulbs, you’ll need a specific dimmer switch designed to work with these types of bulbs. These switches are usually labeled as LED or CFL compatible and help prevent flickering or buzzing commonly associated with incompatible dimming methods.
3. Universal dimmer switches: If you have a mix of different bulb types in your lighting setup, a universal dimmer switch may be the best option. These switches are designed to work with a wide range of bulbs, including incandescent, halogen, LED, and CFL bulbs. However, it’s important to check the compatibility of each specific bulb before installing a universal dimmer switch.
Consider additional features
In addition to the type of dimmer switch, you’ll also want to consider any additional features that may enhance your experience. Some dimmer switches offer:
– Remote control functionality: This allows you to adjust the level of lighting from anywhere in the room, creating a convenient and hassle-free experience.
– Programmable settings: Certain dimmer switches allow you to program custom lighting settings, allowing you to easily achieve different moods or scenes with the touch of a button.

– Compatibility with smart home systems: If you have a smart home setup, you may want to choose a dimmer switch that is compatible with your existing system. This will allow you to control the lighting from your smartphone or through voice commands.
By considering these factors and doing some research on different brands and models, you can make an informed decision and select the best dimmer switch for your specific needs and preferences.
Gathering the Necessary Tools
Before starting the wiring process for a dimmer switch, it’s important to have the following tools handy:
| 1. Non-Contact Voltage Tester | A non-contact voltage tester is crucial for checking whether electrical wires are carrying current. Having one ensures safety during the installation process. |
| 2. Wire Cutters | Wire cutters are necessary for cutting and stripping the insulation from the electrical wires. |
| 3. Wire Strippers | Wire strippers help remove the protective insulation from the wires, allowing for proper connection. |
| 4. Screwdriver | A screwdriver is required for loosening and tightening the screws that hold the dimmer switch and electrical wires in place. |
| 5. Dimmer Switch | A dimmer switch is the main component being installed. Make sure to choose a compatible dimmer switch for the specific lighting fixture. |
| 6. Screw Connectors | Screw connectors are used to secure the wiring connections. They ensure a safe and reliable connection between the wires and the dimmer switch. |
Gathering these tools beforehand will make the installation process smoother and more efficient, ensuring a successful dimmer switch installation.
Equip yourself with the required equipment
Before starting to wire a dimmer switch, it is important to gather all the necessary equipment. Having the right tools and materials will ensure that the installation process is smooth and efficient. Here is a list of the items you will need:

- Dimmer switch: Choose a dimmer switch that is compatible with your light fixture and meets your specific needs, such as a single-pole or three-way dimmer switch.
- Screwdriver: Make sure to have a screwdriver with the correct size and type of head needed for the screws on your dimmer switch.
- Wire strippers: These tools will allow you to safely strip off the insulation from the ends of the wires.
- Wire connectors: These connectors are used to securely connect wires together.
- Voltage tester: A voltage tester is essential for ensuring the power is off before beginning the installation process.
- Electrical tape: Use electrical tape to wrap exposed wires and provide insulation and protection.
- Wire nuts: These nuts are used to secure wire connections.
- Wirefish: Depending on the situation, you may need a wirefish to help guide and pull wires through walls or conduits.
Having all of these tools and materials readily available will allow you to complete the wiring of a dimmer switch efficiently and effectively. Ensure that you have a safe and well-lit work area before starting the installation process to avoid any accidents or mishaps. Always follow the manufacturer’s instructions and local electrical codes when working with electricity.
Step-by-Step Dimmer Switch Wiring
Step 1: Before beginning the installation, make sure to turn off the power supply to the circuit you’re working on. Locate the breaker in your electrical panel and flip it to the “Off” position.
Step 2: Once the power is turned off, use a voltage tester to double-check that no electricity is flowing to the switch you will be working on. This is an important safety precaution.
Step 3: Remove the old light switch by unscrewing the mounting screws on the switch plate and pulling it away from the wall. Disconnect the wires by loosening the terminal screws holding them in place.
Step 4: Take your new dimmer switch and connect the wires according to the manufacturer’s instructions. Usually, there will be three wires: a black “hot” wire, a green or copper ground wire, and a red or yellow wire for the load (the wire that connects to the light fixture). Follow the specific wiring diagram provided with your dimmer switch.
Step 5: Strip about ⅝ inch of insulation from the ends of the wires using wire strippers. Once stripped, twist the exposed ends of the wires tightly together with a clockwise rotation to create a secure connection.
Step 6: Align the dimmer switch with the screw holes in the electrical box and use the provided screws to secure it in place. Ensure the wires are properly tucked into the box before tightening the screws completely.
Step 7: Use a wire connector to restore the power by connecting the black “hot” wire from the dimmer switch to the black wire from the circuit. If necessary, connect the ground wire to the green or copper ground wire from the circuit. Secure the connectors by twisting them clockwise.
Step 8: Push the dimmer switch into the electrical box, making sure not to pinch or damage any wires in the process. Attach the switch plate to the electrical box using the provided screws.
Step 9: Turn on the power supply to the circuit from the electrical panel. Test your new dimmer switch by adjusting the light level and ensuring it functions properly.
Step 10: If everything is in order, securely fasten the switch plate to the wall and clean up any remaining debris from the installation process.


Meet Harrison Clayton, a distinguished author and home remodeling enthusiast whose expertise in the realm of renovation is second to none. With a passion for transforming houses into inviting homes, Harrison's writing at https://thehuts-eastbourne.co.uk/ brings a breath of fresh inspiration to the world of home improvement. Whether you're looking to revamp a small corner of your abode or embark on a complete home transformation, Harrison's articles provide the essential expertise and creative flair to turn your visions into reality. So, dive into the captivating world of home remodeling with Harrison Clayton and unlock the full potential of your living space with every word he writes.


