How to use watercolors in tubes

Watercolor painting is a versatile and popular art medium that can be used to create stunning and expressive works of art. One of the most common forms of watercolor paint is found in tubes, which are a convenient and portable way to carry and use watercolors. Whether you are a beginner or an experienced artist, learning how to use watercolors in tubes can open up a world of creative possibilities.
Using watercolors in tubes requires some preparation and technique, but the process is relatively simple and can be easily mastered with practice. One of the advantages of using watercolors in tubes is the vibrant and concentrated colors they offer. Unlike watercolor pans, where the paint is dried out and needs to be mixed with water to be used, tube watercolors are already moist and ready to be applied directly to the paper.
To start using watercolors in tubes, you will need a few basic supplies:
- Watercolor paper
- Brushes in various sizes
- A palette or a clean surface to mix your colors
- An easel or a flat surface to work on
- A container with water for cleaning your brushes
Once you have gathered your supplies, it’s time to set up your workspace. Ensure that you have enough space to comfortably work and that you are painting in a well-lit area. Set up your watercolor paper on an easel or a flat surface and attach it securely.
Now you can start using your tube watercolors:

- Squeeze a small amount of the desired color onto your palette or clean surface.
- Dip your brush into water and mix it with the paint on your palette to achieve the desired consistency. Remember, watercolor paint is transparent by nature, so experimenting with water-to-paint ratio is key to obtaining different effects.
- Apply the paint to your paper using brushstrokes, washes, or other techniques to bring your vision to life. Be mindful of the watercolor paper’s absorbency and adjust the paint consistency accordingly.
- Continue adding layers of color, allowing each layer to dry before applying the next for better control and intensity.
- Clean your brushes frequently in the water container to prevent colors from mixing unintentionally. It’s crucial to keep your brushes clean to maintain the purity of your colors.
Remember, practice is essential when using watercolors in tubes. Experiment with different colors, techniques, and brushstrokes to develop your own unique style. As you gain experience, you will become more familiar with the behavior and characteristics of your watercolor paints, enabling you to create stunning and expressive watercolor paintings.
The essential guide to using watercolors in tubes
If you are new to watercolor painting or looking to improve your technique, using watercolors in tubes is a great way to achieve vibrant and intense colors in your artwork. Here is a comprehensive guide on how to use watercolors in tubes effectively.
Firstly, it is important to squeeze out a small amount of each color you will be using onto a palette. This will help you control the amount of paint you use and prevent waste. Remember to close the tube tightly to avoid the paint drying out.
Next, thoroughly wet your brush and mix it with the desired color on the palette. This will create a rich pigment load on your brush and help you achieve a more varied range of tones in your artwork.
When starting a painting, it is useful to work from light to dark. Begin by applying lighter washes and gradually build up to darker shades. This technique helps to create depth and dimension in your artwork.
If you want to create a lighter color or tone, you can dilute the paint by adding more water to your brush. Conversely, if you want a more intense color or tone, use less water and apply multiple layers of pigment.
Mixing colors is a crucial skill in watercolor painting. With tubes, you can easily mix different shades to create unique colors. Simply mix two or more colors on the palette before applying them to your artwork. Experimenting with color mixing will help you understand intricate nuances and create a more vibrant and interesting painting.
Remember to clean your brushes thoroughly after each painting session. Watercolor paints can be easily reactivated when wet, so it is important to remove any excess paint before switching colors. Running your brushes under warm water and gently massaging them will help remove any trapped pigment.
Finally, once your painting is complete, let it dry completely before framing or applying any protective coating. This will prevent smudging or unwanted effects on your artwork.
Overall, using watercolors in tubes can be a rewarding experience for artists of all skill levels. By following these steps, you will be able to achieve vibrant and professional-looking paintings that showcase the unique qualities of watercolor paints.
Fundamentals of Watercolor Painting
Watercolor painting is a popular and versatile medium. The unique nature of watercolors allows artists to create beautiful, translucent, and luminous works of art. However, mastering the fundamentals of watercolor painting can be a challenge for beginners. In this article, we will explore the key principles and techniques that are essential for successful watercolor painting.
Color Mixing
One of the most important skills in watercolor painting is color mixing. Unlike other painting mediums, watercolor pigments are transparent and can be mixed on the paper itself. This allows for endless possibilities and variations of color. To obtain the desired color, artists should learn about the color wheel and the principles of color theory. By understanding how different colors interact with each other, artists can create a wide range of stunning effects.
Wet-on-Wet and Wet-on-Dry Techniques
Watercolor painting involves the use of different techniques, and two of the most commonly used techniques are wet-on-wet and wet-on-dry. Wet-on-wet technique involves applying wet paint onto wet paper, allowing the colors to blend and create soft, delicate effects. Wet-on-dry technique, on the other hand, involves applying wet paint onto dry paper. This technique allows for greater control and precision, as the colors remain distinct and less likely to bleed.
Both techniques have their own unique characteristics and can be used to achieve different effects in a watercolor painting. It is important for artists to experiment and find the right balance between the two techniques based on their desired outcome.
In conclusion, the fundamentals of watercolor painting involve understanding color mixing and mastering various techniques. By practicing regularly and experimenting with different approaches, artists can develop their own style and create stunning watercolor artworks. Whether you are a beginner or an experienced artist, exploring the limitless possibilities of watercolors can lead to beautiful and captivating art.

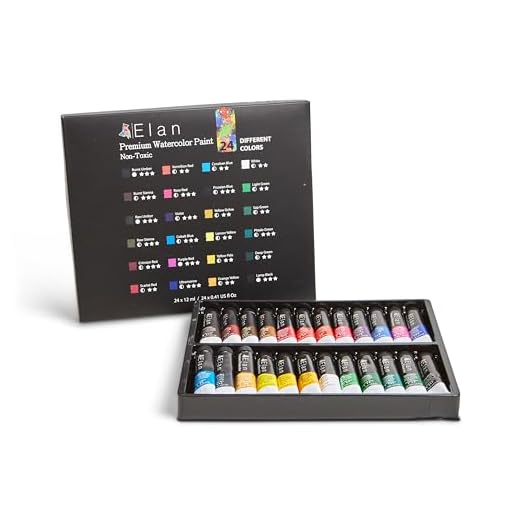
Choosing the right watercolor tubes
When it comes to using watercolors in tubes, choosing the right ones can greatly impact the quality of your artwork. Here are a few tips to consider when selecting watercolor tubes:
1. Quality: Look for professional-grade watercolor tubes made with high-quality pigments. These pigments are usually labeled with a series number, which indicates the level of permanence and lightfastness.
2. Color range: Consider the color range offered by the watercolor brand. Some brands offer a wide range of colors, allowing you to mix a wide variety of hues and shades. Others have more limited options, which may suit certain styles or preferences.
3. Transparency: Watercolor tubes come in various degrees of transparency. Transparent colors are ideal for glazing and creating vibrant, layered effects. On the other hand, more opaque colors can be useful for creating solid highlights or adding texture.
4. Consistency: Watercolor tubes can have different consistencies, ranging from thick and highly pigmented to more diluted and transparent. Choose a consistency that suits your desired technique and style of painting.
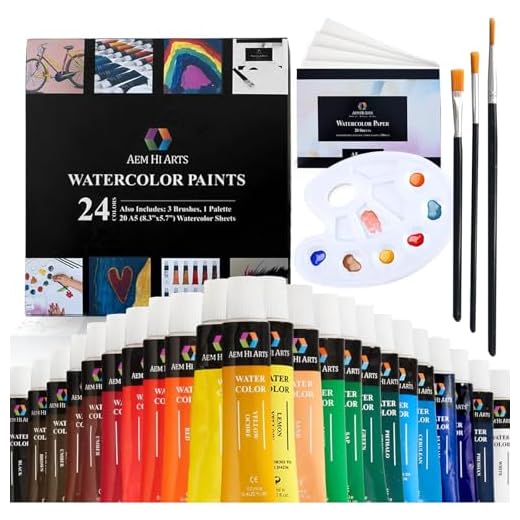
5. Packaging: Consider the packaging of the watercolor tubes. Some brands offer tubes that are easy to squeeze, allowing for precise and controlled application. Others may come with screw-on caps or other features to prevent drying out.
By considering these factors and experimenting with different watercolor tubes, you can find the ones that best suit your artistic needs and preferences. Remember, exploring different brands and colors can lead to exciting new possibilities in your watercolor painting journey.
Preparing your workspace for watercolor painting
Before you start using watercolors in tubes, it’s important to prepare your workspace. Having a clean and organized area will help you stay focused and create better artworks. Here are some tips to help you get started:
Gather your materials
First, gather all the materials you will need for your watercolor painting. This includes your watercolor tubes, watercolor brushes, watercolor paper or sketchbook, palette, water container, and paper towels or a rag for cleanup.
Protect your working area
Cover your working area with a plastic tablecloth or newspaper to prevent any accidental spills or stains. Watercolors can be messy, so it’s important to protect your surfaces.

If you are working on a wooden or easily stained surface, consider using a waterproof drop cloth or plastic sheet for extra protection.
Make sure you have good lighting in your workspace. Natural light is ideal, but if that’s not possible, use a bright lamp that illuminates your painting area effectively.
Set up your palette
Take out your palette and squeeze a small amount of each color of watercolor tube paint onto it. Arrange the colors in a logical order according to the color wheel or your personal preference. Leave some space between the colors to prevent them from mixing together.
If you are using a plastic or disposable palette, make sure it has enough wells for mixing colors and a flat area for thinning the paint with water.
Organize your brushes
Have your watercolor brushes ready and organized. Lay them out on your workspace, categorizing them by size and purpose. Keep them within arm’s reach, so you can easily switch between brushes without interrupting your painting process.

Lastly, make sure you have a water container nearby for rinsing your brushes. It’s best to use a wide-mouthed container, like a jar or a plastic cup, where your brushes won’t touch the sides and damage the bristles.
With your workspace well-prepared, you can now start using watercolors in tubes and enjoy the process of creating beautiful artworks!
Basic techniques for using watercolors in tubes
Watercolors in tubes are versatile and vibrant, allowing artists to create beautiful and expressive works of art. Whether you are a beginner or an experienced painter, there are certain techniques that can help you make the most out of your watercolors in tubes.
1. Diluting the paint: When working with watercolors in tubes, it’s important to remember that they are highly pigmented. To avoid overpowering your painting, dilute the paint with water. Start with a small amount of paint and gradually add water as needed. This will allow you to achieve the desired transparency or opacity.
2. Wet-on-wet technique: This technique involves adding wet paint onto a wet surface, creating soft and diffused edges. Wet your paper or canvas with clean water using a brush or a spray bottle. Then, apply the diluted paint onto the wet surface, allowing the colors to blend naturally. This technique is great for creating atmospheric landscapes and expressive abstracts.
3. Layering: Watercolors in tubes can be layered to create depth and complexity. Start with lighter colors and gradually build up the layers with darker or more intense hues. Allow each layer to dry before adding the next one to achieve cleaner and more vibrant results.
4. Dry brush technique: This technique involves using a minimal amount of water on a brush to achieve a dry, textured effect. Load your brush with thick, concentrated paint and then remove excess water by blotting it on a paper towel. Create textures and details by dragging the brush lightly across the paper or canvas.
5. Glazing: Glazing is a technique that involves applying multiple translucent layers to create luminosity and depth. Start with a light wash, allowing it to dry completely. Then, apply another layer of a different color over the dried layer. Repeat this process to achieve a rich and glowing effect.
6. Masking: Watercolors in tubes can be combined with masking fluid to preserve certain areas of your painting. Apply the masking fluid with a brush in the desired shapes or patterns before painting. Once the paint is dry, peel off the masking fluid to reveal the untouched areas. This technique allows for precise details and sharp highlights.
Remember, practice is key when using watercolors in tubes. Experiment with different techniques and explore your creativity. With time and practice, you’ll be able to create stunning watercolor paintings using these basic techniques.
Exploring different effects with watercolors in tubes
Watercolors in tubes offer a wide range of possibilities in terms of techniques and effects that can be achieved. Below are some examples of the different effects you can explore using watercolors in tubes:
|
Wet-on-Wet Technique: In this technique, you wet the paper with clean water before applying the watercolor. The wet surface helps the colors blend together, creating soft and seamless gradients. You can experiment with different color combinations and brush strokes to create interesting effects. |
Dry Brush Technique: This technique involves using a relatively dry brush to apply the watercolor onto dry paper. It creates a rough and textured appearance, providing a lot of control over the brush strokes. By using quick and short strokes, you can achieve fine details and intricate patterns. |
|
Lifting Technique: With this technique, you can lift off or lighten the watercolor from the paper using a clean wet brush or a sponge. This allows you to correct mistakes or adjust the values and tones of your painting. Just be careful not to overwork the area, as it could damage the surface of the paper. |
Splattering Technique: To achieve a splattering effect, load your brush with a generous amount of water and paint, then tap the brush against your fingers, resulting in splatters on the paper. This technique can add texture and dynamic energy to your artworks. |
These are just a few examples of the many effects you can explore with watercolors in tubes. Don’t be afraid to experiment and discover your own unique techniques. Remember, watercolors are a versatile medium that allows for endless creativity.
Tips and tricks for achieving success with watercolors in tubes
Watercolors in tubes offer a range of vibrant and intense colors, allowing artists to create beautiful and expressive works of art. Here are some tips and tricks to help you achieve success when using watercolors in tubes.
1. Squeeze out a small amount of color
To avoid wasting paint, it is best to squeeze out a small amount of color onto your palette and then add more as needed. This way, you can control the consistency and intensity of the paint.
2. Use a wet brush
Pre-wetting your brush before applying paint can help you achieve a smoother and more controlled application. Dip your brush in water and gently squeeze out any excess before picking up the paint.
3. Experiment with different water-to-paint ratios
Exploring how different amounts of water can affect the intensity and transparency of the paint will give you a better understanding of the medium. Try using more water for transparent washes and less water for more opaque layers.
4. Embrace layering
Watercolors in tubes allow for layering, which can create depth and dimension in your paintings. Allow each layer to dry completely before adding another to prevent colors from becoming muddy or blending together too much.
5. Use the white of the paper
One advantage of watercolors in tubes is the ability to preserve the white of the paper. By leaving areas of your painting untouched, you can create highlights and add contrast to your work.
6. Practice control
Watercolors in tubes can be a bit unpredictable, so it is important to practice controlling the paint. Experiment with brush control and different techniques to achieve the desired effects.
By following these tips and tricks, you can enhance your watercolor paintings and achieve success with watercolors in tubes. Remember, practice makes perfect, so don’t be afraid to experiment and have fun!


Meet Harrison Clayton, a distinguished author and home remodeling enthusiast whose expertise in the realm of renovation is second to none. With a passion for transforming houses into inviting homes, Harrison's writing at https://thehuts-eastbourne.co.uk/ brings a breath of fresh inspiration to the world of home improvement. Whether you're looking to revamp a small corner of your abode or embark on a complete home transformation, Harrison's articles provide the essential expertise and creative flair to turn your visions into reality. So, dive into the captivating world of home remodeling with Harrison Clayton and unlock the full potential of your living space with every word he writes.


