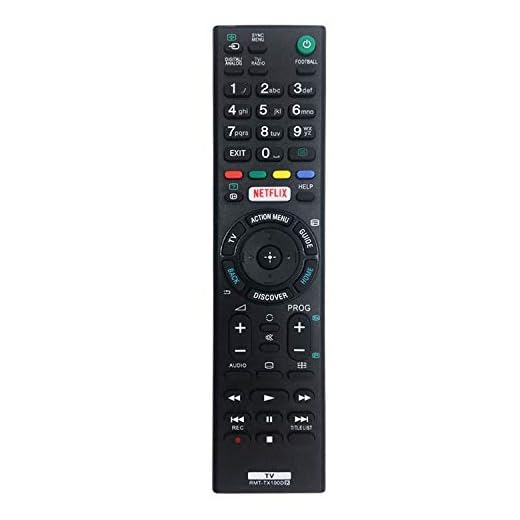
How to tune in a sony bravia tv

If you recently purchased a new Sony Bravia TV, you may be wondering how to tune it in to ensure that you have access to all of your favorite channels and programs. With its sleek design and advanced features, a Sony Bravia TV can be a fantastic addition to any living room or entertainment space. Tuning in your Sony Bravia TV is a straightforward process that can be completed in a few simple steps.
Step 1: Connect Antenna or Cable
Before you can begin tuning in your Sony Bravia TV, you’ll need to ensure that it is properly connected to either an antenna or a cable source. To connect an antenna, plug the antenna cable into the “ANT IN” port on the back of your TV. If you have a cable box, connect the cable from your cable box to the “HDMI IN” port on your TV.
Step 2: Access the Setup Menu
To begin tuning in your Sony Bravia TV, you’ll need to access the setup or installation menu. You can do this by pressing the “Menu” button on your TV remote control. Once the menu is displayed on the screen, use the arrow buttons to navigate to the “Settings” or “Setup” option.

Step 3: Run Channel Scan
Once you’ve accessed the setup menu, you’ll be able to run a channel scan to detect available channels. Look for the option called “Channel Setup”, “Channel Scan”, or “Auto Tuning” in the menu. Select this option and then choose the type of signal input you are using, whether it is an antenna or cable connection.
Note: Depending on your model of Sony Bravia TV, the exact steps or terms may vary. Refer to your TV’s user manual for specific instructions.
Step 4: Complete the Scan
After selecting the signal input, you will need to start the channel scan. This process can take a few minutes, during which your TV will search for available channels. Once the scan is complete, your Sony Bravia TV will display a list of detected channels.
Step 5: Save the Channels
Once the channel scan is finished, you’ll need to save the detected channels. Select the “Save” or “Done” option to store the channels on your TV. The next time you want to watch a particular channel, simply use your TV’s remote control to navigate through the list of saved channels.
By following these simple steps, you can easily tune in your Sony Bravia TV and enjoy all of your favorite shows and content. Whether you’re using an antenna or a cable connection, ensuring that your TV is properly tuned in will provide you with the best possible viewing experience.
Steps to Tune in a Sony Bravia TV
Step 1: Turn on your Sony Bravia TV by pressing the power button on the remote control.
Step 2: Press the ‘Home’ button on the remote control to go to the TV’s home menu.

Step 3: Using the arrow keys on the remote control, navigate to the ‘Settings’ option and press the ‘Enter’ button.
Step 4: In the settings menu, select the ‘Channels & Inputs’ option and press ‘Enter’.
Step 5: Choose the ‘Tuning’ or ‘Channel Setup’ option and press ‘Enter’.
Step 6: Select the ‘Auto Program’ or ‘Auto Tuning’ option and press ‘Enter’.
Step 7: Your Sony Bravia TV will now scan for available channels. Wait for the scan to complete.

Step 8: Once the scan is complete, your TV will display the available channel list.
Step 9: Use the arrow keys on the remote control to navigate through the channel list and highlight the channel you want to tune into.
Step 10: Press the ‘Enter’ button on the remote control to select the highlighted channel.
Step 11: If required, enter any necessary information such as your location or your cable/satellite provider.
Step 12: Once you have tuned in to a channel, you can use the number buttons on the remote control to directly enter a specific channel number.

Step 13: Repeat steps 9-12 to tune in to additional channels.
Note: The steps provided above may vary depending on the model and software version of your Sony Bravia TV.
Accessing the Menu on your Sony Bravia TV
When using a Sony Bravia TV, accessing the menu is a vital step for any adjustments or configurations you may want to make. Follow the steps below to easily access the menu on your Sony Bravia TV:
| Step | Description |
|---|---|
| 1 | Make sure your Sony Bravia TV is turned on and displaying an image. |
| 2 | Locate the “Home” button on your TV remote control. |
| 3 | Press the “Home” button to bring up the Home menu on your TV screen. |
| 4 | Using the arrow buttons on your remote control, navigate to the “Settings” option in the Home menu. |
| 5 | Once the “Settings” option is highlighted, press the “Enter” or “OK” button on your remote control to enter the Settings menu. |
The Settings menu on your Sony Bravia TV gives you access to various options such as Picture, Sound, Network, and System settings, allowing you to customize your TV experience to your liking. From here, you can adjust different parameters, set up network connections, update software, and much more.
Remember to navigate the Settings menu using the arrow buttons on your remote control, as well as the “Enter” or “OK” button to confirm your selections.

By following these steps, you can easily access the menu on your Sony Bravia TV and make any desired adjustments or configurations quickly and efficiently.
Choosing the Tuning Option and Selecting Channels
Once you have set up your Sony Bravia TV, you need to choose the appropriate tuning option and select your desired channels. To do this, follow these steps:
Tuning Options
1. Press the HOME button on your remote control to access the TV’s home menu.
2. Under the Settings tab, select Channel Setup and press the Enter button.
3. In the Channel Setup menu, select the Tuning or Auto Tuning option and press Enter.

4. You will be prompted to select the type of tuning – either Terrestrial, Cable, or Satellite. Choose the appropriate option based on your TV signal source and press Enter.
Selecting Channels
1. Once the tuning process is complete, return to the Channel Setup menu.
2. Under the Digital Setup option, choose the Digital Tuning option and press Enter.
3. A list of available channels will be displayed. Use the arrow buttons on your remote control to navigate through the channels.
4. To select a channel, highlight it and press the Enter button.
5. If you want to skip any channels, mark them as skipped or hidden using the Channel Skip option in the menu.
6. Repeat the process for all the desired channels that you want to add to your channel list.
Once you have completed the tuning process and selected your preferred channels, you can easily switch between them using the channel up and down buttons on your remote control. Enjoy watching your favourite shows and content on your Sony Bravia TV!


Meet Harrison Clayton, a distinguished author and home remodeling enthusiast whose expertise in the realm of renovation is second to none. With a passion for transforming houses into inviting homes, Harrison's writing at https://thehuts-eastbourne.co.uk/ brings a breath of fresh inspiration to the world of home improvement. Whether you're looking to revamp a small corner of your abode or embark on a complete home transformation, Harrison's articles provide the essential expertise and creative flair to turn your visions into reality. So, dive into the captivating world of home remodeling with Harrison Clayton and unlock the full potential of your living space with every word he writes.


