How to tie multiway dress
Are you tired of wearing the same dress to every event? A multiway dress is a versatile and stylish option that allows you to create multiple looks with just one garment. Whether you’re attending a wedding, a cocktail party, or a casual outing, a multiway dress can be customized to suit any occasion.
What makes a multiway dress so special is its ability to be tied and styled in various ways. With just a few simple twists and adjustments, you can transform your dress into a halter, one-shoulder, strapless, or backless design. The possibilities are endless, and it’s a fun and creative way to express your personal style.
If you’re unsure of how to tie a multiway dress, don’t worry! In this article, we’ll guide you through the process step by step. You’ll learn several different tying techniques, including the classic halter, the elegant one-shoulder, and the romantic twist-front. Get ready to unleash your inner fashionista and become a master of tying the multiway dress!
Step-by-Step Guide: How to Tie a Multiway Dress
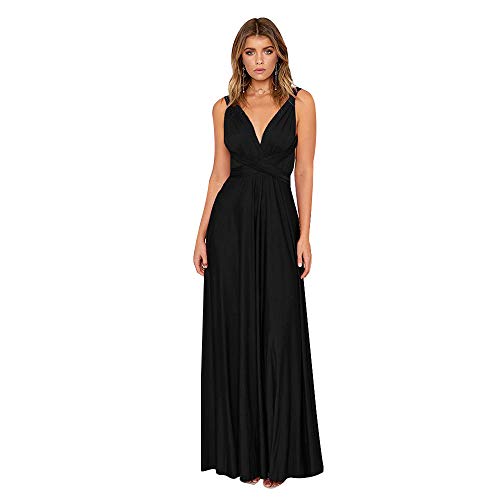
A multiway dress is a versatile and stylish piece of clothing that can be worn in various styles to suit different occasions. Whether you prefer a classic halter-style look or a trendy one-shoulder style, learning how to tie a multiway dress can give you endless options to express your personal style.
Step 1: Choose Your Style
Before you begin tying your multiway dress, decide on the style you want to achieve. Some popular styles include halter, strapless, one-shoulder, and cross-back. Experiment with different variations to find the one that suits you best.

Step 2: Put on the Dress
Start by putting on the multiway dress and adjusting it to your preferred length. Ensure that the dress is worn straight without any twists for a clean look.
Step 3: Create the Base
To create a base for tying your multiway dress, cross the two ends of the dress at the front and wrap them around your body, crossing at the back. Bring the ends back to the front.
|
|

Step 4: Tie the Knot
Tie a knot at the front using the crossed ends of the dress. You can experiment with different knot styles, such as a simple bow or a more intricate knot, depending on the desired look.
Step 5: Adjust and Secure
After tying the knot, make any necessary adjustments to the dress to ensure a comfortable and flattering fit. Check that the dress is securely tied and not too tight or loose.

Step 6: Finishing Touches
Complete your multiway dress look by adding accessories like a belt or statement jewelry. You can also style your hair and makeup to complement your chosen dress style and create a cohesive and fashionable ensemble.
With these step-by-step instructions, tying a multiway dress becomes an effortless task, enabling you to create different looks with a single versatile garment. Let your creativity shine by experimenting with various styles and enjoy the flexibility and elegance that a multiway dress offers.
The Basic Knot
To start tying your multiway dress, you will first need to create the basic knot. This knot serves as the foundation for all other variations of the dress. Here is a step-by-step guide on how to tie the basic knot:
- Step 1: Put on the dress and hold the two longest straps together in front of your body.
- Step 2: Cross the two straps over each other, making an “X” shape in front of you.
- Step 3: Take the strap that is on top and bring it under the strap that is on the bottom.
- Step 4: Bring the top strap back up and over the other strap.
- Step 5: Repeat steps 3 and 4 one more time, ensuring that the straps are securely crossed over each other.
- Step 6: Once you have completed the previous steps, you can adjust the straps to create different styles and looks.
- Step 7: Don’t forget to make sure the straps are evenly balanced on your shoulders and that you feel comfortable in your new multiway dress!
Tying the basic knot is the first step to unlocking the endless possibilities with a multiway dress. Remember, practice makes perfect, so don’t be afraid to experiment and try out different styles! Enjoy the versatility of your fabulous dress.
Creating a One-Shoulder Style
One of the many versatile styles you can create with a multiway dress is the one-shoulder style. This elegant and asymmetrical look is perfect for an evening event or a sophisticated party.

To create the one-shoulder style, follow these simple steps:
- Start by holding one end of the dress strap with your right hand and find the corresponding loop on the opposite side of the dress.
- Bring the strap diagonally across your chest, over the opposite shoulder, and insert the end of the strap into the loop.
- Adjust the fit of the strap until it feels secure and comfortable on your shoulder.
- You can further enhance the one-shoulder look by adjusting the length of the dress on the opposite side. For a more dramatic effect, create a higher hemline on the side of the exposed shoulder.
- Once you are satisfied with the length and fit, secure any loose fabric or straps with safety pins or small clips to ensure everything stays in place throughout the event.
The one-shoulder style is a classic choice that exudes confidence and sophistication. Experiment with different accessories such as statement earrings or a bracelet to complete your look. With a multiway dress, the possibilities are endless!
A Twist at the Neck
If you want to give a unique twist to your multiway dress, try adding a twist at the neck. This style adds an elegant and eye-catching element to your dress and can be easily achieved with a few simple steps.
To create the twist at the neck, start by wearing the dress with the straps crossed over your back and then bring them up and over your shoulders to the front. Instead of tying the straps around your neck, cross them over each other and bring them back to the back of your neck.
Next, tie the straps into a secure knot at the back of your neck, making sure that the twist sits neatly at the front. You can adjust the tightness of the knot to create your desired look.

The twist at the neck adds a touch of sophistication and uniqueness to your multiway dress. It creates an interesting focal point at the front and draws attention to your neckline and shoulders.
Accessorize and Customize
To enhance the twist at the neck, consider adding some accessories. A delicate necklace or statement earrings can complement the style and add an extra touch of elegance. Additionally, you can further customize your look by experimenting with different fabrics, patterns, and colors.
Confidence is Key
Whatever style you choose for your multiway dress, the most important thing is to wear it with confidence. The twist at the neck is just one of many ways to style this versatile dress, so don’t be afraid to experiment and make it your own.
Remember to practice tying the twist a few times before wearing it for a special occasion to ensure that it stays secure and comfortable throughout the day or evening.
With a creative twist at the neck, your multiway dress will stand out from the crowd and showcase your unique style.


Meet Harrison Clayton, a distinguished author and home remodeling enthusiast whose expertise in the realm of renovation is second to none. With a passion for transforming houses into inviting homes, Harrison's writing at https://thehuts-eastbourne.co.uk/ brings a breath of fresh inspiration to the world of home improvement. Whether you're looking to revamp a small corner of your abode or embark on a complete home transformation, Harrison's articles provide the essential expertise and creative flair to turn your visions into reality. So, dive into the captivating world of home remodeling with Harrison Clayton and unlock the full potential of your living space with every word he writes.


