How to test mic on teams

Microsoft Teams has become an essential tool for remote work and online communication. Whether you’re attending virtual meetings or participating in online classes, having a working microphone is crucial for effective communication. In this article, we will guide you through the process of testing your microphone on Teams, ensuring that your voice comes through loud and clear.
Before you can join a Teams meeting, it’s vital to check if your microphone is properly functioning. Without a functional microphone, you won’t be able to engage in conversations or contribute to discussions effectively. Testing your microphone beforehand helps in identifying any potential issues and allows you to fix them before crucial meetings or presentations.
To test your microphone on Teams, follow these simple steps:
- Launch the Microsoft Teams application on your device.
- Sign in to your Teams account or create a new account if you don’t have one.
- Once signed in, select the profile picture in the top-right corner, and click on Settings from the dropdown menu.
- In the Settings menu, navigate to the Devices tab.
- Under the Devices tab, locate the Microphone section.
- Click on the drop-down menu under Microphone and select your desired microphone device from the provided options.
- To test your microphone, select Make a test call.
- Follow the on-screen instructions to record a brief message and listen to the playback.
- If you can hear your recorded message clearly, your microphone is working correctly. If not, try adjusting the volume levels or checking the connections of your microphone.
By following these steps, you can easily test your microphone on Teams and ensure that it works effectively for your online meetings, conferences, and conversations. Remember to regularly test your microphone to avoid any last-minute surprises during important calls. Effective communication is crucial, especially in remote work scenarios, and having a functioning microphone is a fundamental aspect of it.
Step-by-step guide to test mic on Teams
Having clear audio while using Microsoft Teams is essential for effective communication during virtual meetings. If you are experiencing issues with your microphone, it is important to test it to ensure it is functioning properly. Follow the steps below to test your microphone on Teams:

Step 1: Sign in and access settings
Open Microsoft Teams and sign in to your account. Once signed in, click on your profile picture or initials in the top right corner of the screen. A drop-down menu will appear, and from the menu, select “Settings”.
Step 2: Navigate to audio settings
In the Settings window, you will see a list of different options. Look for and click on the “Devices” tab located on the left-hand side of the screen. This will take you to the audio settings page.
Step 3: Select microphone settings
In the audio settings page, scroll down until you see the “Microphone” section. Here, you will find a drop-down menu where you can select the microphone you wish to use with Microsoft Teams. Make sure the correct microphone is selected.
Step 4: Check microphone levels
Below the microphone selection, you will see a bar that displays the microphone volume level. Speak into your microphone and observe whether the bar moves in response to your voice. If the bar does not move, your microphone may not be functioning correctly.
Step 5: Test microphone with Teams
To test your microphone within Microsoft Teams, click on the dropdown arrow next to the microphone icon at the bottom left corner of the screen during a meeting. From the list that appears, select the microphone you want to use. Speak into the microphone, and if others in the meeting can hear you clearly, it means your microphone is working correctly.

Note: If you are experiencing issues, ensure that your microphone is not muted and is properly connected to your computer or device. You may need to adjust settings in your operating system to allow Microsoft Teams to access your microphone.
Following these steps will help you determine if your microphone is working properly on Microsoft Teams, allowing you to have clear and effective communication during virtual meetings.
Accessing the mic settings
To test the microphone on Microsoft Teams, you may need to access the microphone settings on your device. Here’s how:
Windows
1. Click on the Start menu and select “Settings”.
2. In the Settings menu, click on the “Privacy” option.

3. On the left side of the Privacy settings, click on “Microphone”.
4. Under the “Allow access to the microphone on this device” section, ensure that the toggle switch is turned on.
5. Scroll down to the “Allow desktop apps to access your microphone” section and make sure the toggle switch is also turned on.
6. You can further customize app-specific microphone permissions below the toggle switches.
macOS
1. Click on the Apple menu and select “System Preferences”.

2. In the System Preferences window, click on the “Security & Privacy” option.
3. Select the “Privacy” tab in the Security & Privacy settings.
4. On the left side of the Privacy tab, click on “Microphone”.
5. Check the box next to Microsoft Teams to allow microphone access for the application.
Once you have accessed and adjusted the microphone settings as necessary, you can proceed to test your microphone on Microsoft Teams.

Adjusting mic volume and sensitivity
Having the right volume and sensitivity settings for your microphone can greatly improve your Teams experience. Follow these steps to adjust your mic settings:
- Click on your profile picture or initials at the top right corner of the Teams window.
- Select “Settings” from the dropdown menu.
- In the settings panel on the left, click on “Devices”.
- Under the “Mic” section, you will find the options to adjust the volume and sensitivity of your microphone.
- Use the volume slider to increase or decrease the microphone volume.
- Drag the sensitivity slider to adjust the microphone’s sensitivity.
- You can also toggle the “Automatically adjust volume” option to enable Teams to automatically adjust your microphone volume based on your surroundings.
It is recommended to test these settings by joining a Teams meeting or making a test call to ensure that your microphone is working correctly and sounds clear to others. Adjust the settings as needed to achieve the best audio quality.
Testing your mic on Teams
Teams is a popular communication and collaboration platform used by businesses and organizations to facilitate meetings, conferences, and day-to-day operations. One crucial aspect of using Teams effectively is ensuring that your microphone is working properly. This allows you to contribute to discussions, participate in video calls, and communicate seamlessly with your team members.
Step 1: Checking your hardware
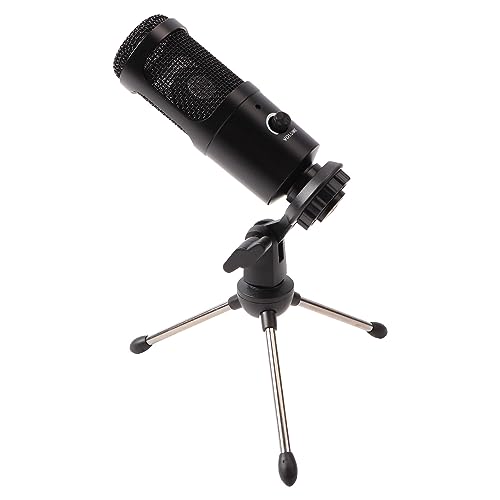
Before testing your mic on Teams, it’s essential to check that your hardware is set up correctly. Ensure that your microphone is connected to your computer or device, and that it is properly configured in the system settings. Additionally, check if there are any physical issues such as loose connections or faulty cables that might affect the functioning of your mic.
Step 2: Adjusting Teams settings
Once you’ve confirmed that your hardware is functioning correctly, it’s time to adjust the microphone settings within Teams itself. Open the Teams application and sign in to your account. Go to the “Settings” menu, usually found by clicking on your profile picture in the top right corner. From there, select “Devices” and navigate to the “Audio devices” section. Make sure that your microphone is selected as the input device, and adjust the volume settings as needed.

Note: It’s crucial to grant the necessary permissions to Teams so that it can access your microphone. Check your device’s privacy settings to ensure that Teams has the required permissions.
Now that you’ve configured your hardware and adjusted the Teams settings, it’s time to test your microphone within the application.
Step 3: Testing your mic
To test your microphone on Teams, start by initiating a call or joining a meeting. Open the chat or call window and look for the microphone icon. Click on the microphone icon to activate your mic. Speak into the microphone and check if the volume or audio indicators within Teams respond, indicating that your microphone is working correctly.
Tip: If your microphone does not seem to be working during the test, try checking your hardware connections again, restarting your computer, or troubleshooting any issues related to your audio drivers.
Once you’ve completed the test, you can mute or unmute your microphone as needed during meetings or calls by clicking on the microphone icon within Teams.

Testing your mic on Teams is important to ensure effective communication and collaboration. By following the steps above, you can make sure that your microphone is functioning correctly, allowing you to fully participate and engage in Teams discussions and activities.

Meet Harrison Clayton, a distinguished author and home remodeling enthusiast whose expertise in the realm of renovation is second to none. With a passion for transforming houses into inviting homes, Harrison's writing at https://thehuts-eastbourne.co.uk/ brings a breath of fresh inspiration to the world of home improvement. Whether you're looking to revamp a small corner of your abode or embark on a complete home transformation, Harrison's articles provide the essential expertise and creative flair to turn your visions into reality. So, dive into the captivating world of home remodeling with Harrison Clayton and unlock the full potential of your living space with every word he writes.


