How to take in a shirt

Are you tired of wearing baggy shirts that don’t fit you properly? Taking in a shirt can be a great solution to give your clothing a more tailored and flattering look.
Whether you’ve lost weight, bought oversized shirts, or inherited a stylish shirt that is just too big for you, this step-by-step guide will help you learn how to take in a shirt and achieve the perfect fit.
With a few simple tools, some basic sewing skills, and the right techniques, you’ll be able to transform your shirts and make them look like they were tailor-made for you. So, grab your sewing kit and let’s get started!
Step-by-step Guide on Taking in a Shirt
If you have a loose-fitting shirt that you wish to alter, taking it in can be a simple and cost-effective solution. Whether you want to make it more fitted or adjust it to your body’s measurements, this step-by-step guide will help you achieve the desired look.
- Start by trying on the shirt to determine how much you need to take it in. Pinch the excess fabric from the sides and make a mental note or mark it to serve as your guide.
- Remove any existing stitches or seams using a seam ripper. Take extra care to avoid damaging the fabric as you do this.
- Turn the shirt inside out, then place it on a flat surface. Smooth out any wrinkles or creases to ensure accurate measurements and easy sewing.
- Using chalk or fabric marker, trace a new seam line along the pinned areas. Ensure that the lines are symmetrical and follow the shape of your body.
- Using a sewing machine or needle and thread, sew along the marked lines, reinforcing the stitches at the beginning and end of each seam.
- After sewing, trim off the excess fabric, leaving a small seam allowance. This will prevent the fabric from fraying and making the alterations more durable.
- Try on the shirt to check the fit. If it is still too loose, you can repeat the process by taking in the shirt further. If it’s too tight, you may need to go back and let out some of the seams.
- Once you are satisfied with the fit, you can finish the altered seams by using an overlock stitch or zigzag stitch.
- Give the shirt a final press with an iron to give it a polished look.
By following this step-by-step guide, you can confidently take in a shirt and achieve a tailored fit that flatters your body shape.

Gathering the necessary tools
To successfully take in a shirt, you will need a few tools. Having these tools ready before starting will help make the process smoother and more efficient. Here are the essential tools you will need:
| 1. Sewing machine | A sewing machine will make the process much quicker and easier. If you don’t have a sewing machine, you can do the alterations by hand, but it may be more time-consuming. |
| 2. Sewing pins | Sewing pins will be used to hold the fabric in place while you make the necessary adjustments. |
| 3. Fabric chalk or disappearing marker | These marking tools will help you indicate where you need to make the alterations on the shirt. |
| 4. Measuring tape | To ensure accurate measurements and even alterations, a measuring tape is essential. |
| 5. Scissors | Scissors will be needed to trim excess fabric or to cut off any loose threads. |
| 6. Thread | Choose a thread color that matches the shirt to make the alterations less noticeable. |
By gathering these tools before you start, you will have everything you need to successfully take in a shirt while making the process much smoother.
Measuring and marking the shirt
Before taking in a shirt, it is crucial to accurately measure and mark the areas that need to be adjusted. This will ensure a precise and tailored fit.
1. Chest and waist measurement
Start by measuring the chest and waist areas of the shirt. Wrap a measuring tape around the chest at the widest point, just below the armpits. Take note of the measurement.
Next, measure the waist. Wrap the measuring tape around the shirt at the narrowest part of the torso, usually just above the belly button. Again, record the measurement.

2. Sleeve length measurement
To determine the correct sleeve length, stretch out one sleeve of the shirt. Measure from the center of the back collar down to the edge of the cuff. This measurement will help in adjusting the sleeve length during the alteration process.
3. Marking the adjustments
With the measurements in hand, it’s time to mark the areas that need to be taken in. Using tailor’s chalk or fabric markers, mark the new seam line along the side seams of the shirt, following the desired measurements.
Additionally, mark any adjustments needed along the sleeves by indicating the desired new length. Make sure to mark both sleeves symmetrically and remember to account for any differences in arm length.
Remember, it’s always best to start with small adjustments and gradually work towards your desired fit. Taking in a shirt requires precision and careful planning to ensure a well-fitted result.
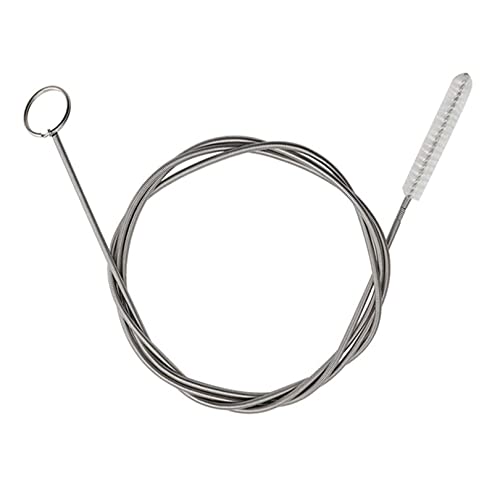
Removing the existing stitches
Before you can take in a shirt, you need to remove the existing stitches. This is an important step to ensure that you can accurately measure and sew the altered fit.

Here’s a step-by-step guide to removing the existing stitches from a shirt:
|
|

Make sure to take your time and remove the stitches carefully to avoid any unwanted damage to the fabric. Once you have successfully removed all the stitches, you are ready to begin the process of taking in the shirt.
Sewing the new seams
Once you have determined the desired width for taking in your shirt, it is time to sew the new seams. Here is a step-by-step guide to help you get the perfect fit:
1. Prepare your sewing machine
Ensure that you have a suitable needle and thread for sewing through the fabric of your shirt. Set up your sewing machine according to the fabric’s thickness and stitch length requirements.

2. Mark the new seam line
Using a fabric pencil or tailor’s chalk, mark the new seam line on both sides of the shirt. Make sure to measure and mark the same distance from the existing seam along the entire length of the shirt.
3. Pin the fabric
Before you start sewing, pin the fabric along the new seam line to secure it in place. This will help prevent any shifting or bunching during sewing.
4. Sew the new seam
With your sewing machine set to the appropriate stitch, sew along the marked seam line. Make sure to backstitch at the beginning and end of the seam to secure the thread. Sew slowly and carefully to avoid any mistakes.
5. Trim and finish the seams
After sewing the new seam, trim any excess fabric to reduce bulk. You can use pinking shears to prevent fraying if desired. Finish the edges of the seam by either zigzag stitching or using an overlock stitch to prevent future fraying.
6. Press the seams
To give your shirt a polished look, press the new seams with an iron. Set the iron to the appropriate heat setting for your fabric and press the seams from both the inside and outside of the shirt. This will help them lay flat and give your shirt a professional appearance.

Following these steps will enable you to sew the new seams of your shirt accurately and create a tailored fit that is perfect for you.
Finishing touches and final try-on
Once you have made the necessary adjustments to your shirt, it’s time to add those finishing touches before giving it a final try-on.
Start by pressing the shirt with a warm iron to eliminate any remaining wrinkles and creases. Pay attention to the collar, cuffs, and button placket to ensure a polished appearance.
Next, check for any loose threads along the seams and carefully trim them off with a pair of scissors. This will give your shirt a clean and professional look.
Finally, it’s time for the final try-on. Button up the shirt and put it on to assess the fit. Take a look in the mirror and evaluate how it looks and feels. It should be comfortable and allow for ease of movement.

If you are happy with the result, congratulations! Your shirt alteration project is complete. If there are still some minor adjustments needed, take note of them and make the necessary changes. Remember, practice makes perfect, and each time you take in a shirt, you’ll improve your skills.

Meet Harrison Clayton, a distinguished author and home remodeling enthusiast whose expertise in the realm of renovation is second to none. With a passion for transforming houses into inviting homes, Harrison's writing at https://thehuts-eastbourne.co.uk/ brings a breath of fresh inspiration to the world of home improvement. Whether you're looking to revamp a small corner of your abode or embark on a complete home transformation, Harrison's articles provide the essential expertise and creative flair to turn your visions into reality. So, dive into the captivating world of home remodeling with Harrison Clayton and unlock the full potential of your living space with every word he writes.


