How to seal around the bath

As a homeowner, ensuring that your bathroom remains in good condition is important for both functionality and aesthetic purposes. One area that often requires attention is the seal around the bath. Over time, the sealant can deteriorate, leading to water leaks which can cause damage to the surrounding areas. To prevent this, it is crucial to regularly inspect and maintain the sealant around your bath.
Step 1: Remove the old sealant. Before resealing your bath, it is essential to remove any existing sealant. You can do this by using a sharp blade or a dedicated sealant remover tool. Take your time and be cautious to avoid damaging your bath or tiles.
Step 2: Clean the area. Once the old sealant is removed, thoroughly clean the area around your bath. Use a bathroom cleaner or a diluted bleach solution to ensure that the surface is free from any mold, mildew, or soap scum. Scrub the area with a brush to remove any stubborn dirt.
Step 3: Apply the new sealant. Now it’s time to apply the new sealant. Choose a high-quality silicone sealant that is specifically designed for bathrooms. Cut the tip of the sealant tube at a 45-degree angle and insert it into a caulking gun. Start by applying a thin bead of sealant along the edge of your bath, making sure to cover the joint between the bath and the tiles. Use a wet fingertip or a caulk smoother to create a neat finish.
Step 4: Let it dry. Allow the sealant to dry according to the manufacturer’s instructions. This can typically take anywhere from 24 to 48 hours. It is essential to avoid using the bath during this time to ensure that the sealant sets properly.

Step 5: Maintain the seal. To ensure the longevity of the sealant, it is important to regularly maintain it. Keep an eye out for any signs of deterioration, such as cracking or discoloration. If you notice any issues, remove the old sealant and apply a fresh layer. Additionally, wipe down the sealant after each use of the bath to prevent the buildup of soap scum or dirt.
By following these steps and properly sealing around your bath, you can prevent water damage and maintain your bathroom’s cleanliness and appearance for years to come.
Why You Should Seal Around the Bath
Ensuring a proper seal around your bath is essential for maintaining the integrity of your bathroom and preventing water damage. Here are some important reasons why you should take the time to seal around your bath:
Preventing water leakage: By properly sealing around your bath, you can prevent water from seeping into the hidden spaces between walls and floors. This can help you avoid costly repairs due to water damage and mold growth.
Preserving the lifespan of your bathroom: A secure seal around the bath can extend the lifespan of your bathroom by protecting the surrounding areas from moisture damage. This means your tiles, walls, and floors are less likely to deteriorate over time.

Maintaining cleanliness: When water leaks from your bath onto the floor, it can create puddles that can be difficult to clean. By sealing the area, you can keep your bathroom clean and hygienic, avoiding stagnant water that can lead to unpleasant odors and unsightly stains.
Enhancing aesthetic appeal: A neatly sealed bath not only looks better, it also adds to the overall aesthetics of your bathroom. A clean and well-maintained seal can make your entire bathroom appear more polished and put-together.
Increasing energy efficiency: A properly sealed bath helps to prevent drafts and air leaks, improving the energy efficiency of your bathroom. By keeping cold air out and warm air in, you can reduce your energy consumption and utility bills.
Preventing damage from cleaning chemicals: Harsh cleaning chemicals used in the bathroom can corrode seals and cause them to deteriorate over time. By regularly sealing and maintaining the area around your bath, you can protect it from the damaging effects of cleaning products.
Remember, a sealed bath is not only functional, but also contributes to the longevity and overall appearance of your bathroom. Don’t neglect this crucial step in your bathroom maintenance routine.

The Importance of Sealing
Neglecting to seal properly around your bath can lead to a range of problems, both aesthetically and structurally. Sealing plays a crucial role in keeping water from escaping and penetrating your bathroom walls and floors. Here are three key reasons why sealing is essential:
1. Water Damage Prevention
A properly sealed bath prevents water from seeping into areas it shouldn’t be, such as the walls and the floor beneath the bath. Water penetration can cause serious damage over time, leading to mold growth, rot, and structural issues. By ensuring a tight seal around your bath, you can protect your bathroom and extend its lifespan.
2. Mold and Mildew Growth Prevention
Without proper sealing, excess moisture can accumulate in the gaps and cracks around your bath. This creates a perfect breeding ground for mold and mildew. These fungi not only look unsightly but can also cause health problems for you and your family. A robust seal prevents moisture build-up and eliminates the risk of mold and mildew growth.
3. Aesthetic Enhancement
A correctly sealed bath adds a clean and polished look to your bathroom. It provides a finished and professional appearance, enhancing the overall aesthetics of the space. With a well-sealed bath, you can create a seamless and tidy bathroom environment that is both visually appealing and functional.
Overall, taking the time to properly seal around your bath is well worth the effort. It protects your bathroom from water damage, prevents mold growth, and improves its overall appearance. Remember to regularly check and maintain the seal to ensure it remains in good condition and continues to provide the necessary protection.

Types of Sealing Materials
When it comes to sealing around the bath, there are several types of sealing materials you can choose from. Each material differs in terms of durability, flexibility, and ease of application. Here are some common sealing materials:
1. Silicone Caulk
Silicone caulk is one of the most popular sealing materials for bath areas. It is a versatile material that provides a waterproof seal and is resistant to mildew. Silicone caulk is available in various colours, allowing you to match it with your bathroom decor. It is easy to apply and can last for several years.
2. Acrylic Caulk
Acrylic caulk is also commonly used for sealing around the bath. It is a water-based sealant that provides a flexible and durable seal. Acrylic caulk is easy to apply and dries quickly. While it is not as resistant to mildew as silicone caulk, it can still provide a reliable seal if properly maintained.
There are also specialty caulks available, such as anti-mildew caulk, which contains additives to prevent the growth of mildew and mould. These specialty caulks may be more expensive but can be worth considering if you have a persistently damp bathroom.
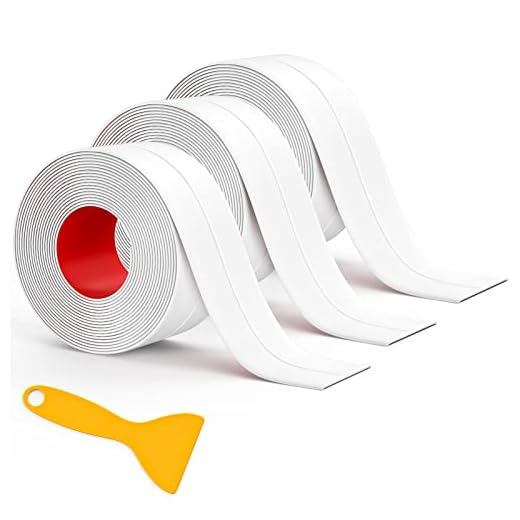
3. Tub and Tile Caulk Strips
If you’re looking for a quick and easy way to seal around the bath, tub and tile caulk strips can be a good option. As the name suggests, these strips are pre-formed and self-adhesive. They can be applied directly onto the areas that need sealing without the need for any additional tools or materials. Tub and tile caulk strips provide a waterproof seal and are resistant to moisture, mould, and stains. However, they may not last as long as other sealing materials and may need to be replaced more frequently.

4. Waterproof Tape
Waterproof tape is another option for sealing around the bath. It is a flexible and adhesive tape that can be applied directly to the areas that need to be sealed. While waterproof tape can provide a temporary seal, it may not be as durable or long-lasting as other sealing materials. It is often used as a temporary solution or in combination with other sealing methods.
Before choosing a sealing material, consider factors such as the condition of your bath area, the level of moisture, and your personal preferences. It is also important to properly clean and prepare the surfaces before applying any sealing material to ensure a secure and long-lasting seal.
Preparing the Surface
Properly preparing the surface around the bath before sealing is a crucial step to ensure a durable and effective seal. Here are some important steps to follow:
1. Clean the Surface:
Thoroughly clean the area around the bath using a mild detergent or suitable bathroom cleaner. Remove any soap scum, grime, or stains from the surface. It is essential to start with a clean and dry surface for effective sealing.
2. Remove Old Sealant:
If there is any old sealant present, it needs to be completely removed before applying a new seal. Use a sharp blade or a sealant remover tool to carefully scrape off the old sealant. Make sure to remove all remnants and clean the area properly.

3. Dry the Area:
After cleaning and removing the old sealant, thoroughly dry the area around the bath. Moisture can hinder the effectiveness of the sealant, so ensure the surface is completely dry before proceeding.
By following these steps to prepare the surface, you can ensure a clean and dry area ready for sealing around the bath. A well-prepared surface will help the sealant adhere properly and prevent any water leakage, enhancing the longevity of the seal.
Step-by-Step Guide to Sealing
Sealing around the bath is an essential step in maintaining a waterproof and neat bathroom. Follow this step-by-step guide to ensure a successful seal:
1. Clean the area: Begin by removing any existing caulk or sealant using a scraper or a suitable tool. Clean the area thoroughly using a mild detergent or a bathroom cleaner to remove any residue or grime. Allow it to dry completely before proceeding to the next step.
2. Prep the tube of caulk: Cut the tip of the caulk tube at a 45-degree angle using a utility knife. The hole should be small enough to control the flow of caulk but large enough to allow for a tight seal.
3. Apply painter’s tape: Use painter’s tape to mask off the edges of the bath and the neighboring tiles. This will create a clean edge and prevent any accidental mess as you apply the caulk.
4. Start sealing: Hold the caulk gun at a 45-degree angle and start applying a thin, even bead of caulk along the seam between the bath and the tiles or the wall. Apply consistent pressure on the trigger while moving steadily at a constant pace.
5. Smooth the caulk: Immediately after applying the caulk, use a caulk smoothing tool or your finger lightly wetted with water to smooth out the bead of caulk. This will create a neat finish and remove any excess caulk.
6. Remove painter’s tape: Carefully remove the painter’s tape before the caulk dries to avoid pulling off any caulk along with it. Pull the tape away at a 45-degree angle for the best results.
7. Allow to dry: Follow the drying time mentioned on the caulk packaging before exposing the sealed area to water or moisture. Typically, it takes a few hours for the caulk to dry completely.
Note: It is important to periodically inspect the seal and reapply caulk if any gaps or cracks appear in the future.
By following these simple steps, you can easily seal around your bath and ensure lasting protection against water damage in your bathroom.
Tips for Effective Sealing
- Clear the area: Before you begin sealing, make sure the area around the bath is clean and dry. Remove any old caulk or silicone using a caulk remover or scraper.
- Apply masking tape: To achieve a neat finish, apply masking tape along the edges of the bathtub. This will protect the surface and help you create straight lines.
- Choose the right sealant: Use a good-quality silicone sealant that is specifically designed for bathrooms. Ensure it is waterproof and mold-resistant to prevent any issues in the future.
- Read the instructions: Always read and follow the instructions provided with your chosen sealant. Different products may have specific application methods or curing times.
- Prepare the sealant gun: Load the sealant cartridge into the caulk gun and cut the nozzle at a 45-degree angle. This will create a smooth and even application.
- Apply the sealant: Start by applying a thin bead of sealant along the edge of the bathtub, following the contours. Work slowly and steadily to achieve an even layer. Use a caulking tool or your finger to smooth the sealant if necessary.
- Remove the masking tape: Gently remove the masking tape immediately after applying the sealant. This will ensure a clean finish without any smudges.
- Allow time to dry: Most sealants require some time to dry and cure fully. Follow the manufacturer’s instructions regarding drying times before using the bath or exposing it to water.
- Maintain regularly: Once the sealant has fully cured, regularly inspect it for any signs of wear or damage. Replace the sealant if necessary to maintain an effective barrier against water and moisture.
By following these tips, you can effectively seal around your bath and prevent any water damage or leaks in the future.


Meet Harrison Clayton, a distinguished author and home remodeling enthusiast whose expertise in the realm of renovation is second to none. With a passion for transforming houses into inviting homes, Harrison's writing at https://thehuts-eastbourne.co.uk/ brings a breath of fresh inspiration to the world of home improvement. Whether you're looking to revamp a small corner of your abode or embark on a complete home transformation, Harrison's articles provide the essential expertise and creative flair to turn your visions into reality. So, dive into the captivating world of home remodeling with Harrison Clayton and unlock the full potential of your living space with every word he writes.


