How to roof a shed with felt
Roofing a shed with felt is a cost-effective and practical solution for homeowners looking to protect their shed and its contents from the elements. Whether you’re a seasoned DIY-er or a beginner, this guide will walk you through the steps you need to take to successfully roof your shed with felt.
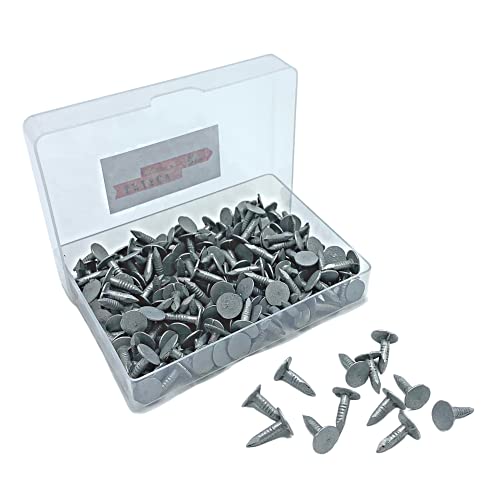
Before you start, gather all the materials you’ll need, including the felt sheets, roofing nails, a hammer, a utility knife, and a measuring tape. It’s also a good idea to have someone assist you with the installation process as some steps may require an extra pair of hands.
First, prepare the roof surface by ensuring it’s clean, dry, and free from any debris. Remove any old roofing material or nails that may be present. Next, measure the length and width of your shed roof, accounting for any overhangs. This will help you determine the amount of felt you’ll need to purchase.
Once you have your measurements, cut the felt sheets to the appropriate size and layout on the roof, starting from the bottom edge and working your way up. Be sure to overlap each sheet by a few inches to ensure a watertight seal. Secure the sheets in place with roofing nails, placing them along the edges and at regular intervals across the roof.
Continue this process until the entire roof is covered. Trim any excess felt using a utility knife, paying careful attention to the edges and corners for a neat and professional finish. Finally, inspect the roof for any loose nails or areas that may require additional securing.

By following these simple steps, you’ll be able to roof your shed with felt, providing it with long-lasting protection and a finished look. Remember to take your time and work carefully to ensure the best results. Enjoy your newly roofed shed!
Step-by-Step Guide: How to Roof a Shed with Felt
Roofing your shed with felt can be a cost-effective and efficient way to protect it from harsh weather conditions. Here is a step-by-step guide to help you roof your shed with felt:
- Gather your materials: Before you begin, make sure you have all the necessary materials such as roofing felt, adhesive, nails, a hammer, a utility knife, and a measuring tape.
- Clean the roof: Sweep or use a blower to remove any debris or dirt from the shed roof. Make sure the surface is clean and smooth, free from any obstructions.
- Measure and cut the felt: Measure the length and width of the roof and cut the felt accordingly, leaving a few inches extra on each side to overlap. You may need to use multiple pieces of felt to cover the entire roof.
- Apply adhesive: Using a brush or roller, apply roofing felt adhesive to the shed roof. Ensure you cover the entire surface, especially the edges and corners.
- Place the first piece of felt: Starting from one edge of the roof, carefully place the first piece of felt over the adhesive. Press it down firmly and smooth out any wrinkles or bubbles.
- Overlap and secure: Overlap the second piece of felt with the first one, ensuring the overlap is at least 2 inches. Nail the layers into place using roofing nails, spaced evenly apart along the edges.
- Trim and repeat: Trim any excess felt hanging over the shed roof using a utility knife. Proceed to repeat the process of laying the felt, overlapping and securing it with nails until the entire roof is covered.
- Trim the final piece: The last piece of felt may need to be trimmed to fit perfectly against the opposite edge of the first piece. Use a utility knife to make precise cuts.
- Secure the edges: Apply adhesive along the edges of the shed roof and press down the overhanging edges of the felt to create a neat finish. Nail down the edges to ensure they remain in place.
- Inspect and maintain: Finally, inspect the roof to ensure everything is secure and in place. Regularly maintain the shed roof by checking for any damage or wear and tear, and make necessary repairs as needed.
Roofing a shed with felt can be a DIY project that is not only budget-friendly but also offers adequate protection. Follow these step-by-step instructions to successfully roof your shed and enjoy a weather-resistant and durable shelter for your belongings.
Preparing the Shed for Roofing
Before you can begin the process of roofing your shed with felt, you will need to properly prepare the shed. This involves a few key steps to ensure that the felt installation goes smoothly and provides long-lasting protection for your shed.
- Clear the roof: Begin by removing any debris, leaves, or other objects from the roof of the shed. This will ensure that the surface is clean and ready for the installation of the felt.
- Inspect for damage: Take the time to carefully inspect the roof for any existing damage or weak areas. Look for signs of rot, decay, or loose shingles. It is essential to repair any issues before proceeding with the roofing installation.
- Prepare the surface: Make sure the roof surface is smooth and even. If necessary, remove any old roofing material or repair any uneven areas to create a flat surface for the felt installation. This can be done by scraping off any remaining shingles or using a silicone-based roof sealant to fix any imperfections.
- Apply a primer: Applying a primer to the roof surface is recommended before installing the felt. This will help create a stronger bond between the felt and the roof, ensuring better protection against the elements. Follow the manufacturer’s instructions for applying the primer and allow it to dry completely before proceeding.
By properly preparing the shed for roofing, you will ensure a more successful installation and increase the longevity of your shed’s roof. Taking the time to inspect and repair any damage, as well as providing a smooth surface for the felt installation, will result in a durable and functional roofing system for your shed.

Installing the Felt Roofing Material
Once you have prepared the shed roof by securing the decking and adding a layer of roof felt underlay, it’s time to install the final layer of felt roofing material. Follow these steps to properly install the felt:
|
Step 1: |
Begin by cutting the felt into the length required for one strip of roofing material. Leave extra length at the edges to overlap with the adjacent strips. |
|
Step 2: |
Start at the bottom of one side of the roof and place the first strip of felt horizontally along the edge, ensuring that it overhangs the roof slightly. |
|
Step 3: |
Using a staple gun or roofing nails, attach the first strip of felt to the roof decking, placing fasteners approximately every 6 inches along the edge and in the middle of the strip. |
|
Step 4: |
Move to the adjacent side of the roof and apply the next strip of felt, overlapping it with the first strip by at least 2 inches. Repeat the process of fastening the strip to the roof decking. |
|
Step 5: |
Continue this process, working your way up the roof and overlapping each strip of felt until you reach the top. |
|
Step 6: |
Trim the excess felt from the edges of the roof using a utility knife, making sure to leave a slight overhang to prevent water infiltration. |
|
Step 7: |
Finally, secure the edge of the felt with special roof felt adhesive to ensure a watertight seal along the edges of the roof. |


By following these steps, you can successfully install the felt roofing material on your shed, providing it with durable protection against the elements.
Finishing Touches and Maintenance
Once you have successfully applied the felt to your shed roof, there are a few finishing touches you can add to ensure a neat and professional appearance.
You can use roofing felt adhesive to secure the edges of the felt to the shed roof. Apply a generous amount of adhesive along the edges and press the felt firmly into place. This will prevent any lifting or damage caused by wind or other external factors.
After securing the felt, you can install roof eaves to provide additional protection and improve the overall aesthetics of your shed roof. Roof eaves are specially designed to fit over the shed roof edges and prevent water from seeping underneath the felt.
Regular maintenance is essential to prolong the life of your shed roof. Here are a few tips:
- Inspect the roof regularly for any signs of damage, such as tears or holes in the felt. Promptly repair any issues to prevent further damage.
- Remove any debris, such as leaves or branches, from the roof to prevent the buildup of moisture, which can lead to rot and deterioration.
- If you notice any signs of moss or algae growth, you can use a moss killer or a mixture of water and bleach to remove it. Be sure to follow the manufacturer’s instructions and protect your skin and eyes during the cleaning process.
- Trim any overhanging branches that may scrape against the roof during strong winds or storms.
By regularly maintaining your shed roof and addressing any issues promptly, you can ensure its longevity and protect against potential damage.

Note: It is always best to consult a professional if you are unsure about any aspect of roofing your shed. Safety should be your top priority, so if you are not comfortable working at heights, it is recommended to hire a roofing contractor.


Meet Harrison Clayton, a distinguished author and home remodeling enthusiast whose expertise in the realm of renovation is second to none. With a passion for transforming houses into inviting homes, Harrison's writing at https://thehuts-eastbourne.co.uk/ brings a breath of fresh inspiration to the world of home improvement. Whether you're looking to revamp a small corner of your abode or embark on a complete home transformation, Harrison's articles provide the essential expertise and creative flair to turn your visions into reality. So, dive into the captivating world of home remodeling with Harrison Clayton and unlock the full potential of your living space with every word he writes.


