How to reseal windows
Windows are an essential part of any home or building as they allow natural light to enter and provide ventilation. However, over time, the seals around windows can deteriorate, leading to drafts, water leaks, and increased energy costs. It is important to regularly inspect and reseal windows to maintain their efficiency and prevent further damage.
In this article, we will guide you through the process of resealing windows, step by step.
1. Assess the condition
The first step in resealing windows is to assess the condition of the existing seals. Check for any visible signs of wear, such as cracks, gaps, or peeling caulk. Also, pay attention to areas with water stains or condensation, as these indicate potential leaks.
If the damage is minor and limited to a small area, you may only need to patch up the affected section. However, if the seals are extensively deteriorated or the windows are old, it is recommended to remove the old seals completely and reapply new ones.
2. Gather the necessary materials
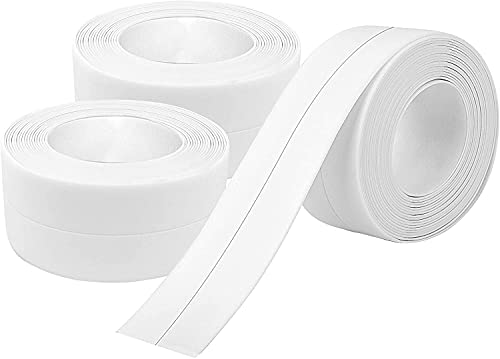
Before starting the resealing process, make sure you have all the required materials on hand. This includes silicone caulk, a caulking gun, a putty knife, a scraper, a utility knife, and clean rags for wiping away excess caulk.

Pro tip: Choose a high-quality silicone caulk that is weather-resistant and flexible to ensure long-lasting results.
3. Prepare the area
Prior to resealing, it is essential to clean and prep the window surfaces. Remove any dirt, dust, or debris using a scraper or putty knife. You may also use a mild detergent and water solution to remove stubborn stains.
Dry the surfaces thoroughly before applying the new caulk. Moisture can prevent the caulk from adhering properly and compromise the seal’s effectiveness.
4. Apply the new caulk
Now, it’s time to apply the silicone caulk. Load the caulk cartridge into the caulking gun and cut the nozzle at a 45-degree angle. Start at one corner of the window and apply a thin, even bead of caulk along the edge of the frame. Use steady pressure on the trigger to maintain control over the flow of caulk.
Work your way around the entire window, making sure to fill any cracks or gaps. Smooth the caulk with the help of a clean rag or damp finger to achieve a neat and professional finish.

5. Allow the caulk to cure
After applying the new caulk, allow it to cure as per the manufacturer’s instructions. Typically, silicone caulk takes about 24 hours to fully cure. Avoid touching or disturbing the caulk during this time to ensure optimal results.
You can open the windows slightly to allow for ventilation, but avoid fully opening them until the caulk has completely dried.
6. Maintain regular inspections
Resealing your windows is not a one-time task. To maximize their lifespan and performance, it is vital to conduct regular inspections and address any issues promptly. Check for signs of wear, cracks, or water leaks, especially after severe weather events, and reseal as needed.
Remember, well-maintained windows not only enhance the energy efficiency of your home but also contribute to its overall aesthetics and comfort.
By following these steps, you can reseal your windows effectively and minimize the risk of potential problems in the future.

Why You Need to Reseal Windows
Windows play a crucial role in our homes, providing us with a view of the outside world and allowing natural light to brighten our living spaces. However, over time, the seal around windows can deteriorate and become less effective. This can lead to a range of issues that may negatively impact your home.
Firstly, worn-out seals can cause air leaks. These leaks allow unwanted drafts to enter your home, leading to temperature imbalances and reduced energy efficiency. As a result, your heating and cooling systems may need to work harder, leading to higher energy bills.
In addition to increased energy usage, air leaks can also allow outside noise to infiltrate your home. This can be especially problematic for those living in noisy areas or near busy streets. Properly sealed windows can act as a barrier, reducing noise pollution and creating a more peaceful living environment.
Resealing windows is also essential for keeping out moisture and preventing water damage. Leaking windows can allow rainwater to enter your home, causing problems such as mold and rot. If left unaddressed, water damage can lead to structural issues and expensive repairs.
Furthermore, a well-sealed window can enhance the security of your home. Weak or deteriorated seals can make it easier for burglars to break in, putting your property and loved ones at risk. By resealing your windows, you can enhance their resistance to forced entry and improve the overall security of your home.

 |
 |
 |
 |
Given these reasons, it is important to regularly check the seals around your windows and reseal them when necessary. Resealing your windows can help improve energy efficiency, reduce noise pollution, prevent water damage, and enhance the security of your home. It is a relatively simple and cost-effective maintenance task that can provide numerous benefits in the long run.
The Importance of Window Seal
Energy Efficiency
A proper window seal is essential for the energy efficiency of your home. Windows that are not sealed properly can allow drafts of air to enter your home, causing your heating and cooling system to work harder and consume more energy. By ensuring that your window seal is in good condition, you can significantly reduce your energy costs and make your home more environmentally friendly.
Noise Reduction
Another benefit of having a well-sealed window is noise reduction. Living in a noisy environment can be both irritating and exhausting. A proper window seal can help minimize the amount of outdoor noise that enters your home, creating a more peaceful and comfortable living space.
Not only does this benefit you while you are inside your home, but it can also help improve your overall quality of sleep, allowing you to rest better and wake up refreshed.
Furthermore, if you live in a busy urban area, having a well-sealed window can help prevent noise pollution from disturbing your home, making it a more relaxing and inviting space.

Moisture Protection
A window seal acts as a barrier against moisture infiltration. If your window seal is damaged or poorly installed, water can seep into your home, leading to issues such as water stains, mold growth, and structural damage.
By maintaining a strong and properly sealed window, you can protect your living space from potential water damage and ensure the longevity of your window frames and surrounding structures.
In conclusion , the window seal is essential for maintaining an energy-efficient, peaceful, and dry living environment. Regularly inspecting and repairing any damage in the window seal is crucial to ensure that it continues to perform its function effectively. So make sure to pay attention to the condition of your window seal and take the necessary steps to keep it in top shape.
Signs of a Broken Window Seal
A broken window seal can result in a number of problems, including drafts, condensation buildup, and decreased energy efficiency. It is important to be able to recognize the signs of a broken window seal so that the issue can be addressed as soon as possible. Here are some common signs to look out for:
1. Condensation Between Window Panes
One of the most obvious signs of a broken window seal is the presence of condensation or fog between the panes of glass. This occurs when the seal between the glass layers fails, allowing moisture to enter and become trapped. If you notice fog or water droplets inside your window, it may be a sign that the seal needs to be replaced.

2. Drafts
Another sign of a broken window seal is the presence of drafts near the window area. When the seal is broken, outside air can easily pass through, causing temperature variations and discomfort in your home. If you feel a noticeable draft near your windows, it may be a sign that the seal is no longer intact.
3. Insect Infestation
Broken window seals can create small openings where insects can easily enter your home. If you notice an increase in pests such as ants, flies, or mosquitoes near your windows, it could be an indication that the window seal is compromised.
4. Increased Energy Bills
When a window seal is broken, it can lead to poor insulation and decreased energy efficiency. You may notice a significant increase in your energy bills if your windows are not sealing properly. If your heat or air conditioning system is working harder than usual to maintain comfortable temperatures, it could be a sign of a broken seal.
5. Visual Appearance
In some cases, a broken window seal may be visible from the outside. Look for signs of discoloration, streaks, or a milky film trapped between the glass layers. These visual cues can indicate that the window seal has failed and needs to be resealed or replaced.
If you notice any of these signs, it is important to address a broken window seal as soon as possible. Ignoring the issue can lead to further damage and increased energy costs. Contact a professional window repair service to evaluate the problem and determine the best solution for your situation.

Tools and Materials You’ll Need
When resealing windows, it’s important to have the right tools and materials to ensure a proper and effective job. Here are the essentials you’ll need:
1. Caulking Gun
A caulking gun is an essential tool for applying the sealant. It allows for easy control and precision when dispensing the sealant, ensuring a clean and even application.
2. Window Sealant
Choose a high-quality window sealant that is designed for the specific needs of your windows and the climate in which you live. Look for one that is waterproof, durable, and flexible to ensure long-lasting results.
3. Putty Knife or Scraper
A putty knife or scraper will be necessary to remove any old or damaged sealant before resealing the windows. It will help to ensure a clean and smooth surface for the new sealant to adhere to.
4. Surface Cleaner
Before applying the new sealant, it’s important to thoroughly clean the window surface. Use a surface cleaner that is safe for use on windows and will effectively remove any dirt, debris, or old sealant residue.
5. Rags or Paper Towels
You’ll need rags or paper towels to wipe down the window surface and clean up any excess sealant or cleaner. They will help ensure a neat and tidy job.
6. Dryer or Heat Gun (optional)
If you’re working with old or stubborn sealant, a dryer or heat gun can be used to soften and remove it more easily. This is an optional tool but can be helpful in certain situations.
Having these tools and materials handy will make the process of resealing your windows much smoother and more efficient. Remember to follow the instructions provided with your chosen sealant for best results.
Step by Step Guide to Resealing Your Windows
If your windows are drafty or if you notice water seeping through during rainy days, it may be time to reseal them. Resealing windows can help improve energy efficiency and prevent water damage. Follow this step-by-step guide to reseal your windows and ensure a tight seal.
- Gather the necessary materials: Before you begin, make sure you have all the materials you need. This includes window caulk, a caulk gun, a putty knife, a utility knife, a scraper, and a cloth for cleaning.
- Inspect your windows: Carefully examine your windows to identify any areas with cracked or worn-out caulk. Look for gaps or openings where air or water may enter.
- Remove the old caulk: Use a scraper or utility knife to remove the old caulk. Be gentle to avoid damaging the surrounding window frame or glass. Clean the area thoroughly with a cloth to ensure it’s free of debris.
- Cut the caulk tube: Cut the nozzle of the caulk tube at a 45-degree angle using a utility knife. The size of the opening should be slightly smaller than the gap you need to fill.
- Load the caulk gun: Load the caulk tube into the caulk gun and make sure it’s secure. Press the trigger a few times to start the flow of caulk.
- Apply the new caulk: Start at one corner of the window and hold the caulk gun at a 45-degree angle. Slowly move along the gap, applying a steady bead of caulk. Use the putty knife to smooth the caulk and remove any excess.
- Repeat for all gaps: Continue the process for all gaps and cracks around the window. Pay extra attention to the top and bottom edges, as they are common areas for air and water leaks.
- Clean up excess caulk: Use a cloth or your finger to remove any excess caulk while it’s still wet. This will ensure a clean and professional-looking finish.
- Allow the caulk to dry: Follow the caulk manufacturer’s instructions regarding drying time. Keep the windows closed during this period to prevent any disturbance to the caulk.
- Inspect the seal: Once the caulk is fully dry, carefully inspect the windows for any gaps or missed spots. Make any necessary touch-ups to ensure that the seal is complete.
- Clean the windows: Finally, clean the windows with a glass cleaner to remove any smudges or marks left during the resealing process.
By following these steps, you can reseal your windows effectively and enjoy the benefits of improved energy efficiency and protection against water damage. Regularly inspect and maintain your windows to ensure they remain weatherproof and secure.
Tips for Maintaining Window Seals
Proper maintenance of window seals is essential for ensuring energy efficiency and keeping out drafts and moisture. Follow these tips to maintain your window seals and extend their lifespan.
1. Regular Inspection
Perform regular inspections of your windows to check for any signs of wear or damage to the seals. Look for cracks, gaps, or shrinkage in the seals that may be allowing air or moisture to seep through.
2. Cleaning
Regularly clean your window seals to remove dirt, dust, and debris. Use a mild soap or window cleaner and a soft cloth to gently wipe down the seals, being careful not to use any abrasive materials or harsh chemicals that could damage the seals.
3. Lubrication
Apply a small amount of silicone lubricant or petroleum jelly to the seals to keep them pliable and prevent drying out. This helps to maintain their flexibility and prolong their lifespan.
4. Avoid Harsh Weather Exposure
Protect your window seals from extreme weather conditions, such as excessive heat or cold. This can cause the seals to expand or contract, leading to cracks or gaps that compromise their effectiveness.
5. Proper Ventilation
Ensure proper ventilation in your home to reduce moisture buildup, as excess moisture can cause window seals to deteriorate. Use exhaust fans in kitchens and bathrooms, and open windows when appropriate to allow for air circulation.
6. Repairing or Replacing Damaged Seals
If you notice any significant damage or deterioration in your window seals, it is important to repair or replace them promptly. Small gaps or cracks can often be filled with weatherstripping or caulk, while larger or severely damaged seals may need to be replaced by a professional.
- Regular inspections
- Cleaning
- Lubrication
- Avoiding harsh weather exposure
- Proper ventilation
- Repairing or replacing damaged seals
By following these tips, you can maintain the integrity of your window seals, improve energy efficiency, and keep your home comfortable and well-insulated.


Meet Harrison Clayton, a distinguished author and home remodeling enthusiast whose expertise in the realm of renovation is second to none. With a passion for transforming houses into inviting homes, Harrison's writing at https://thehuts-eastbourne.co.uk/ brings a breath of fresh inspiration to the world of home improvement. Whether you're looking to revamp a small corner of your abode or embark on a complete home transformation, Harrison's articles provide the essential expertise and creative flair to turn your visions into reality. So, dive into the captivating world of home remodeling with Harrison Clayton and unlock the full potential of your living space with every word he writes.


