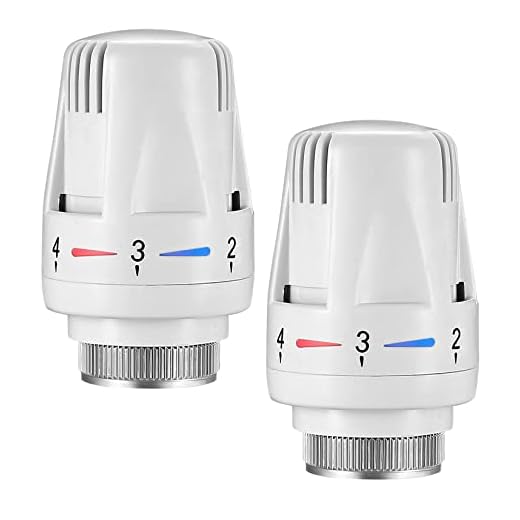
How to replace a radiator valve

Replacing a radiator valve is a common home maintenance task that can save you time and money. A faulty or worn-out valve can cause leaks, poor heating efficiency, or even a burst pipe. By replacing the valve yourself, you can ensure that your radiator operates efficiently and reliably.
Before you begin, it’s important to gather the necessary materials and tools, including a new valve, an adjustable wrench, a towel or cloth, and plumber’s tape. Additionally, it’s recommended to turn off the central heating system and allow the radiator to cool down to avoid any injuries or accidents.
The first step in replacing a radiator valve is to locate the existing valve and turn off the radiator’s water supply by closing the valve handle in a clockwise direction. Afterward, use the adjustable wrench to unscrew the existing valve. Be cautious of any remaining water in the radiator, as it may spill when the valve is removed.
Once the old valve is removed, clean the threads on the radiator using a cloth or towel to ensure a proper seal with the new valve. Take your new valve and wrap plumber’s tape clockwise around the valve threads to ensure a watertight connection. Then, carefully tighten the new valve onto the radiator by turning it clockwise. Ensure that the valve is securely attached without applying excessive force.
Finally, after installing the new valve, you can turn on the radiator’s water supply by opening the valve handle in a counterclockwise direction. Make sure to check for any leaks and observe proper heating operation. If everything looks and functions correctly, you can now enjoy a well-functioning radiator. However, if you encounter any issues or are unsure about the process, it is advised to consult a professional plumber for assistance.

Steps to replace a radiator valve
Replacing a radiator valve can be a relatively simple task if you have the right tools and follow these steps:
| Step 1: | Turn off the heating system. Before replacing the radiator valve, it is important to turn off the heating system to avoid any accidents or leaks. |
| Step 2: | Drain the radiator. Place a container or towel beneath the radiator to catch any dripping water. Then, use the radiator key or a wrench to open the bleed valve located at the top of the radiator. Allow the water to drain completely. |
| Step 3: | Remove the old valve. Use an adjustable wrench or a pipe wrench to loosen and remove the nut connecting the old valve to the pipe. Once the nut is removed, carefully pull out the old valve, making sure to catch any excess water that may leak out. |
| Step 4: | Clean and prepare the pipe. Use a pipe cleaner or sandpaper to clean the pipe and ensure that it is free from any debris or old sealant. Apply a thin layer of joint compound or plumber’s tape to the threaded portion of the pipe. |
| Step 5: | Attach the new valve. Carefully insert the new valve onto the pipe, making sure that it is aligned properly. Tighten the nut using a wrench until it is snug and secure. |
| Step 6: | Turn on the heating system and check for leaks. Once the new valve is installed, turn on the heating system and check for any leaks or drips. If there are no leaks, you can continue to bleed the radiator and repressurize the system if necessary. |
| Step 7: | Test the new valve and adjust as needed. After the heating system is running smoothly, test the new valve to ensure that it is functioning properly. If necessary, adjust the valve as needed to control the temperature and flow of the radiator. |
Remember to always follow safety guidelines and consult a professional if you are unsure about any step of the process. Now you can enjoy a properly functioning radiator with a brand new valve!
Turn off the central heating system
Before replacing a radiator valve, it is important to turn off the central heating system to avoid any potential accidents or damage. Here are the steps to turn off the central heating system:
- Locate the central heating controls in your home. This is usually a wall-mounted unit or a control panel.
- Switch off the power to the central heating system by turning the control knob or switching off the corresponding fuse.
- Set the thermostat to the lowest temperature or turn it off completely.
- If your central heating system has a separate hot water cylinder, make sure to also switch off the immersion heater if it is connected.
- Disconnect any external power sources, such as electricity or gas, that are connected to the central heating system.
By turning off the central heating system, you ensure that there will be no hot water or heat flowing through the radiator, which will make it safer and easier to replace the radiator valve.
Drain the radiator
Before you begin, it’s important to drain the radiator to avoid water damage and make it easier to replace the valve. Here’s how to do it:

1. Turn off the central heating system
Before draining the radiator, make sure to turn off the central heating system. This will prevent any new hot water from entering the radiator while you work on it.
Locate the central heating controls in your home, such as the boiler or thermostat, and turn off the system.
2. Gather your materials
Next, gather the materials you will need to drain the radiator. These may include a bucket or towel, a radiator key or adjustable wrench, and some plumber’s tape for later.
Place the bucket or towel under the radiator to catch any water that may spill during the draining process.
3. Locate and open the drain valve
Locate the drain valve on the bottom of the radiator. This is usually a small valve with a square-shaped head.
Using the radiator key or adjustable wrench, turn the valve counter-clockwise to open it. Be prepared for water to start flowing out of the valve and into the bucket or towel.
Once the water has stopped draining, close the valve by turning it clockwise.
It’s important to note that draining the radiator may release trapped air in the system, so it’s a good idea to bleed the radiator afterwards to avoid any potential airlock issues.


Meet Harrison Clayton, a distinguished author and home remodeling enthusiast whose expertise in the realm of renovation is second to none. With a passion for transforming houses into inviting homes, Harrison's writing at https://thehuts-eastbourne.co.uk/ brings a breath of fresh inspiration to the world of home improvement. Whether you're looking to revamp a small corner of your abode or embark on a complete home transformation, Harrison's articles provide the essential expertise and creative flair to turn your visions into reality. So, dive into the captivating world of home remodeling with Harrison Clayton and unlock the full potential of your living space with every word he writes.


