How to remove radiators for decorating

When it comes to decorating your home, one important step that often gets overlooked is removing your radiators. It may seem like an unnecessary hassle, but taking the time to properly remove your radiators can make a big difference in the quality and finish of your decorating job.
Before you start, it’s important to note that removing radiators can be a delicate process, as they are connected to your heating system. You’ll need to turn off your central heating and let the radiators cool down completely before you begin. If you are not confident in doing this yourself, it’s always best to consult a professional.
Once your radiators are cool, the first step is to isolate the valves. This will prevent any water from leaking out when you remove the radiator. You can do this by turning off the lockshield valve using a spanner or adjustable wrench, and then turning off the thermostatic valve. It’s a good idea to place a bucket or towel below the valves to catch any water that may still be in the system.
Next, you’ll need to drain the radiator. To do this, place a small bowl or container beneath the bleed valve (which is usually located at the top of the radiator) and use a radiator key or screwdriver to carefully open the valve. Allow the water to drain out fully before moving on to the next step.
Once the radiator is drained, you can remove it from the wall. Most radiators are attached to the wall with brackets or brackets and screws. Using a screwdriver or wrench, carefully remove the screws or undo the brackets to detach the radiator. It’s a good idea to have someone help you with this step, as radiators can be heavy and difficult to maneuver on your own.

With the radiator successfully removed, you can now begin your decorating project. Whether you’re painting the walls, wallpapering, or installing new flooring, taking the time to remove your radiators will ensure a professional and clean finish. When you’re ready to reinstall the radiator, simply follow these steps in reverse, making sure to bleed the radiator and check for any leaks before turning your central heating system back on.
Removing your radiators may take a bit of time and effort, but it’s a necessary step for a truly successful home decorating project. By following these steps and taking the time to do it right, you’ll ensure a high-quality finish that will enhance the overall look and feel of your home.
Step-by-Step Guide: Removing Radiators for Home Decorating
When it comes to renovating your home and giving it a fresh new look, one of the tasks you may have to tackle is removing radiators. These heating fixtures can often be an eyesore when trying to revamp your interior. However, removing radiators doesn’t have to be a daunting task if you follow these simple steps.
Tools You Will Need:
- Adjustable wrench
- Bucket or tray
- Towel
- Pipe cutter or hacksaw
- Teflon tape
Step 1: Turn Off the Heating System
Before you start removing the radiator, make sure to turn off your heating system. This will ensure that you don’t have any hot water or steam spraying out while disassembling the radiator.
Step 2: Protect Your Floors and Walls
Place a towel or bucket beneath the radiator valves to catch any water that may drip out when disassembling. You can also use plastic sheets to protect your floors and walls from potential damage.

Step 3: Drain the Radiator
Locate the drain valve at the bottom of the radiator. Attach a hose to the valve and drain the water into a bucket or tray. This step will prevent any leaks or spillages while disconnecting the radiator.
Step 4: Loosen the Valves
Using an adjustable wrench, loosen the nut on the thermostatic radiator valve and lockshield valve. Make sure to place a container underneath the valves to avoid any water spills.
Step 5: Disconnect the Valves
Once the nuts are loosened, take off the thermostatic radiator valve first, followed by the lockshield valve. Place them somewhere safe to avoid losing any parts.
Step 6: Disconnect the Radiator
To disconnect the radiator from its brackets, you may need to use a pipe cutter or hacksaw to cut through any pipes connected to it. Make sure to place a tray or bucket below the cut point to catch any water left in the pipes.
Step 7: Cap the Pipes
Using Teflon tape, tightly seal the ends of the pipes to prevent water leakage. This will ensure that your heating system remains intact while the radiator is removed for decoration purposes.
| Tip: | If you’re unsure how to cap the pipes or handle any step in the process, it is recommended to consult with a professional plumber to ensure a smooth radiator removal. |
|---|
By following these step-by-step instructions, you can easily remove your radiators without any hassle. Remember to take safety precautions and consider seeking professional help if needed. With radiators out of the way, you can now go ahead with your home decorating project and transform the look of your interior!
Preparation for Radiator Removal
Before removing your radiators for decorating purposes, there are a few steps you should take to ensure a smooth transition. This preparation process will not only make the removal easier but also protect your floors and walls from any potential damage.
Gather Necessary Tools
First, gather all the necessary tools you will need for the radiator removal. These may include:
– Adjustable spanner
– Pipe wrench

– Towels or rags
– Bucket
– Dust sheets
– Paintbrush for touch-ups
Having all these tools ready will save you time and make the process more efficient.

Turn Off the Heating System
Prior to removing the radiator, it is crucial to turn off your heating system. This will prevent any hot water from flowing into the radiator and potentially causing burns or injuries during the removal process.
Locate the appropriate valve on your boiler and turn it off. You can also shut off the central heating system by adjusting the thermostatic valves on each radiator to the ‘off’ position.
Once the heating system and radiator have cooled down, it’s time to move on to the next step.
Turning off the Central Heating System
Before removing radiators for decorating, it is important to turn off the central heating system. This will ensure that water flow to the radiators is stopped, preventing any accidents or flooding.
Steps to turn off the central heating system:
-
Locate the boiler or central heating control panel. It is usually found in a utility room or closet.
-
Once you have located the control panel, switch the heating mode to the “Off” position. This may require you to press a button or turn a dial, depending on the type of control panel.
Note: Make sure to refer to the manufacturer’s instructions for the specific control panel in your home.
-
After turning off the heating mode, it is recommended to turn off the electrical power to the boiler or control panel. This will further ensure that the heating system is fully deactivated.
-
If you have a water-based central heating system, locate the cold water feed and turn off the valve. This will prevent any more water from entering the system while you work on removing the radiators.
By following these steps, you can safely and effectively turn off the central heating system before proceeding with removing the radiators for decorating.

Removing the Radiators
Before you can start decorating, you’ll need to remove the radiators from the walls. Follow these steps to ensure a safe and efficient removal process.
Gather the Necessary Tools
Before starting, gather the following tools:
- Adjustable wrench
- Bucket or drip tray
- Old towel or cloth
- Plumber’s tape
Turn Off the Heating System
To avoid any accidents or leaks, it’s essential to turn off the heating system before removing the radiator. Locate the valve on the radiator and turn it clockwise until it’s fully closed. This will stop the flow of hot water into the radiator.
It’s also recommended to turn off the central heating system completely to prevent any potential issues during the removal process.
Release the Pressure
Before disconnecting the radiator, you’ll need to release the pressure. Place a bucket or drip tray under the valve to catch any water that escapes during this step.

Using an adjustable wrench, carefully loosen the nut on the lockshield valve. Once the pressure is released, use plumber’s tape to prevent any water leaking from the valve.
Note: If you’re unsure about how to release the pressure, consult a professional plumber to help you.
Disconnect the Radiator
With the pressure released, you can now disconnect the radiator from the pipes. Again, use an adjustable wrench to loosen the nuts at both ends of the radiator.
Place an old towel or cloth under the radiator to catch any additional water that may come out during the disconnection process.
Remove the Radiator
Once the radiator is disconnected, carefully lift it off the mounting brackets or hangers. Ensure you have assistance if the radiator is too heavy to handle on your own.
Place the radiator aside in a safe and secure area, preventing any potential damage or accidents.
With the radiator successfully removed, you can now proceed with decorating the room. Ensure to properly cover or protect the exposed pipework before starting any painting or wallpapering.
Once your decorating project is complete, you can reinstall the radiator following the reverse steps mentioned above.
Cleaning and Preparing the Exposed Pipework and Wall
Once the radiator has been removed, you may notice that the exposed pipework and wall behind it require some cleaning and preparation before you can continue with your decorating project. Here are some steps to help you clean and prepare the area:
1. Dusting and Vacuuming
Start by dusting the exposed pipework and wall using a clean, dry cloth or a duster. Remove any loose dirt, debris, or cobwebs that may have accumulated. Once the dusting is done, use a vacuum cleaner with a brush attachment to remove any remaining dust and dirt.
2. Washing the Surface
Next, prepare a solution of warm water and mild detergent. Use a sponge or a cloth dampened with this solution to gently wash the wall surface and the pipework. Pay attention to any areas that may have stains or stubborn dirt, and give them a bit of extra scrubbing. After washing, rinse the surface with clean water to remove any soapy residue. Allow the area to dry completely before proceeding.
3. Filling and Sanding
If there are any holes, cracks, or imperfections on the wall, you’ll need to fill them before painting or applying wallpaper. Prepare a suitable filler according to the manufacturer’s instructions and apply it to the damaged areas using a filling knife or putty knife. Smooth the filler flat with the wall surface and let it dry completely. Once dry, use sandpaper to gently sand the filled areas, ensuring they are smooth and level with the surrounding wall.
4. Priming the Surface
Before proceeding with the final decoration, it’s important to prime the exposed pipework and wall. Priming helps the paint or wallpaper adhere better and provides a more even finish. Choose a suitable primer according to the type of wall surface you have, and apply it using a brush or roller. Follow the manufacturer’s instructions for drying time and number of coats required.
By following these steps, you can ensure that the exposed pipework and wall are thoroughly cleaned, repaired if necessary, and well-prepared for your decorating project. Once the preparation is complete, you can proceed with painting, wallpapering, or any other desired renovation.
Reinstalling the Radiators
Once you have completed your decorating work and are ready to reinstall the radiators, you will need to follow these steps:
1. Prepare the area:
Before reinstalling the radiators, make sure the area is clean and free from any debris or dust that may have accumulated during the decorating process.
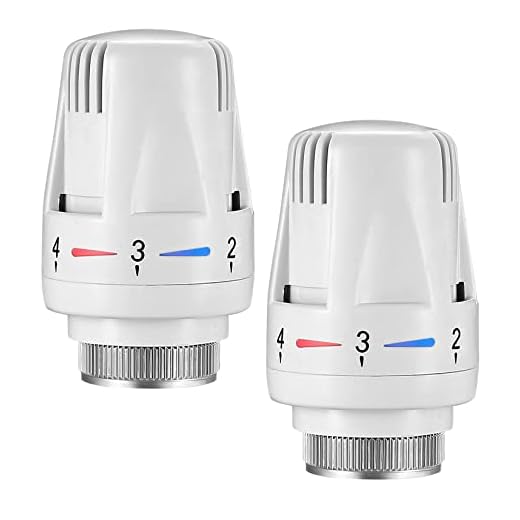
2. Check the radiator valves:
Inspect the radiator valves to ensure they are in good condition and functioning properly. If any of the valves are damaged or leaking, it may be necessary to replace them before reinstalling the radiators.
3. Reconnect the pipes:
Begin by reconnecting the pipes to the radiator. Use a pipe wrench to tighten the connections and make sure they are secure. Take care when reconnecting the pipes to avoid any damage to the radiator or the wall.
4. Bleed the radiators:
Once the pipes are reconnected, it is important to bleed the radiators to remove any trapped air. Use a radiator key to open the bleed valve on each radiator and allow any air to escape. Once water starts to come out, close the valve.
5. Test the system:
Turn the heating system back on and test each radiator to ensure it is heating up properly. Check for any leaks or unusual noises that may indicate a problem with the installation.
6. Make any necessary adjustments:
If you notice any issues during testing, such as uneven heating or leaks, you may need to make some adjustments. These could include bleeding the radiators again, checking the valve connections, or calling a professional plumber for assistance.
Remember to always follow safety precautions when working with radiators and consult a professional if you are unsure about any aspect of the installation process.


Meet Harrison Clayton, a distinguished author and home remodeling enthusiast whose expertise in the realm of renovation is second to none. With a passion for transforming houses into inviting homes, Harrison's writing at https://thehuts-eastbourne.co.uk/ brings a breath of fresh inspiration to the world of home improvement. Whether you're looking to revamp a small corner of your abode or embark on a complete home transformation, Harrison's articles provide the essential expertise and creative flair to turn your visions into reality. So, dive into the captivating world of home remodeling with Harrison Clayton and unlock the full potential of your living space with every word he writes.


