How to remove pebbledash
Pebbledash has long been a popular exterior wall finish in the UK, adding texture and character to homes. However, over time, you may decide that you want to remove pebbledash and give your property a fresh new look. Removing pebbledash can be a time-consuming and messy process, but with the right techniques and tools, it can be done successfully.
In this article, we will explore step-by-step instructions on how to remove pebbledash from your walls and restore them to a smooth finish. We will also discuss the tools and materials you will need, safety precautions to take, and potential challenges you may face during the process.
Before delving into the removal process itself, it’s important to emphasize the significance of safety precautions. As you’ll be working with potentially hazardous materials and using power tools, it’s crucial to protect yourself by wearing appropriate personal protective equipment, such as gloves, safety goggles, and a dust mask.
With the right knowledge and equipment, you can successfully remove pebbledash from your walls and transform the appearance of your home. So let’s get started!
What is pebbledash?
Pebbledash is a form of decorative exterior wall covering that involves applying a layer of small stones or pebbles to the surface of a wall. It is often used to give a textured and aesthetic appearance to buildings, particularly in the United Kingdom.
Appearance
Pebbledash typically consists of a base mortar layer applied to the wall, followed by an additional layer of mortar containing the pebbles or stones. The stones are then pressed into the mortar, creating a rough and bumpy texture. The size and color of the stones can vary, allowing for different design possibilities.
Functions
Aside from its decorative purpose, pebbledash provides added protection to the exterior walls of buildings. The layer of pebbles helps to prevent damage from weather elements such as rain, wind, and temperature fluctuations. It can also help to improve insulation properties by creating an extra layer of thermal resistance.
| Pros | Cons |
|---|---|
| – Provides a unique and textured look – Offers additional protection to walls – Helps with insulation properties |
– Requires regular maintenance – Can be difficult to repair or remove – Some people consider it outdated or aesthetically unappealing |
Reasons to remove pebbledash
There may be several reasons why homeowners decide to remove pebbledash from their properties. While some may appreciate the aesthetic appeal of pebbledash, others may find it dated or unpleasant to look at. Here are a few common motivations for removing pebbledash:
1. Damaged or deteriorating pebbledash: Over time, pebbledash can become cracked or damaged due to exposure to the elements. This can negatively impact the appearance and structural integrity of the property. Removing the pebbledash allows for necessary repairs and restoration work to be conducted.
2. Updating the property: Pebbledash was a popular choice for exterior walls in the past, but many homeowners are now seeking a more modern look. Removing the pebbledash can provide a blank canvas for a new exterior finish or cladding, allowing the homeowner to update the appearance of their property.

3. Resale value: Some potential homebuyers may view pebbledash as outdated or unattractive. Removing the pebbledash and replacing it with a more contemporary finish can increase the resale value of the property and make it more appealing to prospective buyers.
4. Maintenance and cleaning: Pebbledash can be difficult to clean and maintain. The texture of the surface can make it challenging to remove dirt, moss, or algae that may accumulate over time. Removing the pebbledash can make routine cleaning and maintenance tasks easier.
5. Personal preference: Ultimately, the decision to remove pebbledash may simply come down to personal preference. Homeowners may have their own unique design preferences or may want to match the appearance of neighboring properties.
Note: Before undertaking any removal or restoration work, it is important to consult a professional to assess the condition of the pebbledash and ensure that the appropriate measures are taken.
Preparation
Before you begin removing pebbledash, it’s important to properly prepare your workspace and gather the necessary materials. This will help ensure a smooth and efficient process.

1. Safety precautions:
Start by wearing protective clothing, gloves, and eyewear to avoid any injuries. Additionally, make sure you work in a properly ventilated area to minimize the inhalation of dust and debris.
2. Clear the area:
Remove any furniture, decorations, or obstacles in the immediate vicinity of the pebbledash to prevent any damage or hindrance during the removal process.
3. Cover surfaces:

Use protective coverings, such as tarps or plastic sheets, to safeguard nearby surfaces from any potential damage caused by falling debris or scraper tools.
4. Gather materials:
Ensure you have all the necessary tools and materials ready before starting. This typically includes a scraper, pressure washer, protective sealant, safety goggles, a ladder, and a dust mask.
5. Test the pebbledash:
Before removing the entire pebbledash, conduct a small test area to determine the best removal method and possible challenges you may encounter.

6. Enable water supply:
If using a pressure washer, ensure there is a water supply nearby for the duration of the project and that it is functioning properly.
By adequately preparing for pebbledash removal, you’ll be ready to tackle the task with confidence and ensure a successful outcome.
Materials needed
Anja Livny, a United Kingdom-based DIY enthusiast recommends the following materials for removing pebbledash from walls:
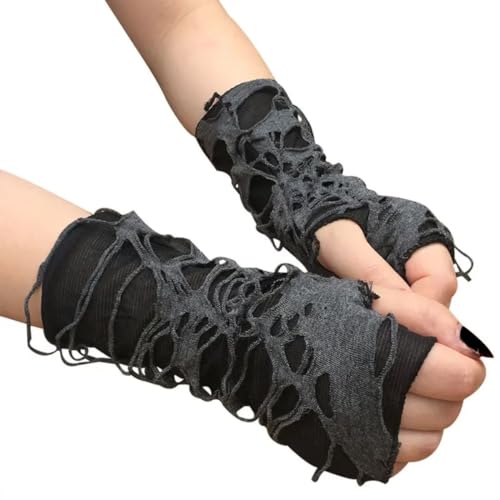
| Protective clothing and equipment | Gloves, goggles, dust mask, and overalls are essential for protecting yourself during the removal process. |
| Ladder | Depending on the height of your exterior walls, you may need a ladder to reach all the areas of pebbledash. |
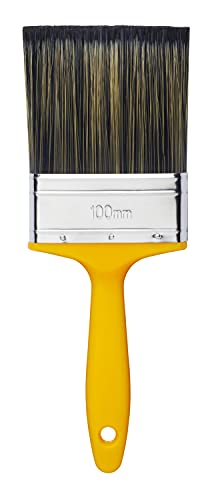
| Scrapers and chisels | You will require a variety of scrapers and chisels with different sizes and types of blade in order to effectively remove the pebbledash. |
| Hammer | A hammer will be needed to help detach fragmented areas of the pebbledash. |
| Safety goggles | To shield your eyes from debris while working, safety goggles are important to wear throughout the process. |
| Plastic sheeting and tarpaulin | Using plastic sheeting and tarpaulin will help limit mess by protecting the ground and surrounding areas from falling debris. |
| Garden hose or pressure washer | Once the pebbledash is removed, a garden hose or pressure washer can be used to clean the surfaces and remove any remaining debris. |
| Respirator | To protect your lungs from dust and potential harmful substances, a respirator is necessary. |
| Scaffold tower or scaffolding | If the walls are particularly high or large in size, a scaffold tower or scaffolding may be required for safety and easier access. |
Safety Precautions
Removing pebbledash can be a challenging and potentially dangerous task if proper safety precautions are not taken. It’s important to prioritize your safety while working on this project. Here are some important safety measures to follow:

1. Wear Protective Clothing and Gear
To protect yourself from the dusty debris and potential injuries, always wear the following:
- A long-sleeved shirt and long pants to cover your arms and legs.
- A dust mask or respirator to avoid inhaling harmful particles.
- Safety goggles or glasses to shield your eyes from flying particles.
- Gloves to protect your hands from sharp edges and substances.
- Steel-toed boots to guard your feet against falling debris.
2. Use Proper Tools and Equipment
Make sure you have the appropriate tools and equipment for pebbledash removal. This may include a chisel, hammer, scraper, wire brush, and ladder. Ensure that your tools are in good working condition and use them correctly following the manufacturer’s instructions.
3. Work with a Partner
It’s always recommended to work with a partner when tackling projects like pebbledash removal. Having someone else nearby can provide assistance, support, and additional safety in case of an emergency.
Remember, safety should always be the top priority. If you don’t have the necessary experience or feel uncertain about removing pebbledash, it’s best to hire a professional to ensure the job is done safely and efficiently.
Methods for removing pebbledash
If you want to remove pebbledash from your walls, there are several methods you can use.

1. Mechanical methods: One option is to scrape off the pebbledash using a scraper or putty knife. This can be a labor-intensive process, but it is effective in getting rid of the textured finish. Make sure to take precautions and wear protective goggles and a face mask to avoid inhaling dust.
2. Chemical methods: Another method is to apply a chemical stripper to the pebbledash. This breaks down the adhesive and makes it easier to remove. Follow the manufacturer’s instructions for the specific stripper you are using and use caution when working with chemicals.
3. Power washing: If the pebbledash is not too firmly attached to the wall, you may be able to remove it by power washing. Use a pressure washer with a medium or high-pressure nozzle and aim it at a downward angle to avoid damaging the underlying wall. Be aware that this method can be messy and may require some touch-up work afterwards.
4. Hiring professionals: If you are unsure about removing pebbledash yourself or if the job seems too large or difficult, it is best to hire professionals to do the job. They will have the necessary tools and expertise to remove the pebbledash safely and efficiently.
Before starting any method, it is important to test a small inconspicuous area first to ensure that the method does not cause any damage to the underlying wall. This will help you determine the best method for removing the pebbledash from your particular wall surface.
Remember to take safety precautions and follow any instructions provided by the product or service you choose to use. With the right method and patience, you can successfully remove pebbledash and achieve the desired look for your walls.
Method 1: Mechanical removal
Pebbledash is a rough texture often applied to the exterior walls of buildings for a decorative or protective purpose. However, over time, you may decide that you want to remove the pebbledash and restore the original finish of the walls. Mechanical removal is one method that can be effective in removing pebbledash. Here are the steps to follow:
Step 1: Preparation
Before you begin the removal process, it is important to prepare the area and ensure your safety. Start by gathering the following materials:
- Safety glasses
- Dust mask
- Gloves
- Protective clothing
- Drop cloths or plastic sheets to protect the surrounding area
- Bucket and sponge
- Dust sheets to cover the floor
Once you have gathered all the necessary materials, put on your safety gear and cover the surrounding area with drop cloths or plastic sheets.
Step 2: Test the adhesion
Before you start removing the pebbledash, it is a good idea to test the adhesion of the material. Use a hammer or a chisel to gently tap on the pebbledash. If it sounds hollow and comes off easily, it indicates that the adhesion is weak and mechanical removal should be effective. However, if the pebbledash seems firmly adhered to the wall, it may be more challenging to remove and you should consider alternative methods.
Step 3: Use a pressure washer
Using a pressure washer can be an effective way to remove pebbledash. Start by setting up the pressure washer according to the manufacturer’s instructions. Direct the water stream at a 45-degree angle to the wall and slowly move it across the surface, working in sections. The high-pressure water should break up the pebbledash and wash it away. Be sure to wear your safety gear and exercise caution when using a pressure washer, as it can be powerful.
Continue working in sections until you have removed all the pebbledash. Once you have finished, allow the wall to dry completely before moving on to any further steps.
Remember, removing pebbledash can be a challenging and time-consuming task. If you are unsure or not confident in your abilities to do it yourself, it is always recommended to consult a professional.

Harrison Clayton
Meet Harrison Clayton, a distinguished author and home remodeling enthusiast whose expertise in the realm of renovation is second to none. With a passion for transforming houses into inviting homes, Harrison's writing at https://thehuts-eastbourne.co.uk/ brings a breath of fresh inspiration to the world of home improvement. Whether you're looking to revamp a small corner of your abode or embark on a complete home transformation, Harrison's articles provide the essential expertise and creative flair to turn your visions into reality. So, dive into the captivating world of home remodeling with Harrison Clayton and unlock the full potential of your living space with every word he writes.


