How to remove curtain pole ends

When it comes to redecorating or replacing your curtains, it may be necessary to remove the curtain pole ends. Whether you want to repaint your walls, change the style of your curtains, or simply clean the area thoroughly, removing curtain pole ends is a relatively straightforward process that can be done with a few simple steps.
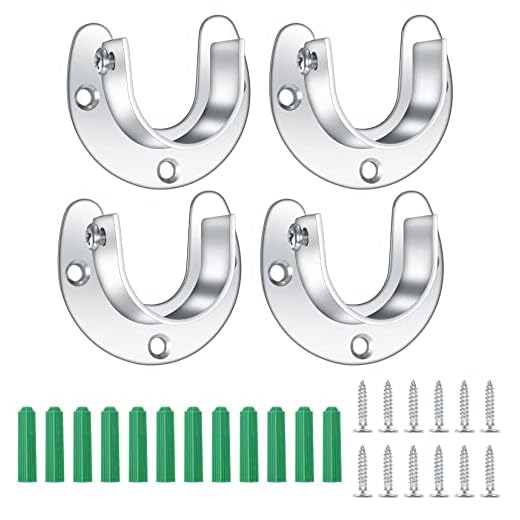
The first step in removing curtain pole ends is to ensure that you have the right tools for the job. You will need a ladder or step stool to reach the ends of the curtain pole, as well as a screwdriver or drill to remove any screws or brackets that are holding the ends in place. Make sure to choose a screwdriver that fits the screws snugly to prevent any damage during the removal process.
Before you begin removing the curtain pole ends, it is important to take some necessary precautions. Ensure that you have a clear path to the curtain pole and that there are no tripping hazards in the area. If your curtains are particularly long or heavy, it may be helpful to ask for assistance to prevent any accidents or damage. Remember to always prioritize your safety when working with ladders or tools.
Once you are ready to begin, examine the curtain pole ends to locate any screws or brackets that are holding them in place. Use your screwdriver or drill to carefully remove any screws or brackets. If the curtain pole ends are glued, gently pry them off with a flathead screwdriver or putty knife. Take your time during this step to avoid any accidental damage to the curtain pole or surrounding area.
With the screws, brackets, or glue removed, you should now be able to easily slide or pull off the curtain pole ends. Be careful while removing them to not scratch or damage the wall or ceiling. If the curtain pole ends are stubborn and refuse to come off, you can try using a small amount of lubricant to aid in the removal process. Once the ends are removed, you can proceed with your planned redecorating or curtain replacement.

In conclusion, removing curtain pole ends is an essential part of any curtain-related project. By following these steps and taking the necessary precautions, you can safely and effectively remove the curtain pole ends without any hassle. Remember to enlist the help of a professional if you encounter any difficulties or if you are unsure of how to proceed. Happy decorating!
Guide on Removing Curtain Pole Ends: Easy Methods and Tips
Removing curtain pole ends may seem like a daunting task, but with the right tools and techniques, it can be surprisingly simple. Whether you need to remove the ends for cleaning purposes or to replace them with new ones, this guide will walk you through the process step by step.
Materials You Will Need:
- Screwdriver
- Allen wrench
- Step stool or ladder (if needed)
- Clean cloth or towel
Step-by-step Instructions:
- Start by preparing your workspace. Remove any nearby objects or obstacles to ensure you have enough room to work safely.
- If your curtain pole ends are attached with screws, grab your screwdriver and locate the screws on each end. You may need to remove any decorative caps or covers to access the screws.
- Once you’ve uncovered the screws, use your screwdriver to loosen and remove them. This may require a bit of force, but be careful not to apply too much pressure and damage the poles.
- If your curtain pole ends are held in place with an Allen wrench, find the small Allen screw on each end. Insert the Allen wrench into the screw and turn it counterclockwise to loosen the ends.
- After loosening the screws or Allen screws, wiggle and pull the curtain pole ends gently to detach them from the poles. If they don’t come off easily, you can use a clean cloth or towel for extra grip while pulling.
- Once the ends are removed, clean them thoroughly with a damp cloth to remove any dust or debris. You can also take this opportunity to clean the poles if needed.
- If you’re replacing the ends with new ones, line up the new ends with the poles and insert them into place. Make sure they are securely and firmly attached.
- To reattach the ends, follow the previous steps in reverse order. Align the screw holes or Allen screws, tighten them with a screwdriver or Allen wrench, and replace any decorative caps or covers.
- Finally, give everything a once-over to ensure the curtain pole ends are securely in place and the poles are straight and stable.
And that’s it! Following these simple steps will help you remove the curtain pole ends with ease. Remember to proceed with caution and take your time to avoid any unnecessary damage. Happy decorating!
Step-by-Step Instructions for Removing Curtain Pole Ends
Removing curtain pole ends may seem like a daunting task, but with the right approach and tools, it can be done easily. Follow these step-by-step instructions to remove curtain pole ends without any hassle.
What You Will Need
- Step ladder or stool
- Screwdriver (size depends on the type of screw)
- Protective gloves (optional)
- Curtain pole end removal tool (if applicable)
Step 1: Prepare the Area
Before you start removing the curtain pole ends, clear the area around the curtains and make sure you have enough space to work comfortably. You might also want to remove the curtains from the pole to prevent them from getting in your way.

Step 2: Ascend the Ladder
Use a step ladder or stool to reach the curtain pole ends. Ensure that the ladder is sturdy and placed on a stable surface.
Step 3: Determine the Type of Curtain Pole
Identify the type of curtain pole end that you have. It could be one of the following:
- Fixed end brackets: These brackets are secured to the wall with screws.
- Removable end brackets: These brackets can be easily detached from the pole.
- Decorative end caps: These caps are decorative elements that are affixed to the end of the curtain pole.
Step 4: Remove Fixed or Removable End Brackets
If you have fixed or removable end brackets, follow these steps:
- Examine the brackets for any visible screws that are securing them to the wall or pole.
- Using the appropriate screwdriver, carefully unscrew the screws counter-clockwise to loosen them.
- Once the screws are sufficiently loose, gently pull the brackets away from the wall or pole until they detach completely.
Step 5: Remove Decorative End Caps
If you have decorative end caps, use the curtain pole end removal tool (if available) or follow these steps:
- Insert the edge of the screwdriver or the removal tool between the end cap and the curtain pole.
- Gently leverage the tool to pry the end cap away from the curtain pole.
- Continue prying around the circumference of the end cap until it is completely removed.
Step 6: Clean and Store the Curtain Pole Ends
Once the curtain pole ends are removed, you can clean them using a damp cloth or mild cleaning solution if necessary. Store them in a safe place to prevent any damage or loss.
Following these step-by-step instructions will allow you to remove curtain pole ends with ease. Just remember to take your time and be careful during the process to avoid any accidents.
Tools and Materials Needed for Removing Curtain Pole Ends
Removing curtain pole ends may seem daunting, but with the right tools and materials, it can be a straightforward process. Before getting started, gather the following items:
1. Screwdriver: A screwdriver is essential for removing any screws or brackets securing the curtain pole ends to the wall or window frame.
2. Pliers: Pliers are useful for gripping and turning any stubborn screws or bolts that may be attached to the curtain pole ends.
3. Step stool or ladder: Depending on the height and location of your curtain pole ends, a step stool or ladder may be necessary for safely and comfortably reaching the area.

4. Penetrating oil: If screws or bolts are difficult to remove, applying some penetrating oil can help loosen them and make the removal process easier.
5. Soft cloth or towel: To protect the curtain pole ends from any scratches or damage during removal, have a soft cloth or towel on hand to place them on.
6. Optional: Assistant or helper: Depending on the size and weight of your curtain pole ends, having an assistant or willing helper can make the process smoother and safer.
Having these tools and materials ready before attempting to remove curtain pole ends will ensure that you are fully prepared and can complete the task efficiently and effectively.
Tips for a Successful Removal of Curtain Pole Ends
Removing curtain pole ends may seem like a daunting task, but with the right approach, it is actually quite simple. Whether you need to replace them or just want to clean them, here are some useful tips to help you successfully remove curtain pole ends.

1. Gather Your Tools
Before getting started, it’s important to gather all the necessary tools. You will typically need a ladder or step stool, a screwdriver, and pliers. Make sure you have these tools readily available before attempting to remove the curtain pole ends.
2. Identify the Attachment Method
Depending on the type of curtain pole you have, the attachment method may vary. Most common curtain poles have removable end caps that are attached with screws or are simply twisted on. Examine the ends of the curtain pole to identify the attachment method before proceeding.
3. Loosen or Remove the Screws
If your curtain pole ends are attached with screws, use a screwdriver to loosen or remove them. Once the screws are loosened or removed, you should be able to easily slide or twist off the end caps. Be careful not to drop or lose any screws during this process.
4. Twist Off the End Caps (if applicable)
If your curtain pole ends are twisted on, use pliers for grip and twist the end caps counterclockwise to loosen them. Once they are loosened, you can simply slide them off the curtain pole. If the end caps are stuck, you can try applying some lubricant to help loosen them.
5. Practice Caution and Take Your Time
During the removal process, it’s important to proceed with caution and take your time. Rushing or using excessive force can result in damage to the curtain pole or its fixtures. Carefully follow the instructions for your specific curtain pole and remain patient throughout the removal process.

By following these tips, you should be able to easily remove curtain pole ends. Remember to take proper safety precautions, such as using a stable ladder and wearing appropriate protective gear if necessary. If you encounter any difficulties or are unsure about the removal process, consider consulting a professional for assistance.


Meet Harrison Clayton, a distinguished author and home remodeling enthusiast whose expertise in the realm of renovation is second to none. With a passion for transforming houses into inviting homes, Harrison's writing at https://thehuts-eastbourne.co.uk/ brings a breath of fresh inspiration to the world of home improvement. Whether you're looking to revamp a small corner of your abode or embark on a complete home transformation, Harrison's articles provide the essential expertise and creative flair to turn your visions into reality. So, dive into the captivating world of home remodeling with Harrison Clayton and unlock the full potential of your living space with every word he writes.


