How to record freeview

If you’re tired of missing your favorite shows or want to have a collection of your favorite movies, recording Freeview is the way to go. Freeview is a digital TV platform in the United Kingdom that gives you access to a wide range of television channels without any monthly subscription fee. By recording Freeview, you can enjoy your favorite shows at your own convenience, without worrying about missing out on the latest episodes. Whether you want to record a series, a movie, or just a one-time event, we’ve got you covered with this guide on how to record Freeview.
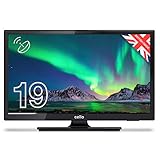
If you have a Freeview set-top box or a Freeview+ box, the process of recording is relatively simple. These boxes come with built-in hard drives, which allow you to record and store your favorite TV programs. All you need to do is connect your Freeview box to your TV and follow a few easy steps to start recording. Make sure you have a standard aerial antenna connected to your Freeview box to receive a good signal for recording.
If you have a Freeview HD box or a Freeview Play box, you can also benefit from additional features such as recording multiple channels at the same time or streaming your recordings to other devices. These boxes offer more flexibility and convenience for recording your favorite shows. You can easily set up series recordings or schedule your recordings in advance, so you never miss a moment of your favorite TV programs.
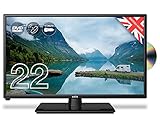
Not only can you record Freeview with a dedicated receiver box, but you can also use other devices to record your favorite shows. If you have a smart TV or a TV with a built-in digital tuner, you can utilize the USB recording function to capture your desired content. Simply connect a USB flash drive or an external hard drive to your TV, select the program you want to record, and let your TV do the work for you. With this method, you can enjoy the convenience of recording without the need for an additional set-top box.
So, whether you prefer a dedicated Freeview box or want to utilize the built-in features of your smart TV, recording Freeview is a simple process that allows you to watch your favorite TV programs at your convenience. Say goodbye to missed episodes and enjoy the freedom of recording with Freeview.

Why it is important to record freeview?
There are several reasons why it is important to record freeview. Firstly, recording freeview allows you to have access to your favorite television shows at your convenience. Life can get busy, and it can be difficult to find the time to sit down and watch your favorite shows as they are being broadcasted. By recording freeview, you can ensure that you never miss an episode.
Secondly, recording freeview allows you to pause, rewind, and fast forward through content. With the ability to pause live television, you can take breaks whenever you need to without worrying about missing anything. Additionally, being able to rewind allows you to catch any parts of the show that you may have missed or want to rewatch. Fast forwarding also allows you to skip through commercials or any parts of the show that you may not be interested in.
Furthermore, recording freeview provides you with the flexibility to watch television on your own schedule. If you have a busy day ahead, you can easily record your favorite shows and watch them later when you have the time. This is especially useful if shows are broadcasted late at night or when you are usually unavailable to watch TV.
Lastly, recording freeview gives you the ability to create your own personal archive of television content. Whether it’s a series you love, a movie you want to watch again, or a sporting event you don’t want to forget, recording freeview allows you to build up a collection of content that you can revisit whenever you want.
| Overall, recording freeview offers convenience, control, and flexibility to ensure that you can enjoy your favorite television shows on your own terms. Take advantage of the recording options available to make the most of your viewing experience. |
The benefits of recording freeview programs
Recording freeview programs provides numerous benefits for viewers who want to enjoy their favorite shows at their own convenience. Whether it’s a busy schedule, conflicting timetables, or simply wanting to watch a program at a later time, recording freeview offers flexibility and convenience.

1. Watch anytime, anywhere
One of the primary benefits of recording freeview programs is the ability to watch them at any time and from anywhere. By recording shows, viewers are no longer bound by the scheduled airtime. They have the freedom to watch the recorded programs at their preferred time, whether they are at home, commuting, or traveling.
2. Pause, rewind, and fast forward
Recording freeview programs allows viewers to take full control of their viewing experience. With a recording, they can pause the program whenever needed, rewind to watch a missed scene, or fast forward through the commercials. This feature ensures that viewers never miss out on important moments and can skip through unwanted content.
3. Avoid scheduling conflicts
Television schedules can often clash, with multiple shows airing at the same time. By recording freeview programs, viewers can easily avoid scheduling conflicts and catch up on their favorite shows without having to choose between them. It gives them the freedom to watch multiple programs and not miss out on any entertainment.
4. Build a personal library
Recording freeview programs allows viewers to create a personal library of their favorite shows, documentaries, and movies. This not only ensures that they have unlimited access to their preferred content but also provides a backup in case the original program is no longer available or accessible through other means.
5. Ad-free viewing
With recorded freeview programs, viewers can enjoy ad-free viewing. They can skip through the commercials and watch their chosen programs without any interruptions or repetitive marketing messages. This enhances the overall viewing experience and saves a significant amount of time.
Overall, recording freeview programs offers the convenience of watching shows at any time and from any location, gives viewers control over their viewing experience, avoids scheduling conflicts, allows for the creation of a personal content library, and provides ad-free viewing. These benefits make recording freeview an excellent choice for those who want to fully enjoy their favorite programs without any limitations.
Getting started with recording freeview
Recording freeview is a great way to ensure that you never miss your favorite shows or movies. Whether you want to catch up on the latest episodes of your favorite TV series or save a big game for later, recording freeview is a convenient feature that you can take advantage of.
Here are the steps to get started with recording freeview:
- Check if your TV has a built-in recorder: Some TVs come with a built-in recorder, which means you don’t need to buy any additional equipment. Check the user manual or settings menu to see if your TV has this feature.
- Buy a digital video recorder (DVR): If your TV doesn’t have a built-in recorder, you can purchase a separate DVR. These devices connect to your TV and allow you to record freeview channels.
- Connect your TV to the recorder: If you’re using a separate DVR, connect it to your TV using an HDMI or AV cable. Follow the instructions that came with your DVR to establish a connection.
- Set up your DVR: Once your TV and recorder are connected, follow the setup instructions provided by the manufacturer. This may involve scanning for freeview channels, choosing a recording quality, and setting up a schedule.
- Select the show or movie you want to record: Use your TV remote or the remote provided with your DVR to navigate to the channel and program you want to record.
- Start the recording: Once you’ve selected the program, look for a recording button on your TV remote or DVR remote. Press this button to start the recording.
- Manage your recordings: After recording, you can manage your saved recordings by accessing the DVR menu. This menu allows you to browse, delete, and organize your recorded content.
- Enjoy your recorded content: Now that you’ve successfully recorded freeview, relax and enjoy your favorite shows and movies whenever you want.
Note: Recording functionality may vary depending on the make and model of your TV or DVR. Consult the instruction manual or manufacturer’s website for specific instructions related to your device.
With these simple steps, you can take full advantage of the recording feature with freeview and never miss out on your favorite shows or movies.

Choosing the right equipment for recording
When it comes to recording Freeview, having the right equipment is essential. Here are some factors that you should consider when choosing the equipment for recording:
- Digital Video Recorder (DVR): A DVR is a popular choice for recording Freeview. It allows you to store and watch your favorite shows at your convenience. Look for a DVR that has a large storage capacity and offers easy-to-use recording features.
- DVD Recorder: If you prefer physical copies of your recorded shows, a DVD recorder might be a good option for you. It allows you to record your favorite shows directly onto DVDs. Ensure that the DVD recorder supports the Freeview format and has a built-in Freeview tuner.
- Set-top Box with Recording Functionality: Some set-top boxes come with built-in recording functionality. This can be a convenient option if you already have a set-top box and don’t want to invest in additional equipment. Look for a set-top box that offers a user-friendly interface and ample storage.
- Smart TV with Recording Capability: If you have a smart TV, it may have built-in recording capability. Check the specifications of your smart TV to see if it offers this feature. A smart TV with recording capability eliminates the need for additional equipment and simplifies the recording process.
Consider your budget, storage needs, and personal preferences before making a decision. Remember to check the compatibility of the equipment with Freeview to ensure seamless recording and playback.
Step-by-step Guide to Recording Freeview
Recording Freeview is a great way to never miss your favorite shows or movies. Whether you want to record a single episode or set up a series link, this step-by-step guide will help you navigate through the process.
Step 1: Check Your Equipment
Make sure you have a Freeview box or a TV with a built-in Freeview tuner. Check that your device has a built-in hard drive or a USB port for external storage.

Step 2: Set Up Freeview
If you haven’t set up Freeview on your TV yet, you need to follow the manufacturer’s instructions to do so. Once set up, you should have access to all the Freeview channels.
Step 3: Find the Program
Use the electronic program guide (EPG) to find the program you want to record. Scroll through the channels and find the specific episode or movie you wish to record.
Step 4: Select the Recording Option

Choose the recording option provided by your device. You may have the option to record once or set up a series link to record all episodes automatically.
Step 5: Confirm the Recording
After selecting the recording option, confirm your selection by pressing the appropriate button on your remote control. Double-check the recording details, including the date, time, and duration.
Step 6: Manage Your Recordings
Once the recording is complete, you can access your recorded programs through the “Recorded” or “Library” section on your Freeview device. Use the playback options to watch or delete your recordings as desired.
Step 7: Troubleshooting
If you encounter any issues with your recording, consult the user manual for troubleshooting steps. You can also visit the manufacturer’s website or contact their customer support for further assistance.
By following this step-by-step guide, you can easily record Freeview and enjoy your favorite shows anytime you want.
Selecting the program you want to record
Once you have set up your freeview recording equipment and are ready to start recording,
you need to select the specific program you want to record. This can be done by following
these simple steps:
- Turn on your freeview receiver and navigate to the TV guide.
- Use the navigation buttons on your remote control to scroll through the TV guide listings.
- Find the program that you want to record and select it.
- Check the program details for the start time, end time, and channel information.
- Ensure that your freeview recorder is set to the correct channel.
- If necessary, adjust the start and end time of the recording to suit your needs.
- Select the record option on your freeview remote control or recorder.
- Confirm the recording and wait for it to begin.
It is important to make sure that your freeview receiver is connected to a reliable source of
electricity and that it is receiving a strong signal. This will help ensure that your recordings
are of the highest quality and that you will not miss any of the programs you want to record.
| Key Point: | Always double-check your recording settings before confirming, to avoid any mistakes. |
|---|
By following these steps, you will be able to easily select and record the program or programs
you want to watch from Freeview. Enjoy your recorded shows at your convenience, and never
miss out on your favorite content again!
Setting up the recording schedule
To record Freeview, you need to set up a recording schedule. This allows you to automatically record your favorite shows and movies without having to remember to start the recording each time.
Here, we will walk you through the steps to set up a recording schedule:
- Access the TV guide: Use your Freeview remote control to access the TV guide. This guide will show you all the available channels and their schedules.
- Find your desired program: Browse through the TV guide to find the show or movie you want to record. Take note of the date, time and channel it will be airing on.
- Select the program: Use the remote control to select the program you want to record. This will bring up more options.
- Choose the recording option: Look for the record button or options related to recording. Depending on your Freeview setup, you may have options to record the entire series, record just this episode, or schedule a one-time recording for this specific program.
- Set the recording schedule: Use the on-screen instructions to set the recording schedule. You will typically be able to choose the start time, end time, and frequency of the recording.
- Save the recording: Once you have set the recording schedule, be sure to save it. This will ensure that your Freeview device knows to record the program at the specified time.
- Manage your recordings: Finally, you can go to the recordings section on your Freeview device to manage and watch your recorded programs. Make sure to free up storage space regularly to avoid running out of room for new recordings.
By setting up a recording schedule, you can enjoy your favorite shows and movies at your convenience without worrying about missing them.
Check the storage capacity
Before you start recording freeview, it is important to check the storage capacity of your device. This will help you determine how much content you can save and how long you can record for. Here are a few steps to check the storage capacity:
Step 1: Access the settings
Navigate to the settings menu on your device. You can typically find this option by pressing the “Menu” button on your remote control.
Step 2: Find the storage or memory option
Look for the storage or memory option in the settings menu. It may be listed as “Storage,” “Memory,” or “Disk Space.” Select this option to access information about your device’s storage capacity.
Step 3: Check the available storage
Once you are in the storage or memory menu, you will be able to see the total available storage and the amount of space currently in use. Take note of the available storage, as this will be important when determining how much content you can record.
Keep in mind that recording freeview content typically requires a significant amount of storage space, especially if you plan on recording multiple shows or movies. If your device’s storage capacity is limited, you may need to periodically delete older recordings to make space for new ones.
By checking the storage capacity of your device before recording freeview, you can ensure that you have enough space to save all your favorite content without any issues.


Harrison Clayton
Meet Harrison Clayton, a distinguished author and home remodeling enthusiast whose expertise in the realm of renovation is second to none. With a passion for transforming houses into inviting homes, Harrison's writing at https://thehuts-eastbourne.co.uk/ brings a breath of fresh inspiration to the world of home improvement. Whether you're looking to revamp a small corner of your abode or embark on a complete home transformation, Harrison's articles provide the essential expertise and creative flair to turn your visions into reality. So, dive into the captivating world of home remodeling with Harrison Clayton and unlock the full potential of your living space with every word he writes.


