How to pump up bike tyres
Properly inflating your bike tyres is crucial for a smooth and safe ride. Whether you’re a novice cyclist or an experienced rider, knowing how to pump up your bike tyres is an essential skill that can save you from potential mishaps on the road.
Firstly, it’s important to check the recommended tyre pressure for your bike. The pressure range is usually imprinted on the side of the tyre to indicate the ideal inflation level. Keeping your tyres within this range ensures optimal performance and minimizes the risk of flats or blowouts.
Once you have identified the correct pressure, you will need a bike pump with a pressure gauge. Begin by unscrewing the valve cap and firmly pressing the nozzle of the pump onto the valve. Make sure the connection is secure to prevent air leaks.
To inflate the tyre, pump using long, smooth strokes. Keep an eye on the pressure gauge and periodically check the tyre’s firmness by pressing it with your finger. It should feel solid yet slightly compliant. Avoid overinflating, as it can lead to a bumpy ride and increase the risk of tyre damage.
Finally, when your tyres are at the desired pressure, remove the pump nozzle carefully and replace the valve cap. Repeat the process for the remaining tyres, and always remember to periodically check and maintain proper inflation levels to ensure a safe and enjoyable cycling experience.

The Proper Way to Inflate Bike Tyres for Optimal Performance
Properly inflating your bike tyres is essential for optimal performance on the road or trail. Riding with tyres that are underinflated not only increases the risk of flats, but it also makes pedalling harder and reduces overall bike handling. On the other hand, overinflated tyres can decrease traction and make the ride uncomfortable. Follow these steps to inflate your bike tyres correctly:
1. Check the recommended pressure
Every bike tyre has a recommended pressure range that you should follow. Look for the tire sidewall to find the specific pressure range written in psi (pounds per square inch) or bar. It’s best to aim for the middle of the pressure range for a good balance between comfort and performance.
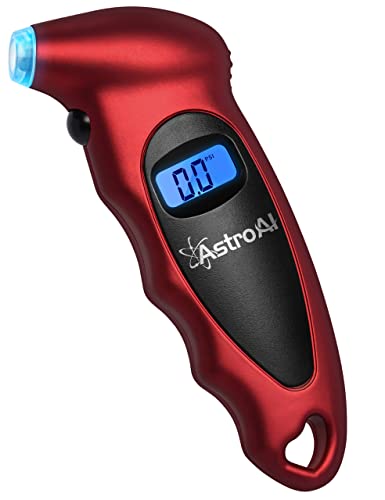
2. Use a reliable pressure gauge
Invest in a high-quality pressure gauge to accurately measure the tire pressure. Using your fingers or eyes alone is not sufficient. Attach the pressure gauge to the valve stem and take a reading. If the pressure is below the recommended range, you will need to add air. If it’s above the range, you will need to release some air.

3. Use a pump with a pressure gauge
Avoid using gas station air pumps as they can overinflate your tyres quickly. Instead, use a pump with a built-in pressure gauge designed specifically for bike tyres. This will allow you to monitor the pressure while inflating.
4. Start inflating gradually
Attach the pump’s nozzle to the valve stem and secure it firmly. Begin pumping in small bursts to prevent sudden pressure build-up. Check the pressure with the gauge periodically and adjust as needed. It’s always better to slightly underinflate the tyres initially and add more air if necessary.
5. Check the pressure one last time

After inflating, double-check the pressure with the gauge to ensure it falls within the recommended range. Adjust as necessary, ensuring both tyres have the same pressure for balanced performance.
By following these steps, you will have properly inflated bike tyres that will deliver optimal performance, enhance your riding experience, and keep you safe on the road or trail.
Importance of Correct Tyre Inflation
Proper tyre inflation is crucial for optimal performance, safety, and durability of your bicycle. Riding a bike with underinflated or overinflated tyres can result in various issues and negatively affect your riding experience. Here are a few reasons why correct tyre inflation matters:
- Better Performance: When your bike tyres are properly inflated, you will experience better traction, control, and handling. Proper tyre pressure allows for smoother rolling and reduced rolling resistance, resulting in improved speed and efficiency.
- Enhanced Safety: A correctly inflated tyre reduces the risk of accidents and injuries. Underinflated tyres can make your bike unstable, affecting your handling and control, especially when cornering or braking. On the other hand, overinflated tyres may cause the bike to bounce, making it harder to maintain balance.
- Extended Tyre Lifespan: Riding with the correct tyre pressure increases the lifespan of your tyres. Underinflated tyres are more prone to punctures, pinch flats, and sidewall damage. Overinflated tyres may experience excessive wear in the center tread. By maintaining the proper inflation, you can avoid unnecessary tyre replacements and save money in the long run.
- Comfortable Ride: The right inflation pressure helps to absorb shocks and vibrations from the road surface, resulting in a smoother and more comfortable ride. Riding with underinflated tyres, on the other hand, can make your ride uncomfortable and increase the risk of tube damage.
Now that you understand the importance of correct tyre inflation, it’s essential to regularly check and adjust your bike’s tyre pressure. Refer to the manufacturer’s recommendations for the appropriate pressure range and use a reliable tyre gauge to achieve the desired inflation level. By maintaining proper tyre inflation, you can optimize your riding experience and ensure a safe and enjoyable journey.
Step-by-Step Guide to Inflating Bike Tyres
Step 1: Gather the necessary materials, including a bike pump with the appropriate valve attachment and a pressure gauge.

Step 2: Identify the recommended tyre pressure for your bike. This information is usually found on the sidewall of the tyre or in the bike’s user manual.
Step 3: Remove the dust cap from the valve stem on the tyre.
Step 4: Attach the pump’s valve connector to the valve stem firmly. Make sure it is secured to prevent any air leakage.
Step 5: Begin pumping air into the tyre. Use smooth and even strokes of the pump handle. Keep an eye on the pressure gauge to ensure you do not overinflate the tyre.
Step 6: Monitor the tyre pressure periodically while pumping. Stop pumping and check the pressure with the gauge to avoid overinflating the tyre.

Step 7: Once the tyre reaches the recommended pressure, stop pumping. Remove the pump’s valve connector from the valve stem and quickly replace the dust cap.
Step 8: Test the tyre pressure by giving it a firm squeeze with your hand. The tyre should feel firm to the touch but should have a slight give when pressed firmly.
Step 9: Repeat the process for the other tyre(s) on your bike, ensuring they are all inflated to the correct pressure.
Step 10: Regularly check your bike tyres for signs of wear, damage, or deflation, and inflate them as needed to maintain optimal performance and safety.


Meet Harrison Clayton, a distinguished author and home remodeling enthusiast whose expertise in the realm of renovation is second to none. With a passion for transforming houses into inviting homes, Harrison's writing at https://thehuts-eastbourne.co.uk/ brings a breath of fresh inspiration to the world of home improvement. Whether you're looking to revamp a small corner of your abode or embark on a complete home transformation, Harrison's articles provide the essential expertise and creative flair to turn your visions into reality. So, dive into the captivating world of home remodeling with Harrison Clayton and unlock the full potential of your living space with every word he writes.


