How to pull out wall plugs

Removing a wall plug may seem like a simple task, but it can be quite tricky if you don’t have the right technique. Whether you need to replace a damaged plug or you simply want to redecorate your walls, knowing how to pull out wall plugs properly is essential to avoid damaging your walls or injuring yourself.
Step 1: Assess the situation
Before attempting to remove a wall plug, it’s important to assess the situation and determine the type of plug you are dealing with. Wall plugs can be made of plastic or metal and they can vary in size. Knowing the type and size of the plug will help you choose the right tools for the job.
Step 2: Gather the necessary tools
To remove a wall plug, you will need a few basic tools: a screwdriver, pliers, and a utility knife. The screwdriver will be used to loosen the plug from the wall, the pliers will help you grip and remove the plug, and the utility knife can be used to cut through any paint or caulk that may be covering the plug.

Step 3: Loosen the plug
Using a screwdriver, gently loosen the anchor screw holding the wall plug in place. Be careful not to use too much force, as this could strip the screw or damage the wall. Once the plug is loose, you can move on to the next step.
Remember to always wear safety goggles and protective gloves when working with tools.
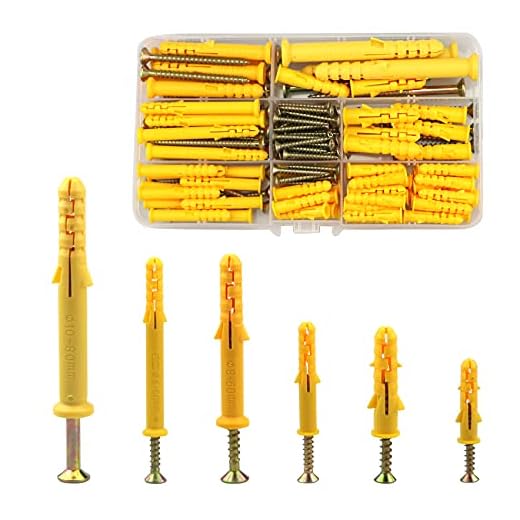
Tools for removing wall plugs
To successfully remove wall plugs, you will need a few essential tools. The following list outlines the necessary equipment for removing wall plugs efficiently:
1. Screwdriver
A screwdriver is one of the most commonly used tools for removing wall plugs. It helps to lever the plug out of the wall once the screw holding it in place has been removed. A flat-head screwdriver is typically the best choice for this task, as its flat blade can easily fit behind the plug for optimal leverage.

2. Pliers
Pliers can also be useful for removing wall plugs. They can be used to grip the plug firmly in order to twist and pull it out of the wall. Pliers with long noses provide better control and reach into tight spaces, allowing you to grip the plug more effectively.
| Tool | Function |
|---|---|
| Screwdriver | Leverage to remove plug |
| Pliers | Grip and pull out plug |
Other optional tools that you may find useful include a drill, a hammer, and a wall plug removal tool. These tools can help you remove wall plugs that are in difficult or hard-to-reach positions.
It is important to select the appropriate tools for the task at hand, as using the wrong tools can result in damage to the wall or plug. Always exercise caution and use the necessary tools to remove wall plugs safely and effectively.
Preparation for wall plug removal
Before you begin removing wall plugs, it is important to prepare the necessary tools and ensure your safety. Follow these preparation steps:
Gather the tools
- A claw hammer or a pair of pliers
- A flathead or a Phillips head screwdriver, depending on the type of wall plug
- A small drill bit or sharp object for creating a pilot hole
- A putty knife or scraper for patching the hole after plug removal
- Safety goggles for eye protection
- Gloves to protect your hands
- A bucket or bag for collecting debris
Switch off the electricity
If the wall containing the plugs is near electrical outlets or light fixtures, it is crucial to switch off the electricity to avoid potential electrical shocks. Locate the breaker connected to the specific area and turn it off.

Clean the work area
Clear the surrounding area to ensure there are no obstacles or obstructions that may hinder your work or cause accidents. This includes moving furniture, rugs, and other objects that may be in the way.
By following these preparation steps, you will have everything ready for removing wall plugs safely and efficiently.
Step-by-step guide to removing wall plugs
Wall plugs are commonly used to secure objects to the wall but can sometimes become loose or need to be replaced. Here is a step-by-step guide on how to remove wall plugs without causing damage to the wall.
Materials you will need:
- A claw hammer or a pair of pliers
- A screwdriver (if necessary)
Step 1: Assess the plug
The first step is to assess the wall plug. Determine its type (e.g., plastic or metal) and how it is secured to the wall. Some plugs might be easily removable by hand while others may require additional tools.
Step 2: Firmly hold the plug
Hold onto the wall plug with one hand, ensuring a secure grip to prevent it from turning or rotating. This will provide better control and stability during the removal process.

Step 3: Use a claw hammer or pliers
With the other hand, use a claw hammer or pair of pliers to gently pull the wall plug out of the wall. Apply steady pressure while pulling at a 45-degree angle away from the wall. Be careful not to put too much force to avoid damaging the wall.
Step 4: If necessary, use a screwdriver
If the wall plug is not easily coming out, it might be necessary to use a screwdriver. Insert the screwdriver into the wall plug and gently twist it counterclockwise to loosen it. Once loose, continue using the pliers or claw hammer to remove the plug completely.
Note: Take caution when using a screwdriver to avoid slipping and causing injury. Always wear safety gloves for extra protection.
Step 5: Inspect and patch the wall (if needed)
Once the wall plug has been successfully removed, inspect the hole left behind. If necessary, use a suitable wall filler material to patch the hole and create a smooth surface. Allow the filler to dry before applying any paint or other finishing touches.
By following this step-by-step guide, you can remove wall plugs with minimal effort and without causing any damage to the wall. Remember to always approach the task with caution and use the appropriate tools for an effective removal process.

Step 1: Assess the anchor type
Before you start pulling out wall plugs, it’s important to assess the type of anchor that was used. This will help determine the appropriate technique and tools needed for removal. There are several common types:
- Plastic anchors: These are the most common type of wall anchor and are often used for lightweight items. They can usually be removed by pulling straight out with a pair of pliers.
- Metal anchors: Metal wall anchors are typically used for heavier items. They often have a screw that needs to be unscrewed using a screwdriver to release the anchor from the wall before pulling it out.
- Masonry anchors: These anchors are specifically designed for use in concrete or brick walls. They require a hammer and chisel or a drill to remove.
By assessing the anchor type, you can ensure that you have the appropriate tools and technique to successfully pull out the wall plug without causing damage to the wall.
Step 2: Gather the necessary tools
Before you begin pulling out wall plugs, it’s important to ensure you have all the necessary tools handy. Having the right tools at your disposal will make the process much easier and more efficient.
Here’s a list of tools you’ll need:
| 1. | Needle-nose pliers: | To grip the wall plug firmly and provide leverage while pulling it out. |
| 2. | Flathead screwdriver: | To pry the wall plug away from the wall or dislodge it. |
| 3. | Hammer: | If the wall plug is firmly stuck, a hammer can help loosen it by tapping gently on the screwdriver. |
| 4. | Safety goggles: | To protect your eyes from any flying debris or wall plug fragments. |
| 5. | Dust sheet or newspaper: | To cover the area beneath the wall plug and collect any debris that falls during the process. |
Having these tools ready before you start will save you time and frustration. Once you have them gathered, you’ll be well-prepared to move on to the next step of pulling out wall plugs.

Step 3: Loosen the anchor
Once you have removed the screw, the wall plug will still be attached by the anchor that holds it securely in place. To loosen the anchor, you will need to use a pair of pliers or a screwdriver.
Tools you will need:
– Pair of pliers or a screwdriver
– Safety goggles (optional, but recommended)
Follow these steps to loosen the anchor:
- Secure your safety goggles: Before you begin working with any tools, it is important to prioritize your safety. Put on your safety goggles to protect your eyes from any potential debris or flying parts.
- Grab the anchor: Use your pliers or screwdriver to grab onto the anchor firmly. Make sure you have a good grip before proceeding.
- Apply pressure: Once you have a firm grip on the anchor, apply gentle but steady pressure in a counter-clockwise direction. This should gradually loosen the anchor from the wall.
Note: If the anchor seems stubborn and does not loosen easily, you can try gently tapping it with a hammer to loosen it further. However, make sure to use caution to avoid damaging the wall or causing any injuries.
By following these steps, you will successfully loosen the anchor and be ready to remove the wall plug completely in the next step.
Step 4: Remove the anchor
Once the screw has been fully removed, the next step is to remove the anchor from the wall. The anchor is the piece of plastic that expands behind the wall, providing support for the screw. Here’s how you can remove it:
- Inspect the hole in the wall where the anchor was inserted. If you can see the anchor protruding, use a pair of pliers to grasp it and gently pull it out.
- If the anchor is not visible, insert the tip of a flathead screwdriver into the hole and gently pry it out. Be careful not to damage the surrounding wall.
- If the anchor is still not coming out, use a small drill bit to drill into the anchor. Insert the drill bit into the anchor and drill in a clockwise direction. As the drill bit turns, it will catch onto the anchor and gradually pull it out.
- Once the anchor is removed, inspect the hole to ensure it is clean and free from any debris or leftover anchor fragments.
Removing the anchor is an important step as it allows you to patch and repair the hole left behind in the wall. It also ensures that the hole is ready for a new anchor and screw if needed in the future.
Step 5: Fill the hole
After removing the wall plug, you will be left with a hole in the wall. It’s important to fill this hole to ensure a smooth finish.
You can use a lightweight spackling compound or a wall filler to fill the hole. Using a putty knife, apply the filler to the hole, making sure to completely cover it. Smooth out the surface with the putty knife, removing any excess filler.
Once the filler has dried, sand the area gently to ensure a flush finish. Use a fine-grit sandpaper to avoid damaging the surrounding wall surface.
Caution:
Make sure to follow the instructions provided by the manufacturer when selecting and using the filler. Some fillers may require multiple layers or additional drying time.
Tip:
If the hole is large or deep, you may need to repeat the filling and sanding process until the area is completely smooth.

How to tile onto floorboards

Meet Harrison Clayton, a distinguished author and home remodeling enthusiast whose expertise in the realm of renovation is second to none. With a passion for transforming houses into inviting homes, Harrison's writing at https://thehuts-eastbourne.co.uk/ brings a breath of fresh inspiration to the world of home improvement. Whether you're looking to revamp a small corner of your abode or embark on a complete home transformation, Harrison's articles provide the essential expertise and creative flair to turn your visions into reality. So, dive into the captivating world of home remodeling with Harrison Clayton and unlock the full potential of your living space with every word he writes.


