How to paint the frame of a mirror

Painting the frame of a mirror can be an effective and inexpensive way to update the look of an old or plain mirror. Whether you want to add a pop of color or match the frame to your decor, painting the frame is a simple DIY project that can be done in just a few steps.
To get started, gather your materials. You will need sandpaper, painter’s tape, primer, paint, a paintbrush or roller, and a drop cloth to protect your work surface. If the mirror is already hung on the wall, make sure to cover it with plastic or newspaper to prevent any splatters.
Before painting, it’s important to prepare the frame surface. Use sandpaper to roughen up the frame, creating a slightly rough surface that will help the primer and paint adhere better. Once the frame is sanded, wipe away any dust with a damp cloth.
Next, apply painter’s tape to protect the edges of the mirror and any areas you don’t want to paint. Make sure the tape is pressed firmly against the frame to prevent any paint from bleeding through. It’s a good idea to also cover the mirror with paper or plastic, securing it with tape.
Now it’s time to prime the frame. Apply a thin coat of primer, using a paintbrush or roller, and let it dry completely. The primer will help ensure that the paint adheres evenly to the frame and will also create a smooth surface for the paint.

Once the primer is dry, you can begin painting. Choose your desired color and apply a thin, even coat. If needed, apply additional coats after allowing the paint to dry between each layer. Remove the painter’s tape while the paint is still slightly wet to prevent any paint from peeling off with the tape.
Allow the paint to dry completely before handling the mirror. Once dry, you can hang your beautifully painted mirror on the wall and enjoy the new refreshed look it brings to your space.
Remember to always work in a well-ventilated area and follow the manufacturer’s instructions on the primer and paint cans. With a little time and effort, painting the frame of your mirror can be a fun and rewarding DIY project that will give your mirror a whole new lease on life.
Choosing the Right Paint for Your Mirror’s Frame
When it comes to painting the frame of your mirror, it is important to choose the right type of paint that will not only enhance its overall appearance but also protect it from scratches and wear. Here are some key factors to consider when selecting paint for your mirror’s frame.
| 1 | Type of Frame Material |
| 2 | Paint Finish |
| 3 | Color Palette |
| 4 | Primer |
1. Type of Frame Material: Before you start painting your mirror’s frame, it is vital to determine the type of material it is made from. Common materials include wood, metal, plastic, and resin. Each material requires a specific type of paint to adhere properly and achieve a long-lasting finish. Make sure to choose a paint that is suitable for the material of your mirror’s frame.

2. Paint Finish: The finish of the paint you choose can significantly impact the appearance and durability of your mirror’s frame. Consider factors such as the level of glossiness, texture, and overall aesthetic you desire. Popular choices for mirror frames include high-gloss, semi-gloss, satin, or matte finishes. Keep in mind that glossy finishes may require more maintenance to avoid smudges or fingerprints.
3. Color Palette: Selecting the right paint color for your mirror’s frame is crucial for achieving the desired look and coordinating with the rest of your decor. Look for colors that complement your existing color scheme or opt for a contrasting shade to make a bold statement. Consider paint samples or color swatches to visualize how different shades will appear against your mirror and surrounding space.
4. Primer: Applying a primer before painting your mirror’s frame is highly recommended, especially for materials that are porous or have a slick surface. Primer helps the paint to adhere better, ensures a smoother finish, and improves paint durability. Choose a primer that is suitable for the material and paint type you plan to use.
By taking these factors into consideration, you can ensure that the paint you choose for your mirror’s frame not only enhances its visual appeal but also provides the necessary protection and longevity. Remember to prepare your mirror’s frame properly and follow all manufacturer instructions for best results.
Consider the Material of Your Mirror Frame>
When it comes to painting the frame of your mirror, it is essential to consider the material it is made of. Different materials require different painting techniques and products. By understanding the material of your mirror frame, you can ensure that the paint adheres well and provides a long-lasting finish.

Wood Frame
If your mirror frame is made of wood, it is essential to prepare the surface properly before painting. Start by sanding the wood to create a smooth and even surface. Fill any cracks or imperfections with wood putty and let it dry completely. Apply a coat of primer to seal the wood and create a good base for the paint. Once the primer is dry, apply your chosen paint color in thin layers, allowing each layer to dry completely before applying the next. Finish with a clear protective topcoat for added durability.
Metal Frame
For a metal mirror frame, start by cleaning the surface thoroughly to remove any dirt or grease. Use sandpaper to create a slightly rough texture for the paint to adhere to. Apply a coat of metal primer, making sure to cover the entire surface. Let the primer dry completely before applying your chosen paint color. For a smooth and even finish, use spray paint designed for metal surfaces. Apply multiple thin coats, allowing each coat to dry before applying the next. Finish with a clear protective topcoat to prevent the paint from chipping or peeling.
When painting a mirror frame with a plastic or resin material, it is important to choose a paint that is specially formulated for these types of surfaces. This will ensure proper adherence and durability. Clean the surface thoroughly before painting, and then apply a plastic or resin primer. Let the primer dry completely before applying your chosen paint color. Use thin and even coats, allowing each coat to dry before applying the next. Finish with a clear protective topcoat to protect the paint finish.
By considering the material of your mirror frame and following the appropriate painting techniques, you can transform the look of your mirror and enhance the overall aesthetic of your space.
Preparing the Mirror Frame for Painting
Prior to starting the painting process, it is important to prepare the mirror frame properly to achieve a smooth and even finish. Follow these steps to ensure success:

- Begin by wiping down the frame with a damp cloth to remove any dust or dirt.
- If there are any imperfections or old layers of paint, use sandpaper to gently sand them down. This will help the new paint adhere better.
- After sanding, wipe the frame clean with a dry cloth to remove any remaining dust particles.
- If there are any areas of the frame that need to be repaired, such as cracks or holes, use a suitable filler to fill in these imperfections. Once dried, sand the filled areas to make them smooth and blend them with the rest of the frame.
- Before starting the painting process, it is recommended to apply a primer to the mirror frame. This will help the paint adhere better and ensure a longer-lasting finish. Choose a primer specifically designed for the material of the frame.
- Ensure that the primer is fully dry before proceeding to the painting step. Refer to the manufacturer’s instructions for the recommended drying time.
By following these steps to prepare the mirror frame for painting, you will create a solid foundation for achieving a professional-looking finish.
Sanding and Priming the Mirror Frame
Before painting the frame of your mirror, it is important to prepare the surface by sanding and priming it. This ensures that the paint will adhere properly and result in a smooth, professional finish.
Materials Needed:
- Sandpaper (medium grit)
- Sandpaper (fine grit)
- Tack cloth
- Primer
- Paintbrush
Steps:
- Start by removing any existing paint or varnish from the mirror frame. Use the medium grit sandpaper to gently sand the entire surface, including any intricate detailing. This will help to create a rough texture for the primer and paint to adhere to. Be sure to wipe away any dust with a tack cloth.
- Next, switch to the fine grit sandpaper and gently sand the frame again. This will help to smooth out any rough areas and create an even surface. Remember to wipe away any dust with a tack cloth before moving on to the next step.
- Apply a coat of primer to the mirror frame using a paintbrush. Make sure to cover the entire frame evenly, including any intricate detailing. Allow the primer to fully dry according to the manufacturer’s instructions.
By sanding and priming the mirror frame before painting, you are setting the foundation for a successful paint job that will result in a beautifully finished frame. Once the primer is dry, you can proceed with painting the frame in the color of your choice.
Applying the Base Coat and Additional Layers
Once you have prepared your mirror frame by cleaning and sanding it, you can start applying the base coat. Choose a paint color that matches the style of your room or go for a bold contrasting color for a statement piece.
Step 1: Priming the Frame
Before applying the base coat, it is essential to prime the frame. This step ensures that the paint adheres properly and provides an even finish. Use a brush or roller to apply an even layer of primer to the entire surface of the frame. Allow the primer to dry completely before moving on to the next step.

Step 2: Applying the Base Coat
Once the primer is dry, you can start applying the base coat. Dip your brush into the paint and begin painting the frame using long, smooth strokes. Ensure that the paint is applied evenly and covers the entire surface. You may need to apply multiple coats for a solid, opaque finish. Allow each coat to dry before applying the next one.
Pro Tip: If you prefer a distressed or aged look, you can sand areas of the base coat once it is completely dry to reveal the primer or wood beneath.
Step 3: Adding Additional Layers
If you want to add depth and dimension to your frame, you can consider adding additional layers of paint. This technique can create a weathered or textured effect. Apply a small amount of a contrasting color to a sponge or cloth. Dab off any excess and lightly rub it onto the frame in a random pattern. Repeat this step with other colors or blending techniques until you achieve the desired effect. Allow the additional layers to dry completely.
With the base coat and additional layers complete, you have successfully painted the frame of your mirror. The next step is to protect the finish with a coat of clear sealer or varnish.
Finishing Touches and Final Steps
Once you have applied the desired number of coats of paint and allowed them to dry completely, it’s time for the finishing touches on your mirror frame.

If you want to add some extra dimension to your frame, consider using a technique called distressing. This involves lightly sanding certain areas of the frame, such as corners and edges, to create a worn and weathered look. The wood underneath will show through, giving your frame a vintage or rustic appearance.
After distressing, you may choose to apply a coat of clear protective varnish to seal the paint and protect it from moisture and scratches. This step is especially important if your mirror frame will be exposed to high humidity, such as in a bathroom.
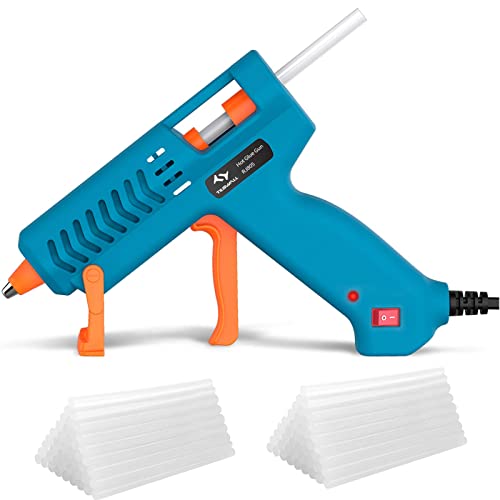
If you want to add some decorative elements to your frame, now is also the time to do so. You can glue on small embellishments, such as seashells or crystals, to give your mirror a unique and personalized touch.
Mounting the Mirror
Before ending your project, it’s essential to mount the mirror securely to its intended location. Depending on the type of mirror frame and the weight of the mirror, different methods may be used.
If your mirror frame has hooks or brackets already attached, you can use them to hang the mirror on a wall. Ensure that you use appropriate wall anchors or brackets that can support the weight of the mirror.

Alternatively, if your mirror frame does not have hooks or brackets, you may need to purchase mirror clips or adhesive hangers. These can be screwed into the wall and then used to secure the mirror in place.
Once you have mounted the mirror, step back, and admire your handiwork. Your painted frame has given your mirror a fresh and stylish new look, and it is now ready to be enjoyed in its designated space.
Remember to clean your mirror periodically to maintain its appearance and keep it looking its best.
Summary
In conclusion, transforming the frame of a mirror through paint can be an easy yet effective way to update its look and tie it into your overall décor. By following the steps outlined in this article, you can achieve a professional and polished result.
From preparation to priming to painting, each step plays a crucial role in ensuring a high-quality finish. Taking your time, choosing the right materials, and paying attention to detail will help you achieve the desired outcome.
With just a few supplies and a little bit of patience, you can turn an ordinary mirror into a stunning focal point in your home. So go ahead, grab your paintbrush, and let your creativity shine!

Meet Harrison Clayton, a distinguished author and home remodeling enthusiast whose expertise in the realm of renovation is second to none. With a passion for transforming houses into inviting homes, Harrison's writing at https://thehuts-eastbourne.co.uk/ brings a breath of fresh inspiration to the world of home improvement. Whether you're looking to revamp a small corner of your abode or embark on a complete home transformation, Harrison's articles provide the essential expertise and creative flair to turn your visions into reality. So, dive into the captivating world of home remodeling with Harrison Clayton and unlock the full potential of your living space with every word he writes.


