How to paint copper pipes

Painting copper pipes can be a great way to add a touch of style and creativity to your home. Whether you have exposed copper pipes that you want to blend with your decor or are looking to protect them from corrosion, painting them can be a simple and effective solution. In this guide, we will walk you through the steps to paint copper pipes and achieve a professional-looking finish.
Step 1: Clean the Surface
Before you start painting, it’s essential to clean the copper pipes thoroughly. Use a mixture of warm water and mild detergent to remove any dirt, grease, or grime. Scrub the surface gently with a soft brush or sponge, and rinse the pipes with clean water. Allow them to dry completely before moving on to the next step.
Tip: Wearing gloves while cleaning the pipes is recommended to avoid transferring oils from your skin onto the surface.
Step 2: Sand the Surface
In order to promote better adherence of the paint, it’s important to create a rough surface on the copper pipes. Use fine-grit sandpaper to sand the surface lightly and remove any shiny finish. Go over the entire surface, and pay extra attention to areas with existing scratches or rough patches. Once you’ve finished sanding, wipe away any dust with a clean cloth.
Step 3: Apply Primer
Priming the copper pipes is crucial as it provides a foundation for the paint and inhibits corrosion. Choose a primer that is suitable for metal surfaces and apply it evenly using a paintbrush or roller. Allow the primer to dry completely before moving on to the next step.
Note: Some primers offer the option of tinting, which can help improve the coverage and adhesion of the paint.
Following these initial steps will prepare the copper pipes for the painting process. Stay tuned for the next part of our guide, where we will cover the best techniques and materials for painting copper pipes, ensuring a long-lasting and seamless finish.

Materials required for painting copper pipes
When it comes to painting copper pipes, you’ll need to gather a few materials to ensure a successful project. Here is a list of the essential items you will need:
- Paintbrush
- Painter’s tape
- Primer suitable for metal surfaces
- High-quality paint suitable for metal surfaces
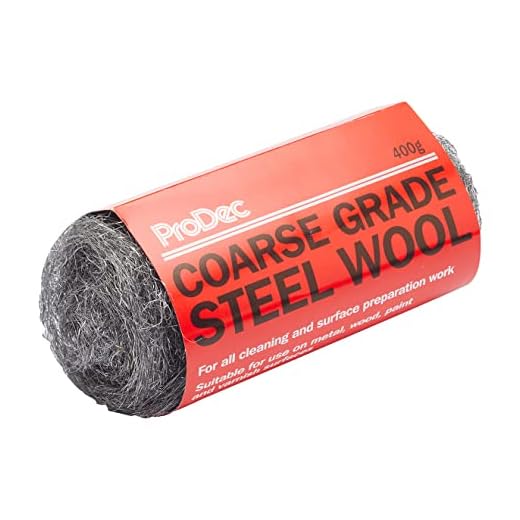
- Sandpaper or steel wool
- Rags or towels
- Paint thinner or mineral spirits (for cleaning brushes)
- Drop cloths or plastic sheets to protect surrounding areas
- Gloves and safety goggles for protection
By gathering these materials beforehand, you’ll be well-prepared to paint your copper pipes effectively and achieve the desired finish.
Copper pipe cleaning
Before painting your copper pipes, it is important to clean them properly to ensure that the paint adheres well to the surface. Here are some steps you can follow to clean copper pipes:
1. Gather the necessary materials. You will need some fine-grit sandpaper, a wire brush, a clean cloth, and a gentle cleaning solution.
2. Start by sanding the surface of the copper pipes using the fine-grit sandpaper. This will help remove any rough patches or dirt that may be present. Make sure to sand all areas evenly to achieve a smooth surface.

3. After sanding, use a wire brush to remove any remaining debris or loose particles from the pipes. The brush will also help in getting rid of any oxidation or tarnish on the surface.
4. Once the pipes are free of debris, wipe them down with a clean cloth dampened with a gentle cleaning solution. Avoid using harsh chemicals or abrasive cleaners, as they may damage the copper surface.
5. Rinse the pipes thoroughly with clean water to remove any residual cleaning solution. Make sure to dry them completely before proceeding with the painting process.
By following these steps, you can ensure that your copper pipes are properly cleaned and ready for painting. Taking the time to clean the pipes will help the paint adhere better and ensure a more professional and long-lasting finish.
Primer for copper pipes
Before you start painting your copper pipes, it’s essential to apply a primer. The primer acts as a bonding agent between the pipe’s surface and the paint, ensuring better adhesion and a longer-lasting finish. Here are some steps to follow when applying a primer to your copper pipes:

- Clean the surface: Use a clean cloth or rag to remove any dirt, dust, or grease from the copper pipes. This step is crucial to ensure that the primer adheres properly to the surface.
- Choose the right primer: Select a primer specifically designed for metal surfaces, preferably one that is also suitable for outdoor use. Check the product label for compatibility with copper materials.
- Apply the primer: Follow the manufacturer’s instructions for application. Generally, you’ll need to shake the primer can well before spraying a thin, even coat onto the copper pipes. Make sure to cover the entire surface.
- Allow drying time: Let the primer dry completely as per the manufacturer’s instructions. This cooling-off period is necessary before proceeding to the next step.
- Inspect the coated pipes: After the primer has dried, examine the pipes for any missed spots or areas that may need a second coat. If necessary, apply another thin layer of primer and allow it to dry.
Note: Applying a primer to your copper pipes is a critical step in the painting process. It enhances the overall durability and performance of the painted surface, ensuring that the color adheres evenly and stays intact for an extended period.
Choosing the right paint for copper pipes
When it comes to painting copper pipes, it is important to choose the right type of paint that will adhere well to the surface and provide long-lasting protection. Here are a few factors to consider when selecting the paint for your copper pipes:
1. Heat resistance
Copper pipes are often used to carry hot water or steam, so it is crucial to choose a paint that can withstand high temperatures without chipping or peeling. Look for paint specifically designed for heat resistance or labeled as suitable for metal surfaces exposed to high heat.
2. Rust prevention
Although copper pipes are relatively resistant to corrosion, over time they can develop spots of rust or other forms of corrosion. To prevent this, opt for a paint that has rust-inhibiting properties. This will help to protect the pipes and maintain their integrity.
Additionally, it is a good idea to choose a paint that is resistant to moisture and humidity, as copper pipes are commonly used in plumbing systems where water is present.

3. Adhesion and durabilityEnsure that the paint you choose has good adhesion to copper surfaces. It should be able to bond well and withstand any expansion or contraction of the pipes due to temperature changes.
Furthermore, select a paint that offers long-lasting durability. This will ensure that the color stays intact and the pipes remain protected for an extended period, reducing the need for frequent repainting.
In conclusion, choosing the right paint for your copper pipes involves considering heat resistance, rust prevention, adhesion, and durability. By selecting a paint that meets these criteria, you can ensure that your pipes are well-protected and maintain their aesthetic appeal.
Preparing the copper pipes for painting
Before you start painting your copper pipes, it is important to prepare them properly. This will ensure that the paint adheres well and that the finished result is smooth and long-lasting. Follow these steps to prepare your copper pipes for painting:
Clean the pipes
The first step is to clean the copper pipes to remove any dirt, grease, or other impurities. You can use a mild detergent or a copper pipe cleaning solution for this purpose. Apply the cleaning solution to a cloth or sponge and scrub the pipes thoroughly. Rinse with water and allow the pipes to dry completely.

Sand the pipes
Next, you’ll need to sand the copper pipes to create a rough surface that will help the paint adhere. Use fine-grit sandpaper or emery cloth to gently sand the pipes, moving in a circular motion. Be sure to sand all areas of the pipes evenly. Once you’re done, wipe away any dust using a clean, dry cloth.
It is important to note that copper oxide, which naturally forms on copper surfaces, may influence the adhesion of paint. If your pipes have copper oxide, you may want to remove it before sanding. You can use a copper cleaner or a mixture of vinegar and salt to remove the copper oxide. Apply the cleaner to a cloth, rub it onto the pipes, rinse with water, and dry thoroughly.
Apply a primer
Once the pipes are clean and sanded, it is a good idea to apply a primer. The primer will create a smooth surface and help the paint adhere better. Choose a primer that is suitable for metal surfaces and apply it following the manufacturer’s instructions. Allow the primer to dry completely before moving on to the next step.
Following these steps to prepare your copper pipes for painting will ensure that your finished project not only looks great but also lasts for a long time. Taking the time to properly prepare the surfaces will result in a professional-looking paint job that you can be proud of.
Applying paint on copper pipes
After thoroughly cleaning and sanding the copper pipes, it’s time to apply the paint. Here are the steps to follow:

- Prepare the paint: Choose a paint specifically designed for metal surfaces. Look for one that is rated for outdoor use and provides protection against corrosion.
- Prime the pipes: Before applying the paint, it is recommended to prime the copper pipes. Apply a thin, even coat of primer that is suitable for metals. Allow the primer to dry fully before moving on to the next step.
- Apply the paint: Use a small brush or a roller to apply the paint onto the copper pipes. Apply thin, even coats, starting from one end and working your way to the other. Make sure to cover the entire surface of the pipes. Allow the first coat to dry completely before applying additional coats if necessary.
- Apply multiple coats: Depending on the desired finish and the type of paint you are using, you may need to apply multiple coats. Follow the manufacturer’s instructions regarding drying time between coats. Applying multiple thin coats will help prevent drips and ensure a more even and durable finish.
- Let the paint cure: Once you have applied all the coats and achieved the desired finish, allow the paint to cure as per the manufacturer’s instructions. This usually takes a few hours to a couple of days. Avoid touching or disturbing the painted surface during this time.
- Check for touch-ups: After the paint has fully cured, inspect the painted copper pipes for any areas that may need touch-ups or additional coats. Use a small brush or a touch-up pen to take care of any imperfections.
Following these steps will help ensure a successful paint job on your copper pipes. Remember to read and follow all safety instructions and work in a well-ventilated area when working with paint and primer.
Tips for maintaining painted copper pipes
Once you have successfully painted your copper pipes, it is important to maintain them to ensure longevity and prevent any issues from arising. Here are some tips for maintaining painted copper pipes:
1. Inspect regularly
Regularly inspect your painted copper pipes for any signs of peeling, cracking, or chipping. If you notice any damage, it is important to address it promptly to prevent further deterioration.
2. Clean gently
To remove any dirt or grime from your painted copper pipes, gently clean them with a soft cloth or sponge using mild soap and water. Avoid using harsh chemicals or abrasive materials that could damage the paint or the copper surface.
3. Avoid impact
Avoid bumping or hitting your painted copper pipes with heavy objects or tools as this can chip or dent the paint. Be cautious when moving any items near the pipes to prevent accidental damage.
4. Prevent moisture
Ensure that the area where your painted copper pipes are located is properly ventilated and free from excessive moisture. Moisture can cause the paint to deteriorate more quickly and expose the copper surface to potential damage.
5. Use insulation
If your copper pipes are located in areas with fluctuating temperatures, such as basements or attics, consider insulating them. Insulation can help maintain a consistent temperature and prevent the pipes from being exposed to extreme heat or cold, which can also affect the paint.
6. Touch up as needed
If you notice any small chips or scratches on your painted copper pipes, touch them up using the same paint color and finish that was originally used. This will help maintain the appearance and protection of the pipes.
By following these tips, you can keep your painted copper pipes in top condition and enjoy the aesthetic benefits they bring to your space. Regular maintenance will prolong the lifespan of your paint and enhance the overall appearance of your plumbing system.


Meet Harrison Clayton, a distinguished author and home remodeling enthusiast whose expertise in the realm of renovation is second to none. With a passion for transforming houses into inviting homes, Harrison's writing at https://thehuts-eastbourne.co.uk/ brings a breath of fresh inspiration to the world of home improvement. Whether you're looking to revamp a small corner of your abode or embark on a complete home transformation, Harrison's articles provide the essential expertise and creative flair to turn your visions into reality. So, dive into the captivating world of home remodeling with Harrison Clayton and unlock the full potential of your living space with every word he writes.


