How to paint behind radiators
If you’ve ever tried to paint a room, you know that one of the most difficult and often forgotten areas to tackle is behind the radiators. It seems like a small, insignificant task, but neglecting this area can lead to a finished room that still looks incomplete.
Why is painting behind radiators so challenging? Well, radiators are typically mounted on the wall, leaving a small gap between the radiator and the wall itself. This narrow space makes it difficult to maneuver a paint roller or brush, and traditional painting techniques just won’t cut it.
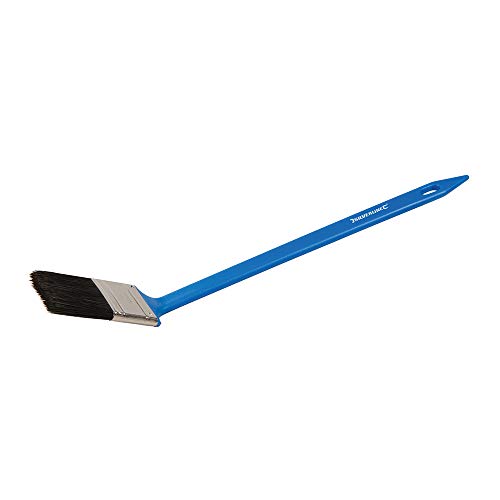
So, how can you ensure that every nook and cranny behind your radiators gets a fresh coat of paint? There are a few tips and tricks that can help you master this often-overlooked task. The first step is to properly prepare the area. Make sure you gather all the necessary tools, such as a small angled paintbrush, a mini roller, drop cloths, and painter’s tape.
Next, you’ll want to protect your floor and surrounding area from any potential paint drips or spills. Lay down drop cloths and use painter’s tape to secure them in place. This will help keep your workspace clean and minimize the risk of any accidental mess.
Preparing the painting area
Before you start painting behind radiators, it’s important to prepare the area to ensure a smooth and even finish. Follow these steps to prepare the painting area:

- Turn off the radiator: Before you begin, make sure to turn off the radiator and allow it to cool down. This will prevent any accidental burns or damage to the newly painted area.
- Clean the surface: Use a mild detergent and warm water to clean the wall behind the radiator. Remove any dirt, dust, or grease that may have accumulated over time. This will help the paint adhere better to the surface and ensure a lasting finish.
- Protect nearby objects: Cover the floor and any nearby objects or furniture with drop cloths or plastic sheets to protect them from paint splatters or drips. Ensure that the radiator itself is adequately covered to prevent any accidental paint damage or clogging.
- Apply painter’s tape: Use painter’s tape to protect the edges of the radiator and any adjoining surfaces, such as skirting boards or window frames. This will help create clean lines and ensure that the paint only goes where you want it to.
- Fill in any holes or cracks: Inspect the wall for any holes, cracks, or imperfections. Use an appropriate filler or putty to patch up these areas and smooth them out with a putty knife. Allow the filler to dry thoroughly before proceeding.
- Sand the surface: Gently sand the wall behind the radiator to create a slightly roughened surface. This will help the new paint adhere better and ensure a more even finish. Wipe away any dust with a damp cloth after sanding.
By following these steps to prepare the painting area, you’ll be well on your way to achieving a professional-looking paint job behind your radiators.
Removing the radiator cover
Before you can start painting behind your radiators, you will need to remove the radiator cover. This will allow you easy access to the wall behind the radiator and ensure a smooth and even finish. Follow these steps to properly remove the radiator cover:
Step 1: Turn off the radiator
Before you begin, make sure that your radiator is turned off and has cooled down. This will prevent any accidents or burns while you are working.
Step 2: Locate the fixings
Look for the fixings or screws that are holding the radiator cover in place. These are usually located on the top or sides of the cover. Use a screwdriver to loosen or remove these fixings.
Step 3: Lift the cover
Gently lift the radiator cover upwards or slide it towards you to remove it from the wall. Be careful not to damage the surrounding paint or wallpaper.

Once the cover is removed, you will have clear access to paint behind your radiator. Take this opportunity to clean any dust or dirt that may have accumulated on the wall before applying a new coat of paint.
| Materials needed: | Tools needed: |
|---|---|
| – Screwdriver | – Paintbrushes or rollers |
| – Soft cloth or sponge | – Drop cloths or plastic sheets |
| – Paint primer | – Paint tray |
| – Paint | – Paint scraper (if needed) |
Make sure to keep track of the fixings or screws that you removed so that you can easily reattach the radiator cover later. Once you have finished painting, wait for the paint to dry completely before reinstalling the cover. This will ensure that there are no smudges or marks on your new coat of paint.
Gathering the necessary tools
Before you start painting behind radiators, it’s essential to gather all the necessary tools to ensure a smooth and efficient process. Here’s a list of items you’ll need:
| 1. Drop cloths or plastic sheets | These will help protect your flooring and other surfaces from paint splatters. |
| 2. Paintbrushes and small rollers | You’ll need these to reach the narrow and hard-to-reach areas behind radiators. |
| 3. Paint tray | This will hold the paint as you work and provide easy access for dipping your brush or roller. |
| 4. Painter’s tape | Use painter’s tape to mask off the areas around your radiator, preventing accidental paint smears on the walls or radiators themselves. |
| 5. Small paint scraper or putty knife | To remove any old paint or loose debris before starting the painting process. |
| 6. Sandpaper or sanding sponge | These will help you smooth any rough surfaces or remove any imperfections before painting. |
| 7. Dry cloth or vacuum cleaner | To remove any dust or dirt that might interfere with the painting process. |
| 8. Primer and paint | Select a primer that is suitable for metal and a paint color of your choice. Ensure that they are compatible with the radiator’s material. |
| 9. Extension pole | If needed, an extension pole can help you reach higher areas behind your radiator without straining yourself. |
| 10. Drop light or flashlight | In case the area being painted is poorly lit, a drop light or flashlight can help you clearly see what you’re doing. |
By having all of these tools prepared and on-hand, you will be ready to tackle the challenging task of painting behind radiators with ease and efficiency.
List of required supplies
Before starting the process of painting behind radiators, it is important to gather all the necessary supplies. Here is a list of items you will need:

1. Drop cloths or plastic sheets
These will help protect your flooring and furniture from any paint splatters or spills.
2. Painter’s tape
Use painter’s tape to mask off the edges and corners of the radiators, as well as any adjacent walls or surfaces you don’t want to get paint on.
3. Small paintbrush
A small paintbrush will allow you to easily navigate the tight spaces around the radiator and paint the hard-to-reach areas.
4. Radiator paint
Radiator paint is specially designed to tolerate the high temperatures radiators can reach. Make sure to choose a paint that is heat-resistant and suitable for use on metal surfaces.

5. Roller or paint sprayer
If you prefer not to use a brush, you can use a small roller or a paint sprayer to cover larger areas behind the radiators more quickly.
6. Extension pole
If you decide to use a roller or paint sprayer, an extension pole will help you reach areas that are higher up and lessen the need for ladders or step stools.
7. Cleaning supplies
Before painting, ensure the radiator surface is clean and free of dust, dirt, and debris. You may need a cleaning solution, paint thinner, or a soft cloth for this purpose.
8. Ventilation
It is important to have proper ventilation to prevent fumes from the paint and chemicals from accumulating. Open windows or use fans to keep the area well-ventilated while working.
By gathering all of these supplies before you begin, you will be well-prepared and have a smooth painting process behind radiators.

Protecting the surrounding area
Before starting to paint behind radiators, it is essential to take the necessary precautions to protect the surrounding area. Paint accidents can happen, and prevention is key to avoid any damages.
Here are some steps to follow to ensure that the adjacent walls, flooring, and furniture are not affected during the painting process:
| Step 1: | Cover the floor with drop cloths or plastic sheets. This will protect the flooring from any drips or spills. Secure the covers with masking tape to ensure they stay in place. |
| Step 2: | Use painter’s tape to cover the edges of the radiator and any objects close to it, such as pipes or skirting boards. This will provide a clean, defined line while also protecting those surfaces from paint splatters. |
| Step 3: | Remove any movable furniture from the immediate area. If there are items that cannot be moved, cover them securely with plastic sheets or dust covers to prevent paint from reaching them. |
| Step 4: | Open windows and doors to ensure good ventilation in the room. This will help in reducing any lingering paint odor and prevent potential fumes from building up. |
| Step 5: | If you are concerned about protecting the adjacent wall during the painting process, you may consider applying painter’s tape along the edge of the radiator where it meets the wall. This will create a barrier to prevent accidental paint markings on the wall. |
By taking these simple but necessary precautions, you can confidently paint behind radiators without worrying about damaging the surrounding area.
Covering the floor and nearby objects
Before you start painting behind radiators, it is important to protect the floor and nearby objects from paint spills and splatters. Painting can be messy, and taking the proper precautions will help avoid any unwanted damage or stains.
Here’s what you need to do to cover the floor and nearby objects:

| Step | Description |
|---|---|
| 1 | Move any furniture or belongings away from the area. |
| 2 | Lay down plastic sheets or drop cloths on the floor to protect it from paint spills and drips. Make sure to cover a wide area around the radiator. |
| 3 | Tape the edges of the plastic sheets or drop cloths securely to the floor using painter’s tape. This will prevent them from shifting while you are painting. |
| 4 | Cover any nearby objects, such as furniture or fixtures, with additional plastic sheets or drop cloths. This will ensure that they are protected from paint splatters. |
| 5 | Securely tape the edges of the plastic sheets or drop cloths to the objects to keep them in place. |
By following these steps, you can minimize the chances of any accidental paint spills or splatters on the floor or nearby objects. This will make the painting process easier and ensure that only the areas behind the radiators are painted.
Choosing the Right Paint
When painting behind radiators, it is important to choose the right type of paint that will adhere properly to the surface and withstand the heat that radiators produce. Here are some factors to consider when selecting paint:
Type of Paint
Due to the high heat generated by radiators, it is crucial to choose a paint that can withstand these temperatures. Heat-resistant or high-temperature paint is specifically designed for use on surfaces exposed to heat, such as radiators. These paints are formulated to resist cracking, peeling, and discoloration caused by heat over time.
Paint Finish
When painting behind radiators, it is best to use a paint finish that is easy to clean and maintain. A gloss or semi-gloss finish is recommended because they are more resistant to moisture and can be easily wiped clean with a damp cloth. This is especially important in areas near radiators where dust and dirt can accumulate.
To ensure proper adhesion to the surface, it is essential to prepare the area before painting. This includes cleaning the surface of any dirt, dust, or grease and applying a primer if necessary. Make sure to follow the manufacturer’s instructions on the paint can for best results.

| Type of Paint | Recommended Finish |
|---|---|
| Heat-resistant or high-temperature paint | Gloss or semi-gloss |
By choosing the right paint and finish, you can ensure a long-lasting and visually appealing result when painting behind radiators. It is important to prioritize the safety and functionality of the radiators while still achieving the desired aesthetic for the room.
Selecting a paint brand and type
When painting behind radiators, it is important to choose a reliable paint brand and type that can withstand the heat and direct sunlight that radiators can produce. Here are some factors to consider when selecting the right paint for this task:
1. Heat resistance:
Radiators can generate significant heat, especially when turned on during colder months. Therefore, it is crucial to choose a paint that is specifically designed to resist high temperatures. Look for paints that have a heat resistance rating of at least 500 degrees Fahrenheit (260 degrees Celsius) to ensure that your paint job holds up well over time.
2. Durability and washability:
Since radiators can become dirty and dusty over time, selecting a paint that is durable and washable is essential. Opt for paints that have a matte or semi-gloss finish, as these finishes are easier to clean and can withstand regular wiping without losing their color or fading.
It is also beneficial to choose a paint that is resistant to yellowing and staining, as radiators can sometimes release oily substances that may affect the appearance of the paint over time.
Additionally, certain paint brands offer anti-microbial paints that can help prevent mold and mildew from developing behind radiators, which is particularly important in areas with high humidity.
3. Color selection:
When selecting a color for painting behind radiators, it is best to choose a lighter shade that can reflect heat and light rather than absorb it. Lighter colors also help make the space appear larger and create a clean and neat overall look.
Keep in mind that paint hues can change slightly when exposed to heat, so it is a good idea to test a small area first to ensure that the color remains consistent after installation.
By considering these factors, you can ensure that the paint you choose for painting behind radiators will provide long-lasting results and remain in good condition despite the temperature changes and potential staining that radiators can cause. Always follow the manufacturer’s instructions and guidelines when applying the paint to achieve the best possible outcome.


Meet Harrison Clayton, a distinguished author and home remodeling enthusiast whose expertise in the realm of renovation is second to none. With a passion for transforming houses into inviting homes, Harrison's writing at https://thehuts-eastbourne.co.uk/ brings a breath of fresh inspiration to the world of home improvement. Whether you're looking to revamp a small corner of your abode or embark on a complete home transformation, Harrison's articles provide the essential expertise and creative flair to turn your visions into reality. So, dive into the captivating world of home remodeling with Harrison Clayton and unlock the full potential of your living space with every word he writes.


