How to make pine look like oak


Looking to transform your pine furniture into an oak-like piece? Unleash your creativity and learn the art of wood finishing. With some simple techniques, you can achieve the desired oak appearance and add a touch of elegance to your furniture.
If you have pine furniture that clashes with the rest of your wood finishes, don’t worry. Pine, known for its light color and grain pattern, can be beautifully transformed to mimic the rich tones and distinctive grain of oak wood. This process requires some patience and attention to detail, but the results will undoubtedly be worth it.
Before diving into the process, it’s crucial to prepare the surface properly. First, remove any existing finishes or sealants from the pine furniture using sandpaper or a paint stripper solution. Once the surface is bare, proceed with a thorough sanding to ensure a smooth and even base.

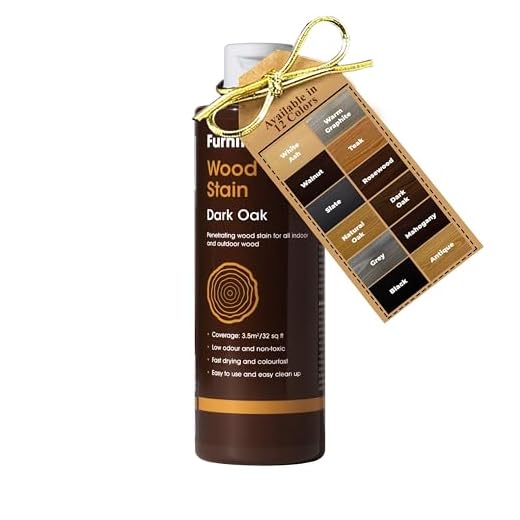
After preparing the surface, the next step is to apply a wood stain in a shade that resembles oak. Look for stains specifically designed to mimic oak or experiment with different tones to achieve your desired outcome. Apply the stain evenly with a brush or a cloth, following the wood grain. Let the stain penetrate for the recommended time, and then wipe off any excess with a clean cloth.
Choosing the right paint for a realistic oak finish
When trying to make pine look like oak, one of the most important steps is choosing the right type of paint that can mimic the natural grains and tones of oak wood. To achieve a realistic oak finish, consider the following factors when selecting a paint:
1. Look for an acrylic or oil-based paint: Acrylic or oil-based paints are great options for achieving a realistic oak finish. They provide better adhesion and durability compared to other types of paint.
2. Opt for the right color: Oak wood has a distinct warm tone, so it’s important to choose a paint color that can reproduce that appearance. Look for paints labeled specifically as “oak” or “golden oak” to get a shade that closely matches the natural oak wood.
3. Get a paint with a satin or semi-gloss finish: Oak wood typically has a slight luster to it, so using a paint with a satin or semi-gloss finish can help replicate that characteristic. These finishes also provide durability and are easier to clean if needed.
4. Consider purchasing paint samples: To ensure that the chosen paint color truly resembles oak, purchase small samples and test them on a small section of the pine wood. This will allow you to see how the paint looks on the surface and make adjustments if necessary.
5. Apply multiple layers: To achieve a realistic oak finish, apply multiple thin layers of paint rather than one thick coat. This will help build up the color and texture, mimicking the natural grains of oak wood.
By carefully selecting the right paint, you can achieve a realistic oak finish and transform your pine wood into a desirable oak-like appearance. Remember to always follow the manufacturer’s instructions for best results and enjoy the process of turning ordinary pine into the look of beautiful oak!
Consider the wood grain
One important factor in making pine look like oak is considering the wood grain. Oak typically has a prominent grain pattern with visible rays and cathedrals, while pine has a more subtle grain pattern.
To give pine a more oak-like grain, you can use a faux wood graining technique. This involves creating grain lines and patterns on the surface of the pine to mimic the appearance of oak. You can use various tools and materials like a graining comb or a wire brush to achieve the desired grain pattern.
When creating the faux graining, it is important to study real oak wood and understand its unique grain patterns. This will help you recreate the look more accurately on pine. Pay attention to the direction of the grain lines, the size and shape of the cathedrals, and the overall flow of the grain.
In addition to creating the grain pattern, you can also use colored stains or glazes to simulate the color of oak. Look for stains or glazes that match the desired oak color tone and apply them evenly on the pine surface. Apply multiple coats if necessary to achieve the desired color depth.
Note: It is important to prepare the pine surface properly before applying any stains or glazes. Sand the surface smoothly and remove any existing finish or paint. This will ensure that the stain or glaze adheres properly and gives a realistic oak appearance.
Remember: While these techniques can help you achieve the look of oak on pine, keep in mind that pine is still a different type of wood with its own unique characteristics. The final result may not be as close to oak as using real oak wood, but with careful crafting and attention to detail, you can definitely create a convincing oak-like appearance on pine.
Use the right base color
Pine has a distinctive yellowish-brown color, which is quite different from Oak’s warm golden hues. To make pine look like oak, it’s important to choose the right base color for your project.
The base color is what will be visible on the surface of your pine, so you’ll want to select a paint or stain that closely matches the desired color of oak. Look for a high-quality wood stain or paint in a shade that matches the oak finish you’re aiming for.
Consider your options
There are several options when it comes to selecting a base color for your pine. If you prefer a natural wood look, you can use a wood stain that mimics the color of oak. Look for stains specifically designed to mimic oak or consult with a professional paint store to find the closest match.
If you prefer a painted finish, there are also options available. You can choose a paint color that matches the tone of oak or go for a lighter or darker shade, depending on the look you are trying to achieve.
Test before committing
Before applying the base color to the entire piece of pine, it’s always a good idea to test it on a small, inconspicuous area. This way, you’ll be able to see how the color looks on the pine and make any necessary adjustments.
Remember, the base color will have a significant impact on the overall appearance of your pine. Taking the time to choose the right color and test it out beforehand will ensure that your pine ends up looking like oak, seamlessly blending with other oak furniture or elements in your space.
Apply multiple layers for depth
One of the key techniques to make pine look like oak is to apply multiple layers of paint or stains. This will help create depth and variation in color, which is a prominent characteristic of oak wood.
Start by applying a base coat of light-colored paint or stain. This will serve as the foundation for the final look. Make sure to evenly coat the entire surface of the pine wood.
After the base coat has dried, it’s time to add the second layer. Choose a darker shade of paint or stain that closely resembles the color of oak wood. Apply this layer using a brush or a sponge, focusing on creating texture and mimicking the grain pattern of oak.
Let the second layer dry completely before moving on to the next step. Adding additional layers will intensify the depth and richness of the faux oak finish.
If desired, you can apply a third and even fourth layer to achieve a more authentic look. Use different shades of brown and experiment with blending techniques to create a realistic oak wood appearance.
To enhance the final result, consider using a wood graining tool or a brush to create subtle lines and knots that are characteristic of oak woodgrain. These details will add further visual interest and contribute to the overall illusion of oak wood.
Finally, once all the layers have dried, protect the finish with a clear topcoat. This will ensure durability and longevity of your faux oak finish.
By following these steps and applying multiple layers with attention to detail, you can transform pine wood surfaces into stunning faux oak creations that beautifully resemble the warmth and richness of oak wood.

Finish with a protective clear coat
Once the transformation is complete and your pine has been successfully made to look like oak, it is important to apply a protective clear coat to ensure the longevity and durability of the finish. This clear coat will not only add a professional look to your project but also provide a layer of protection against scratches and stains.
The first step is to gently sand the surface of the wood with a fine-grit sandpaper to create a smooth and even surface. This will help the clear coat to adhere properly to the wood. After sanding, make sure to remove any dust or debris using a clean cloth or vacuum cleaner.
Next, choose a clear coat that is specifically designed for wood surfaces. There are various options available, such as polyurethane, varnish, or lacquer. Each type has its own advantages and finish. Make sure to read the manufacturer’s instructions and choose a clear coat that is compatible with the type of finish you desire.
You can apply the clear coat using a brush, roller, or spray gun, depending on your preference and the size of the project. Start by applying a thin and even layer of clear coat, following the grain of the wood. Allow the first coat to dry completely, which can take a few hours or overnight, before applying additional coats. It is recommended to apply multiple thin coats rather than one thick coat to achieve a more professional and even finish.
Once the desired number of coats has been applied, allow the clear coat to cure for the recommended time indicated on the product’s instructions. This will ensure that the clear coat has fully dried and hardened, providing maximum protection to your pine-turned-oak piece.
Tips for applying a clear coat:
- Work in a well-ventilated area to ensure proper air circulation and prevent the inhalation of fumes.
- Apply the clear coat in long, smooth strokes to avoid streaks and bubbles.
- Avoid touching the surface while the clear coat is drying to prevent leaving fingerprints or marks.
- If desired, you can lightly sand the surface between coats using a fine-grit sandpaper to remove any imperfections and achieve an even smoother finish.
- After the final coat has dried and cured, gently buff the surface with a clean cloth to enhance the shine and smoothness of the finish.
Conclusion
By following these steps and applying a protective clear coat, you can successfully transform pine wood to look like oak. This process not only enhances the visual appeal of the wood but also provides durability and protection for years to come.


Meet Harrison Clayton, a distinguished author and home remodeling enthusiast whose expertise in the realm of renovation is second to none. With a passion for transforming houses into inviting homes, Harrison's writing at https://thehuts-eastbourne.co.uk/ brings a breath of fresh inspiration to the world of home improvement. Whether you're looking to revamp a small corner of your abode or embark on a complete home transformation, Harrison's articles provide the essential expertise and creative flair to turn your visions into reality. So, dive into the captivating world of home remodeling with Harrison Clayton and unlock the full potential of your living space with every word he writes.


