How to make angel wings
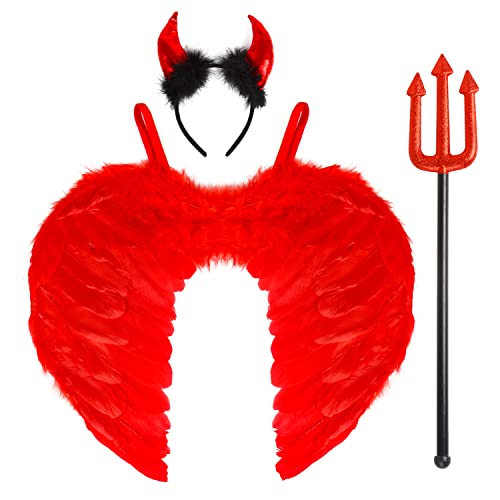
Angels are known for their ethereal beauty and their stunning wings. Whether you are crafting a costume for a cosplay event, a Halloween party, or simply want to channel your inner angel, making your own angel wings can be a fun and creative project. In this article, we will guide you through the process of making your own angel wings, using simple materials and easy steps.
Step 1: Gather Your Materials
Before you start making your angel wings, make sure you have all the necessary materials. You will need some wire or coat hangers as the base for the wings, nylon stockings or tights for the wings’ fabric, feathers, scissors, craft glue, and ribbon or elastic to attach the wings to your shoulders.
Step 2: Create the Base
Start by shaping the wire or coat hangers into the desired wing shape. You can make them large or small, wide or narrow, depending on your preference. Bend and twist the wire to form an outline of the wings. This will serve as the basic frame for your angel wings.

Step 3: Adding the Fabric
Once you have the wire frame ready, it’s time to add the fabric. Take a pair of nylon stockings or tights and cut them open. Stretch one leg of the stockings over each side of the wire frame, making sure that it covers the entire wing shape. Use craft glue or a needle and thread to secure the fabric in place.
Step 4: Decorate with Feathers
Now comes the fun part – decorating your angel wings with feathers. Take your feathers and apply craft glue to the quill end. Place the feathers along the fabric, starting from the bottom of the wing and working your way up. You can choose to cover the entire wing in feathers or create a feather pattern of your choice. Let the glue dry completely.
Step 5: Attach the Wings

Once the embellishments are dry, it’s time to attach the wings to your shoulders. Simply use ribbons or elastic straps and tie them to the top section of the wire frame. Adjust the wings to sit securely and comfortably on your back.
With these easy steps, you can create your own beautiful and unique angel wings. Customize them with different fabric colors, feather arrangement, or even add some glitter for extra sparkle. Whether you are dressing up for a special occasion or simply want to spread some angelic vibes, your handmade angel wings will surely make you stand out!
Making Angel Wings: An Easy Step-by-Step Guide
If you’re looking to create your very own angel wings for a costume or for decoration, we’ve got you covered! With a few simple materials and our easy-to-follow step-by-step guide, you’ll have beautiful angel wings in no time.
Materials You’ll Need:
- White cardboard or foam board
- White feathers
- Glue gun and glue sticks
- Scissors
- Elastic band
- Decorative embellishments, such as glitter or ribbons (optional)
Step 1: Design your Wings
Start by deciding on the size and shape of your angel wings. You can draw a wing pattern on the cardboard or foam board and cut it out using scissors. Make sure to create two identical pieces for each wing.
Step 2: Attach the Feathers
Using a glue gun, carefully attach the feathers to one side of each wing piece, starting from the outer edges and working your way inwards. Make sure to cover the entire area, leaving no gaps. Repeat this process for the second wing.

Step 3: Reinforce and Connect the Wings
To add durability to your wings, you can reinforce them by attaching another layer of cardboard or foam board to the back. Use the glue gun to secure it in place. Once both wings are reinforced, attach them together at the center using a strip of cardboard or foam board.
Step 4: Attach the Elastic Band
Cut two small holes near the top of each wing and thread the elastic band through them. Adjust the length of the elastic to comfortably fit around your shoulders, and then tie a knot to secure it in place.
Step 5: Add Additional Decorations (optional)
If desired, you can enhance the look of your angel wings by adding decorative embellishments. You can use glitter, ribbons, or any other materials that fit your desired look. Simply use the glue gun to attach these decorations to the feathers or base of the wings.
And there you have it! You’ve successfully created your very own angel wings. Whether you’re dressing up for a costume party or adding an ethereal touch to your home decor, these wings are sure to impress. So spread your wings and embrace your inner angel!
Gathering Materials and Tools
Before you embark on making your own angel wings, you’ll need to gather a few essential materials and tools. Here’s a list of everything you’ll need:

Materials:
- Large sheets of cardboard
- Pencil
- Scissors
- Craft feathers
- Glue gun
- Elastic or ribbon
- Gesso or white paint
- Acrylic paint
- Paintbrushes
- Gems, glitter or other embellishments (optional)
Tools:
- X-ACTO knife
- Measuring tape or ruler
- Low-temperature glue gun
- Paint palette or disposable plates
- Newspaper or a large drop cloth for protection
Make sure you have all these materials and tools ready before you start making your angel wings. It’s important to have everything prepared to ensure a smooth and enjoyable crafting process. Once you’ve gathered everything, you’re ready to move on to the next step of creating your heavenly angel wings!
Creating the Base Structure
To make angel wings, you will need to start by creating the base structure that will support the feathers. The base structure provides the shape and stability for the wings. Here is a step-by-step process to create the base structure:
| Materials: | A pair of wire hangers, Wire cutters, Pliers, Duct tape, Foam sheets or cardboard |
| Step 1: | Start by taking two wire hangers and unraveling them with the help of pliers. Straighten the wires as much as possible. |
| Step 2: | Using the wire cutters, remove the hooks from the hangers. We will only need the straight wires. |
| Step 3: | Take one wire and form a loop at the top, creating the top edge of the wing. The size of the loop will depend on how big you want the wings to be. |
| Step 4: | Repeat step 3 with the second wire, ensuring that the loop is approximately the same size. |
| Step 5: | Bend the wires to create the desired shape of the wings. You can bend the wires to create curves or angles, depending on the angelic look you want to achieve. |
| Step 6: | Use duct tape to secure the wires together at the center, where the loops meet. Wrap the duct tape tightly around the intersecting wires to provide stability. |
| Step 7: | You can reinforce the base structure further by attaching foam sheets or pieces of cardboard to the back of the wings. These materials will add more support and make the wings sturdier. |
Now that you have created the base structure, you can move on to adding the feathers to complete your angel wings.
Adding Feathers to the Wings
Once you have your base structure for the angel wings, it’s time to add the feathers. Adding feathers will give your wings a more realistic and angelic appearance. Here are the steps to follow:
Step 1: Gather Your Feathers
First, gather a variety of feathers in different sizes and shapes. You can find feathers at your local craft store or order them online. Look for feathers that are lightweight and preferably white or off-white in color, as these will give your wings a more angelic look.

Step 2: Prepare the Feathers
Before attaching the feathers, you may want to trim them to your desired length using scissors. Consider the wing layout you want to achieve and trim the feathers accordingly. Make sure to keep a few longer feathers at the center for a natural, layered effect.
Step 3: Attach the Feathers
You can attach the feathers to the wings using a strong adhesive such as hot glue or fabric glue. Begin by applying a thin line of glue along the stem of each feather. Press the feathers firmly onto the wings, starting from the wingtip and working your way towards the center. Continue attaching feathers until the entire wingspan is covered.
Step 4: Layer the Feathers
For a more realistic look, consider layering the feathers. Start by attaching the longer feathers at the center. Then, add shorter feathers on top, slightly overlapping the longer ones. This layering effect creates depth and gives the wings a realistic appearance.
Step 5: Finishing Touches
Once all the feathers are attached, take a step back and assess the overall look of the wings. Adjust the feathers as needed to achieve the desired shape and symmetry. You can also add smaller feathers or embellishments, such as glitter or rhinestones, for extra sparkle and detail.
By following these steps, you can create a pair of stunning angel wings that will surely make you stand out at any costume party or event.

Decorating and Finishing Touches
Once you have created the base structure for your angel wings, it’s time to add some beautiful decorations and finishing touches to bring them to life. Here are some ideas to help you enhance the visual appeal of your angel wings:
1. Glitter and Sequins
Add a touch of sparkle to your angel wings by using glitter and sequins. Sprinkle glitter over the wings or use a glue stick to create a design with sequins. Let your creativity guide you as you make your angel wings sparkle.
2. Feathers
To give your angel wings a more realistic and textured look, you can add feathers. Use a hot glue gun to glue feathers onto the backside of the wings, starting from the top and layering them down. Consider using different sizes and types of feathers to create dimension and variety.
3. Ribbons and Bows
Another way to enhance the aesthetics of your angel wings is by using ribbons and bows. Attach ribbons along the edges of the wings or create a bow at the center to give them an elegant touch. Choose ribbons that complement the color scheme of your wings.
4. Paint and Glitter Glue
If you want to add more color to your angel wings, use fabric paint or glitter glue. Paint delicate designs or create patterns using different colors to make your wings stand out. Gently brush glitter glue along the edges to create a whimsical effect.

5. Gemstones and Beads
Incorporate gemstones and beads to add a touch of elegance and a 3D effect to your angel wings. With the help of a hot glue gun, carefully attach gemstones or beads to specific parts of the wings, such as the centerpiece or along the feather-like structures.
Remember to let your creativity shine and personalize your angel wings to your liking. Decorating and finishing touches are essential in transforming your DIY angel wings into a beautiful and eye-catching accessory.
Final Tips and Tricks
Here are some final tips and tricks to help you make the best angel wings:
1. Choose the Right Materials
When making angel wings, it’s important to choose the right materials. Opt for lightweight materials such as feather boas or thin fabric that will give your wings a delicate and ethereal look. Make sure the materials are also sturdy enough to withstand wear and tear.
2. Plan Your Design
Before starting your angel wings project, take some time to plan out your design. Think about the size and shape you want your wings to be. Consider any specific details or embellishments you want to add, such as glitter or rhinestones. Having a clear plan will help you stay organized and achieve the desired look.
3. Use Templates or Stencils
If you’re not confident in your ability to freehand draw the shape of the angel wings, consider using templates or stencils. You can easily find printable templates online or create your own by tracing the outline of a large object, such as a platter or cardboard cutout. Using templates or stencils will ensure that your wings have a symmetrical shape.
4. Take Breaks and Patience
Making angel wings can be a time-consuming process, so be sure to take breaks and be patient with yourself. Rushing through the process can result in mistakes or a final product that doesn’t meet your expectations. Take your time, step back when you need to, and enjoy the process of creating something beautiful.
5. Add Finishing Touches
Once you’ve made the base of your angel wings, don’t forget to add some finishing touches. You can add extra layers of feathers or fabric to give your wings more dimension. Consider embellishing them with glitter, sequins, or even LED lights to make them truly stand out. The finishing touches will enhance the overall look and add a touch of personalization.
By following these final tips and tricks, you’ll be well on your way to creating stunning angel wings. Have fun and let your creativity soar!


Meet Harrison Clayton, a distinguished author and home remodeling enthusiast whose expertise in the realm of renovation is second to none. With a passion for transforming houses into inviting homes, Harrison's writing at https://thehuts-eastbourne.co.uk/ brings a breath of fresh inspiration to the world of home improvement. Whether you're looking to revamp a small corner of your abode or embark on a complete home transformation, Harrison's articles provide the essential expertise and creative flair to turn your visions into reality. So, dive into the captivating world of home remodeling with Harrison Clayton and unlock the full potential of your living space with every word he writes.


