How to make a roman blind with lining

Do you want to add a touch of elegance and style to your windows? Look no further! Making a roman blind with lining is a great way to achieve a sleek and classy look while also providing privacy and insulation. In this article, we will guide you step by step through the process of creating your very own roman blind.
Step 1: Gather Your Materials
The first step in making a roman blind is to gather all the necessary materials. You will need:
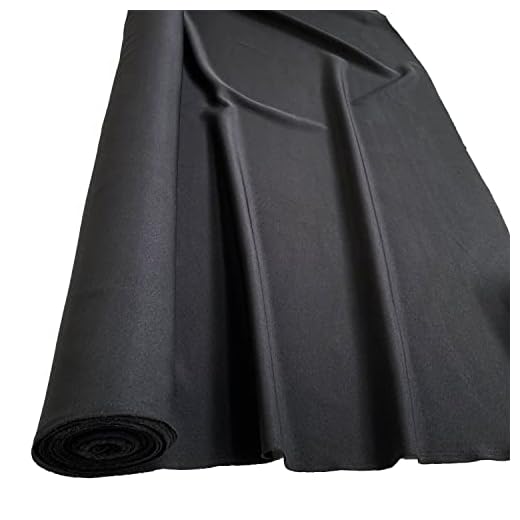
- Fabric for the blind
- Lining fabric
- Roman blind tape
- Roman blind cord
- Roman blind rings
- Cleats and a cleat hook
- Velcro
- Sewing machine
- Scissors and measuring tape
- Pins
- Ironing board and iron
Step 2: Measure and Cut
Next, measure your window and determine the final dimensions of your blind. Add allowances for seams and hems. Once you have your measurements, cut the fabric and lining accordingly. Remember to cut the lining fabric slightly smaller than the main fabric to allow for the blind to fold neatly.
EMphasize for a UPScale finished lookStep 3: Sew the Buttons and Cords in Place
Now it’s time to sew the buttons and cords. Fold the fabric in half lengthwise and sew together the top edge of the main fabric and lining. Attach the buttons at regular intervals along the seam, and the blind rings to the lining. Thread the cords through the rings, ensuring they hang freely at the bottom of the blind.
Concluding Key Takerying to our embark project.
With a bit of patience and the right materials, you can create your own custom roman blind with lining. By following these steps, you’ll be able to achieve a professional-looking result and transform your windows into a focal point of your room. So why wait? Start your blind-making adventure today!
Learn how to make a beautiful roman blind
If you’re looking to add a touch of elegance to your home decor, a roman blind can be a perfect choice. Not only does it provide privacy and light control, but it also adds a modern and stylish look to any room. By making your own roman blind, you have the freedom to choose the fabric and customize it to fit your unique style and space.

Gather the materials
Before getting started, gather all the necessary materials. You will need the following:
- Fabric for the front of the blind
- Lining fabric
- Wooden batten
- Thin wooden rods
- Cord
- Roman blind ring tape
- Eye screws
- Ringblind base bar
- Velcro tape
- Thread
- Scissors
- Measuring tape
- Pins
- Sewing machine (optional)
Measure and cut the fabric
Start by measuring the window where you plan to hang the blind. It’s important to measure both the width and length, adding a few inches for seam allowances and finished hems. Once you have your measurements, cut the front fabric and lining fabric to the desired size.
Pro tip: If you’re using a patterned fabric, make sure to align the pattern on both the front fabric and lining fabric for a cohesive look.
Sew the fabrics together and add the rods
With the right sides of the fabric together, sew the front fabric and lining fabric along the sides, leaving the top and bottom open. Press the seams open. Then, sew the rod channels by folding and stitching parallel lines across the blind, evenly spaced apart. Slide the thin wooden rods into the rod channels, allowing the blind to fold neatly when raised.
Attach the roman blind tape and eye screws
Attach the roman blind tape along the top of the blind, sewing it securely. This tape will hold the cord that controls the movement and positioning of the blind. Next, attach eye screws to the wooden batten and base bar at the desired intervals. These eye screws will guide the cords and keep the blind in place when raised or lowered.
Attach the blind to the window
Finally, attach the velcro tape to the top of the wooden batten and to the window frame. This will securely hold the blind in place. Hang the blind by inserting the wooden batten into the brackets, making sure it is level. Thread the cords through the eye screws and attach the ringblind base bar. Test the blind to ensure it operates smoothly before finishing.
With these simple steps, you can create your own beautiful and functional roman blind. Enjoy the satisfaction of a DIY project and the enhanced beauty and functionality it brings to your home.
Add a touch of elegance to your home
When it comes to transforming the look and feel of your home, incorporating roman blinds with lining can add a touch of elegance that instantly elevates your interior aesthetic. Roman blinds have long been a popular choice for window coverings, thanks to their clean lines, versatility, and ability to create a refined and elegant atmosphere.
By adding a lining to your roman blinds, you not only enhance their functionality but also lend a glamorous and luxurious feel to any room. The lining serves several purposes, including preventing light from filtering through the blinds, providing thermal insulation, and ensuring privacy. This means you can enjoy complete darkness when you want to sleep or watch a movie, and also reduce heat loss during colder months.
Opting for a contrast lining can add an interesting pop of color or texture to your roman blinds. Whether you choose a complementary shade or opt for a bold statement color, this small detail can make a big impact on the overall design of your window coverings.
The addition of a lining also allows for more fabric choices, giving you an opportunity to play with different textures and patterns to perfectly complement your existing decor or add a stylish twist to your space. The layered effect created by the lining and main fabric adds depth and dimension to the blinds, making them appear more luxurious and visually appealing.
To further enhance the elegance of your roman blinds with lining, consider adding decorative trims or embellishments such as fringes, braids, or pom-pom trim. These little details can take your blinds from ordinary to extraordinary, adding a touch of sophistication and personality to your window treatments. However, remember to choose trims that complement the overall style and color scheme of your space, ensuring a cohesive look.
Conclusion
By adding lining to your roman blinds, you can create a stylish and refined look for your home. Choosing the right fabric, contrasting or complementing linings, and adding decorative trims can transform your window coverings from functional to fabulous. Whether your style is traditional, modern, or somewhere in between, roman blinds with lining can elevate the overall elegance and sophistication of any room.
Create a stylish and functional window dressing
Window dressings are an important element in any room’s decor, providing both style and functionality. A well-designed window dressing, such as a roman blind with lining, can add a touch of elegance to your space while also offering good insulation and privacy.
Choosing the right fabric
The first step in creating a stylish and functional window dressing is to choose the right fabric. Consider the color scheme and overall theme of your room, as well as the level of privacy and light control you desire. For a more formal look, opt for heavy and luxurious fabrics such as silk or velvet. If you prefer a more casual and relaxed feel, lighter fabrics like cotton or linen are a great choice.
When choosing fabric, keep in mind the dimensions of your window and how much material you will need to create the roman blind. Measure the width and length of the window, taking into account any extra fabric needed for the folds and hems.
Add a lining for functionality
Adding a lining to your roman blind is not only a decorative touch but also adds functionality. The lining can help to protect the fabric from fading due to direct sunlight and provide insulation to your room, keeping it cooler in the summer and warmer in the winter.
You can choose from a variety of lining options, such as cotton or blackout lining, depending on your needs. Cotton lining is a great choice if you want to maintain a soft and translucent look, while blackout lining is ideal for those who prefer complete darkness during sleep or for rooms that require extra privacy.
| Dressing Option | Pros | Cons |
|---|---|---|
| Roman Blind with Lining | – Provides insulation | – Requires more fabric and time to make |
| Curtains | – Versatile style options | – Can block natural light |
| Shutters | – Durable and low-maintenance | – Limited control over light and privacy |
| Blinds | – Easy to clean and operate | – Limited decorative options |
By considering fabric choices and adding a lining, you can create a stylish and functional window dressing that perfectly complements your room’s decor while also providing the desired level of privacy and light control.


Meet Harrison Clayton, a distinguished author and home remodeling enthusiast whose expertise in the realm of renovation is second to none. With a passion for transforming houses into inviting homes, Harrison's writing at https://thehuts-eastbourne.co.uk/ brings a breath of fresh inspiration to the world of home improvement. Whether you're looking to revamp a small corner of your abode or embark on a complete home transformation, Harrison's articles provide the essential expertise and creative flair to turn your visions into reality. So, dive into the captivating world of home remodeling with Harrison Clayton and unlock the full potential of your living space with every word he writes.


