How to install wall lights
Wall lights are a great way to add style and functionality to any room in your home. Whether you want to brighten up a dark hallway or create a cozy atmosphere in your living room, installing wall lights can transform the look and feel of the space. While the task may seem intimidating, it is actually quite straightforward and can be done by anyone with a little bit of knowledge and some basic tools. In this article, we will provide you with a step-by-step guide on how to install wall lights.
Before you begin the installation process, it is important to choose the right wall lights for your space. Consider the style and design of your room, as well as the intended purpose of the lights. Are you looking for something sleek and modern, or do you prefer a more traditional and ornate look? Do you want a directional light that can be adjusted, or a soft and diffused glow?
Once you have selected the perfect wall lights for your room, it’s time to gather the necessary tools and materials. You will need a screwdriver, wire connectors, a voltage tester, electrical tape, and of course, the wall lights themselves. It is important to cut off the power supply to the area where you will be installing the lights to ensure your safety.
Choosing the Right Wall Lights for Your Home
Wall lights can be a great addition to any room, providing both functionality and style. Whether you’re looking for a light fixture to illuminate a specific area or to enhance the overall ambiance of your space, selecting the right wall lights is essential. Here are some factors to consider when choosing wall lights for your home:
1. Purpose
Before purchasing wall lights, think about their purpose in the room. Do you need them for general lighting or for task lighting? Wall lights can provide general ambient lighting or can be strategically placed to provide focused lighting for specific activities like reading or working.

2. Style
The style of the wall lights should complement the overall décor of your room. Whether your home has a modern, minimalist, or traditional aesthetic, there are wall lights available in various designs and finishes to suit your style. Consider the materials, colours, and shapes that will work best with your existing interior design.
3. Size and Placement
Choose wall lights that are appropriately sized for your space. Consider the scale of the room and the location where you plan to install the lights. Wall lights that are too small may seem insignificant, while oversized fixtures can overwhelm the room. Also, think about the height at which the lights will be placed to ensure they provide the desired illumination.
4. Light Bulbs
Consider the type of light bulbs that can be used with the wall lights. Some fixtures are designed for specific bulbs, such as incandescent, LED, or fluorescent. Keep in mind the brightness, colour temperature, and energy efficiency of the bulbs to create the desired lighting effect.
5. Installation and Wiring
Before purchasing wall lights, consider the installation process and any necessary wiring. Some fixtures may require professional installation, while others can be easily installed with basic tools. Additionally, check if the wiring can accommodate dimmer switches if that is a feature you desire.
Overall, choosing the right wall lights involves considering their purpose, style, size, light bulbs, and installation requirements. By selecting the appropriate wall lights for your home, you can create a well-lit and visually pleasing space that reflects your personal style.
Factors to Consider Before Installation
Before installing wall lights in your home, there are several important factors that you should consider to ensure the best results. These factors include the location, wiring, power source, and finish of the wall lights.
| Factor | Description |
|---|---|
| Location | Choose the ideal location for the wall lights based on the intended purpose and functionality. Consider factors such as height, angles, and proximity to other light sources. |
| Wiring | Ensure that proper wiring is in place before installing wall lights. This can involve running electrical wires through walls or utilizing existing wiring. Hiring a professional electrician may be necessary. |
| Power Source | Determine the power source for the wall lights. This can include hardwiring them to your home’s electrical system or using battery-powered options. Consider the convenience and practicality of each option. |
| Finish | Select a finish for the wall lights that complements the overall aesthetic of the room. Consider the existing decor, color scheme, and style to ensure a cohesive look. |
By carefully considering these factors before installation, you can make informed decisions that will ultimately result in the successful installation and functionality of your wall lights.
Tools and Materials You Will Need
Installing wall lights requires the use of a few tools and materials to ensure the process goes smoothly. Here are the essential items you will need:
- Electric drill: You will need an electric drill to create holes in the wall for mounting the light fixture.
- Hole saw or spade bit: This tool is necessary to create a hole that matches the size of the wall light.
- Screwdriver: A screwdriver will be needed to secure the mounting bracket and attach the light fixture.
- Wire strippers: These are necessary for exposing the wires and making connections.
- Voltage tester: It is crucial to have a voltage tester to ensure the electrical supply is turned off before working on the wiring.
- Wire nuts: These are used for joining wires securely and safely.
- Wire connectors: You will need these to connect the wires to the light fixture.
- Measuring tape: A measuring tape will be handy for ensuring precise placement of the wall lights.
- Pencil: Use a pencil to mark the placement of the wall lights on the wall before drilling.
- Safety glasses: It is crucial to protect your eyes during the installation process.
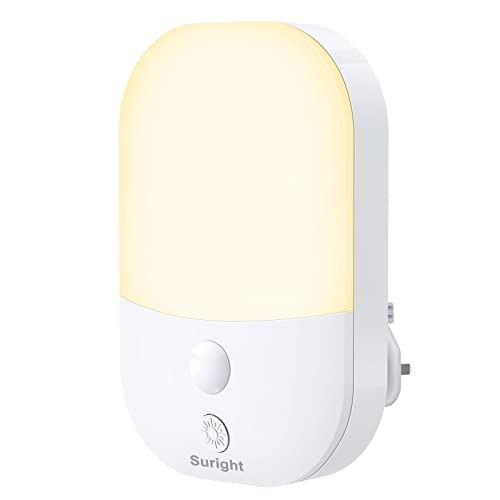
- Wall lights: Finally, you will need the wall lights themselves. Ensure you have chosen the appropriate style and type for your space.
Having these tools and materials ready before you begin the installation will make the process easier and more efficient.
Step-by-Step Guide to Installing Wall Lights
Wall lights can add a touch of elegance and functionality to any room. Whether you want to brighten up a hallway, create a cozy ambiance in the bedroom, or highlight a piece of artwork, installing wall lights is a simple DIY project that can be completed in a few easy steps. Follow this guide to learn how to install wall lights yourself.

Tools and Materials You Will Need:
- A wall light fixture
- A screwdriver (either a Phillips or flat-head, depending on the fixture)
- A voltage tester
- A wire stripper
- A utility knife
- A wire cutter
- Two wire nuts
- An electrical junction box
- Bolts or screws for attaching the fixture to the wall
- A pencil or marker
- A tape measure
Step 1: Turn Off the Power
Start by turning off the power to the room where you will be installing the wall lights. Locate the circuit breaker for the room and switch it off. Use a voltage tester to ensure that the power is truly off before proceeding.
Step 2: Determine the Location
Decide where you want to install the wall lights. Use a tape measure and a pencil or marker to mark the spots on the wall where the fixtures will be positioned.
Step 3: Install the Electrical Junction Box
Using a utility knife, carefully cut a hole in the wall at each of the marked spots large enough to accommodate the electrical junction box. Install the boxes according to the manufacturer’s instructions, making sure they are securely attached to the wall.
Step 4: Connect the Wires
Remove the cover plate from the electrical junction box. Inside, you will find the wires. Use a wire stripper to remove about half an inch of insulation from the end of each wire. Connect the black wire from the light fixture to the black wire in the junction box, and the white wire from the fixture to the white wire in the box. Twist the exposed ends of the wires together and secure them with wire nuts. Repeat this process for any additional wires, such as a ground wire.
Step 5: Attach the Fixture to the Wall
Align the mounting plate on the back of the wall light fixture with the holes in the electrical junction box. Use bolts or screws to attach the fixture to the wall, tightening them securely.

Step 6: Install the Light Bulbs
Finally, install the light bulbs into the wall light fixture according to the manufacturer’s instructions. Make sure they are securely in place.
That’s it! You have successfully installed your wall lights. Once you have completed the installation, restore power to the room and enjoy the new ambiance and functionality that your wall lights provide.
Tips for Proper Wiring and Junction Box Installation
- Before starting any wiring work, make sure to turn off the power to the circuit from the main electrical panel.
- Check local building codes and regulations to ensure compliance before proceeding with the installation.
- Choose the appropriate type and size of electrical wire suitable for the wall light installation project. Consider the wattage of the light and the distance from the power source.
- Ensure that the junction box you are using is suitable for installing the wall light and is rated for the proper amperage.
- Properly size the junction box to accommodate the wiring and any necessary connectors. It should provide enough room for all the wires and connections without overcrowding.
- Position the junction box at the proper height and align it with the desired location for the wall light. Use a level to ensure it is straight and properly aligned.
- Carefully strip and splice the wires, ensuring that each is securely connected and there are no loose ends.
- Use wire nuts to secure the connections and protect them from exposure. Ensure that electrical tape is used to cover any exposed wire nuts.
- Wrap each individual wire with electrical tape to provide insulation and prevent any accidental wire contacts.
- Insert all the wires into the junction box and secure them in place. Make sure there is enough slack for easy installation of the wall light.
- Double-check all connections and ensure that they are tight and secure. Any loose or faulty connections can pose a risk of electrical shock or fire.
- Once the wiring is complete and secured, close and fasten the junction box cover using the appropriate screws. Make sure it is properly sealed to protect the wiring from dust and moisture.
- After reactivating the power, test the wall light to ensure it is functioning correctly.
Finishing Touches: Adjusting Angle and Checking for Balance
Once you have installed your wall lights, it’s time to make the finishing touches and ensure that they are perfectly angled and well balanced. These final adjustments can make a big difference in how your lights look and how effectively they illuminate the space.
Follow these steps to adjust the angle and check for balance:
- Step 1: Determine the desired angle: Before making any adjustments, decide on the angle at which you would like your wall lights to shine. This will depend on the specific purpose of the lights and the aesthetic you want to achieve.
- Step 2: Loosen the mounting screws: Use a screwdriver to partially loosen the mounting screws of the wall lights. This will allow you to adjust the position of the lights more easily.
- Step 3: Adjust the angle: Gently move the lights up, down, or side to side to achieve the desired angle. Take a step back and evaluate the positioning to ensure that it suits your preferences.
- Step 4: Tighten the mounting screws: Once you are satisfied with the angle, use the screwdriver to tighten the mounting screws securely. This will hold the lights in place and prevent them from slipping or becoming misaligned.
- Step 5: Check for balance: If you have installed multiple wall lights, it’s important to check that they are balanced. Use a level or measure the distance from the lights to the floor or other reference points to ensure that they are evenly positioned.
- Step 6: Make any necessary adjustments: If you find that the lights are not balanced, repeat the previous steps to make any necessary adjustments. This may involve repositioning one or more of the lights or adjusting the angle slightly.
- Step 7: Test the lights: Finally, turn on the lights and evaluate their performance. Make sure they are achieving the desired level of brightness and effectively illuminating the targeted area. If necessary, further adjust the angle to optimize their performance.
By following these steps, you can ensure that your wall lights are perfectly angled and balanced, enhancing the overall look and functionality of your space.


Meet Harrison Clayton, a distinguished author and home remodeling enthusiast whose expertise in the realm of renovation is second to none. With a passion for transforming houses into inviting homes, Harrison's writing at https://thehuts-eastbourne.co.uk/ brings a breath of fresh inspiration to the world of home improvement. Whether you're looking to revamp a small corner of your abode or embark on a complete home transformation, Harrison's articles provide the essential expertise and creative flair to turn your visions into reality. So, dive into the captivating world of home remodeling with Harrison Clayton and unlock the full potential of your living space with every word he writes.


