How to install concrete fence posts

Installing a fence around your property is a great way to add privacy and security. One of the most important components of a sturdy and long-lasting fence is the fence post. Concrete fence posts offer durability and strength, making them an excellent choice for anyone looking to install a reliable fence.
Before you begin the installation process, it’s essential to gather all the necessary materials. You will need concrete posts, gravel, cement, water, a post hole digger, a level, and a shovel. Additionally, make sure you have the proper safety equipment, such as gloves and safety goggles, to protect yourself during the installation.
Once you have all the materials ready, the first step is to mark out the fence line. Use stakes and string to indicate where each post will go, ensuring that they are evenly spaced. Next, it’s time to dig the holes for the posts. Use a post hole digger to create holes that are approximately one-third of the length of the post and at least 2 feet deep.
After the holes are dug, place a layer of gravel at the bottom to facilitate drainage. Next, carefully lower the concrete posts into the holes, checking that they are level and plumb as you go. If needed, add or remove gravel or soil to level the posts. Once the posts are in the correct position, backfill the holes with concrete mix, making sure to tamp it down firmly as you go to eliminate any air pockets.
Step-by-Step Guide to Installing Concrete Fence Posts
Welcome to our step-by-step guide on how to install concrete fence posts. Follow these instructions carefully to ensure a sturdy and long-lasting fence for your property.

Step 1: Determine the Post Layout
Start by laying out the positioning of your fence posts. Use a measuring tape and mark each location with a small stake or spray paint. Ensure the distance between each post is consistent.
Step 2: Digging the Post Holes
Using a post hole digger, start digging the holes for your fence posts. The holes should typically be around one-third the total length of the fence post, or about 2 feet deep for a 6-foot post. Make sure the holes are wide enough to provide ample room for concrete and stability.
Step 3: Inserting the Posts
Once the holes are dug, place a concrete post directly into each hole. Make sure they are standing vertically and at a consistent height. Have an assistant hold the post steady while you proceed to the next step.
Step 4: Pouring Concrete
Mix concrete according to the manufacturer’s instructions in a wheelbarrow or concrete mixer. Pour the mixed concrete around each fence post, ensuring it fills the hole and covers the entire base of the post. Use a spirit level to make sure each post is perfectly vertical.
Step 5: Curing the Concrete
Allow the new fence posts to cure properly as per the recommendation on the concrete package. This typically means leaving them undisturbed for at least 24 to 48 hours or as instructed by the manufacturer.

Step 6: Installing Fencing
After the concrete has fully cured, you can proceed with installing your chosen fencing material. Whether it’s wooden panels, wire mesh, or any other type of fencing, follow the manufacturer’s instructions for attaching it to the concrete posts.
Step 7: Finishing Touches
Once the fencing is securely attached to the concrete posts, step back and inspect your work. Use a hammer or mallet to ensure any remaining loose soil around the posts is packed down to maintain stability. Your concrete fence posts are now installed and ready to provide reliable support for your fence for years to come.
Now armed with these step-by-step instructions, you are ready to install your concrete fence posts and enjoy the added security and privacy they offer. Remember, compromise on quality during this process can lead to significant issues down the line, so take your time, measure carefully, and work meticulously to achieve the best results!
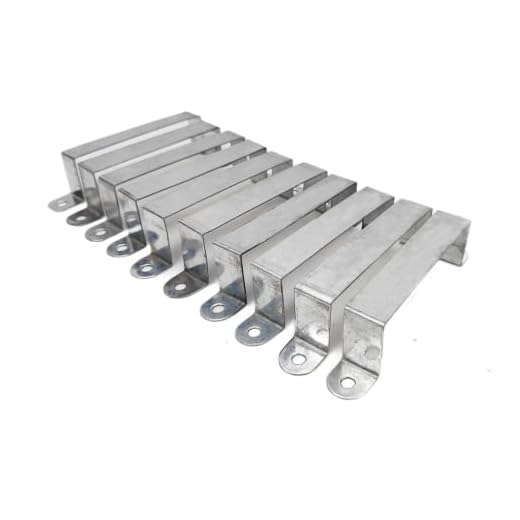
![[FIXINGS DIRECT®] (10 Pack) Ultimate 4Inch Fence Post Security Brackets (for 100mm/4" Posts) Concrete Or Wood (Check Sizing Before Ordering) Anti Rattle Post Clips, Galvanised Anti Corrosion](https://m.media-amazon.com/images/I/41CQxrOoD3L._SS520_.jpg)
Preparation and Measurements
Prior to installing concrete fence posts, it is important to properly prepare the area and take accurate measurements. This will ensure that the fence is level, stable, and aligned with your property boundaries.
Gather Your Tools and Materials
Before starting the installation process, gather all the necessary tools and materials. You will need:
- Tape measure
- Marking paint
- String line
- Shovel
- Post hole digger
- Mixing tray
- Cement mixer (optional)
- Concrete
- Water
- Spirit level
- Wooden stakes
- Hammer
- Timber panels
- Gravel
- Postcrete
- Protective gloves and eyewear
Measure and Mark the Fence Line
Using a tape measure, determine the length of the fence line and mark the starting and ending points. Use marking paint and stakes to clearly define the boundaries of the fence.
Determine the Post Spacing
The spacing between your concrete fence posts will depend on the type of fence you are installing and your personal preference. As a general rule, aim for a distance of 6 to 8 feet between each post. Measure and mark the location of each post along the fence line, ensuring that you maintain a consistent distance between them.
Dig the Post Holes
Using a post hole digger or shovel, dig holes at each marked location. The depth of the holes will depend on the height of your fence, but a typical depth is around one-third to one-half of the length of the post above ground. Ensure that the holes are evenly spaced and level from one another.
![Fence Panel Security Brackets [20 Pack] for Concrete Fence Posts or Wooden 4x4 Posts Prevents Panel Theft and Fence Panels Rattling & Banging in The Wind (20)](https://m.media-amazon.com/images/I/41PT6bEd-CL._SS520_.jpg)
TIP: It may be helpful to use a string line connected between the posts to ensure they are all in line.
Continue with the installation process once you have prepared the area and correctly measured the fence posts’ locations. Following these steps will help ensure a successful installation of your concrete fence posts.


Meet Harrison Clayton, a distinguished author and home remodeling enthusiast whose expertise in the realm of renovation is second to none. With a passion for transforming houses into inviting homes, Harrison's writing at https://thehuts-eastbourne.co.uk/ brings a breath of fresh inspiration to the world of home improvement. Whether you're looking to revamp a small corner of your abode or embark on a complete home transformation, Harrison's articles provide the essential expertise and creative flair to turn your visions into reality. So, dive into the captivating world of home remodeling with Harrison Clayton and unlock the full potential of your living space with every word he writes.


