How to flush central heating system diy
Is your home not getting as warm as it used to? Or perhaps you’ve noticed cold spots on your radiators? If so, it may be time to flush your central heating system. Flushing your system is a cost-effective way to improve the efficiency and longevity of your heating system, ensuring it runs smoothly for years to come.
Flushing the central heating system is a common maintenance task that can be done by homeowners with a moderate level of skill. By removing built-up sludge, rust, and debris from the system, you can achieve optimal performance and avoid costly repairs.
To flush your central heating system, you will need just a few basic tools and some free time. While the process can be a bit time-consuming, it is worth it in terms of the benefits you will reap.
Step 1: Start by turning off your boiler or any energy source connected to your heating system. This is a crucial safety step to avoid any accidents during the flushing process.
Step 2: Open all the valves on each radiator in your home. This will allow the system to drain out any water or sludge that has accumulated.

Step 3: Once the water has stopped flowing and the radiators are empty, close the valves and remove them with a wrench. This will ensure that the sludge doesn’t flow back into the clean system.
Step 4: Connect a hose to the drain valve at the bottom of the radiator and run the other end outside or to a sink. Open the valve and let the water and debris drain out until it runs clear.
Remember to follow all safety guidelines and manufacturer instructions while flushing your central heating system. If you’re unsure or uncomfortable with the process, it’s always best to consult a professional.
By flushing your central heating system DIY, you can save money on maintenance costs and ensure that your heating system operates efficiently, providing you with a warm and comfortable home environment.
Flushing Your Central Heating System: A Step-by-Step Guide
Flushing your central heating system is an important maintenance task that should be done periodically to ensure its efficient operation. Over time, sediment and debris can accumulate in the system, causing blockages and reduced heat output. Flushing the system helps remove this buildup and restore its performance.

What You’ll Need
Before you start flushing your central heating system, gather the following tools and materials:
- A hose
- A bucket
- A screwdriver
- A chemical cleaner specifically designed for central heating systems
- A radiator bleeding key
Step 1: Turn Off the Heating System
Start by turning off your central heating system and allowing it to cool down completely. This is important to avoid any accidents or burns during the process.
Step 2: Draining the System
Locate the drain valve on your central heating system. Place the bucket underneath to catch the water. Use a screwdriver to open the valve and let the water drain into the bucket. Be careful, as the water may be hot.
Step 3: Flushing with Water
Once the water has drained, close the drain valve and connect the hose to a nearby cold water tap. Connect the other end of the hose to the fill loop valve or the radiator bleed valve. Open the cold water tap slowly to allow water to flow through the system and flush out any remaining sediment. Keep the tap open until the water running through the hose is clean and free of debris. Close the cold water tap.
Step 4: Using the Chemical Cleaner
If you notice that the water still has a significant amount of debris, you may need to use a chemical cleaner specifically designed for central heating systems. Follow the manufacturer’s instructions for mixing and applying the cleaner. Let the cleaner circulate through the system for the recommended amount of time to dissolve any stubborn buildup. Then, flush the system again with clean water to remove the loosened debris.

Step 5: Bleeding the Radiators
Now that the central heating system is clean and free of debris, it’s a good time to bleed the radiators. Use the radiator bleeding key to open the bleed valve on each radiator, releasing any trapped air. This will ensure that your radiators can heat up efficiently and evenly.
Step 6: Refilling the System
After bleeding the radiators, you can now refill the central heating system. Make sure all the bleed valves are closed. Connect the hose to the cold water tap again and the other end to the fill loop valve or the radiator bleed valve. Open the tap slowly to allow water to fill the system. Keep an eye on the pressure gauge and refill the system to the appropriate level. Once the system is filled, close the tap and remove the hose.
Congratulations! You have successfully flushed and maintained your central heating system. Remember to schedule regular flushing every couple of years to keep your system running smoothly and efficiently.
| Key Points to Remember: |
|---|
| Turn off the heating system |
| Drain the system |
| Flush with water |
| Use a chemical cleaner if necessary |
| Bleed the radiators |
| Refill the system |
Tools Needed for DIY Central Heating System Flush
When it comes to flushing your central heating system on your own, having the right tools is crucial for a successful process. Below are the essential tools you’ll need:
| Tools | Description |
|---|---|
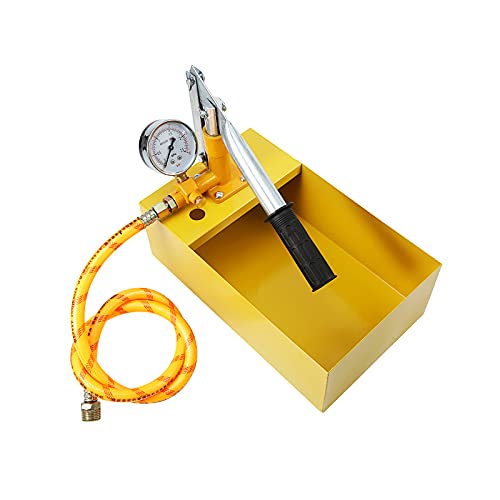
| Powerflushing Unit | A powerflushing unit is the main tool used to perform a DIY central heating system flush. It helps in circulating a cleaning solution throughout the system to remove debris and sludge build-up. |
| Magnetic Filter | A magnetic filter is installed in the boiler or somewhere in the flow and return pipes. It catches and removes any metal particles, preventing further blockages in the system. |
| Hose Pipes | High-quality hose pipes are necessary for connecting the powerflushing unit to the heating system. Make sure they are long enough to reach all necessary points in the system. |
| Chemical Cleaner | A suitable chemical cleaner is required to break down the debris and sludge that has accumulated in the central heating system. Follow the manufacturer’s instructions for proper usage. |
| Inhibitor | An inhibitor protects the heating system from future corrosion and prevents the re-occurrence of debris and sludge formation. |
| Alkaline Flush | In some cases, an alkaline flush may also be necessary before the powerflush. It helps remove stubborn deposits that may be resistant to a standard powerflush. |
| Water Source | A reliable water source is important for supplying clean water to the powerflushing unit and flushing out the system effectively. |
Having these essential tools ready before starting the DIY central heating system flush will ensure a smoother process and help you achieve optimal results in improving the heating performance of your system.

Step-by-Step Instructions for Flushing Your Central Heating System
Flushing your central heating system is an important maintenance task that should be done regularly to keep it running efficiently. Over time, debris, sludge, and sediment can accumulate in your system, reducing its performance and potentially causing damage. Here is a step-by-step guide to help you flush your central heating system yourself:
Step 1: Turn off your heating system. Find the shut-off valve or switch near your boiler or water heater and turn it off to ensure no hot water is circulating while you work on the system.
Step 2: Locate the draining point. Most systems have a draining point at the bottom of the boiler or a nearby radiator. You may need a hosepipe or a suitable container to collect the water and debris.
Step 3: Attach the hosepipe or container to the draining point. If using a hosepipe, ensure it is securely attached and that the other end is outside or directed towards a suitable drain.
Step 4: Open the draining point. Carefully open the tap or valve to allow the water and debris to start flowing out. Be prepared, as the water might be hot and the debris might cause blockages. Empty the container or monitor the hosepipe to ensure proper collection.

Step 5: Flush the system. Once the initial water is drained, it’s time to flush the system. Close the draining point valve and turn on all the hot water taps in your home. Let the water flow for several minutes to expel any remaining debris and sediment from the pipes and radiators.
Step 6: Reconnect and refill. After flushing, close all the hot water taps and faucets. Remove the hosepipe or container from the draining point and close it securely. Turn on the shut-off valve or switch to refill the system with water and start circulating it again.
Step 7: Bleed the radiators. While the system is refilling, bleed each radiator in your home to release any trapped air. Use a radiator key to open the bleed valve at the top, allowing the air to escape until water flows out smoothly.
Step 8: Check and test. Once the system is refilled, check for any leaks around the connections and joints. Turn on the heating and hot water, and monitor the performance to ensure it is working efficiently.
By following these step-by-step instructions, you can effectively flush your central heating system and help prolong its lifespan while keeping it running smoothly and efficiently.


Meet Harrison Clayton, a distinguished author and home remodeling enthusiast whose expertise in the realm of renovation is second to none. With a passion for transforming houses into inviting homes, Harrison's writing at https://thehuts-eastbourne.co.uk/ brings a breath of fresh inspiration to the world of home improvement. Whether you're looking to revamp a small corner of your abode or embark on a complete home transformation, Harrison's articles provide the essential expertise and creative flair to turn your visions into reality. So, dive into the captivating world of home remodeling with Harrison Clayton and unlock the full potential of your living space with every word he writes.


