How to fix a rip in fabric
Accidents happen, and sometimes that favorite shirt or pair of pants can end up with an unsightly rip or tear. But don’t fret! There are easy fixes you can do at home to mend those fabric tears and have your clothing looking good as new.
First, assess the size and location of the rip. If it is a small tear, you can fix it using a needle and thread. Choose a matching thread color and use a strong, thin needle. Start by knotting the thread and securing it on one side of the tear, then carefully weave the thread through the fabric around the tear, making small stitches as you go. Pull the thread tight to bring the edges of the tear together, and finish off with another knot at the end.
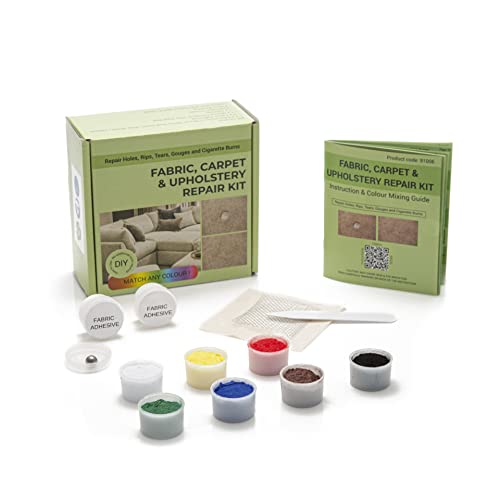
For larger rips or tears, you may want to consider using a patch. Choose a fabric patch that matches the color and texture of the fabric you are repairing. Cut the patch slightly larger than the tear, ensuring there is enough fabric to securely cover the area. Place the patch over the tear and pin it in place. Using a needle and thread, carefully stitch around the edges of the patch, securing it to the fabric. Make sure your stitches are close together to prevent the patch from coming loose.
No matter which method you use to mend the rip, it’s always a good idea to reinforce the area to prevent further damage. You can apply a fabric glue or iron-on patch on the inside of the garment, behind the tear, to provide extra support. This will make sure that the tear doesn’t open up again after repairing it.
Remember, repairing rips and tears in fabric is an easy task that can save you money and extend the life of your favorite clothing items. By following these simple steps, you can fix those fabric mishaps and have your garments looking like new again.

Understanding the Rip in Fabric
Before you can properly fix a rip in fabric, it’s important to understand why rips happen and the different types of rips you may encounter.
Causes of Rips
Rips in fabric can occur for various reasons, including:
- Wear and Tear: Over time, the constant use and friction can weaken the fabric and eventually lead to a rip.
- Accidents: Mishaps such as catching the fabric on sharp objects or snagging it on something can result in an unintended tear.
- Poor Quality: Inferior materials or substandard stitching can contribute to the fabric’s susceptibility to ripping.
Types of Rips
A rip in fabric can range from a minor tear to a large, gaping hole. Here are a few common types:

- Minor Tear: A small rip that hasn’t spread and can be easily repaired.
- Straight Tear: A clean straight-line rip that is relatively simple to mend.
- Fractured Tear: A rip with irregular edges that may require more intricate repairing techniques.
- Shattered Tear: A tear with multiple branches or intersecting rips that can be more difficult to fix.
Understanding the cause and type of rip will help you choose the most appropriate method for repairing the fabric.
Identifying Types of Rips
When it comes to repairing a rip in fabric, it is important to first identify the type of rip you are dealing with. Different rips require different methods of repair to ensure a successful fix. Here are some common types of rips to look out for:
1. Straight Tear: A straight tear is a clean rip that goes in a straight line from one edge of the fabric to another. These types of tears are often easier to repair as they usually have well-defined edges.
2. Jagged Tear: A jagged tear is a rip that has uneven and irregular edges. These tears can be a bit more challenging to repair as the edges may not align correctly, making it difficult to sew the fabric back together seamlessly.
3. Frayed Edge: A frayed edge occurs when the threads of the fabric have unraveled and are coming apart. This type of rip should be taken care of as soon as possible to prevent further fraying and damage.

4. Hole: A hole in fabric occurs when a larger piece of fabric is missing, leaving a gap in the material. Repairing a hole may require patching or reweaving techniques to fill in the missing area.
5. Split Seam: A split seam refers to a rip or tear that occurs along a stitched seam. These types of rips are common in clothing and can usually be fixed by resewing the seam with a strong needle and thread.
By correctly identifying the type of rip you are dealing with, you can choose the most appropriate method of repair and increase the chances of a successful fix. Keep in mind that some rips may be more difficult to repair than others, and it is always recommended to seek professional help if needed.
Assessing the Level of Damage
Before you start repairing a rip in fabric, it is essential to assess the level of damage. This step is crucial as it will help you determine the appropriate repair technique and materials needed for fixing the rip.
Begin by closely examining the size and extent of the tear. Is it just a small hole or a large rip that spans across the fabric? This will determine the complexity of the repair and the amount of time and effort required to fix it.

Next, inspect the surrounding area of the rip. Are there any frayed edges or loose threads? If so, you may need to trim them carefully before proceeding with the repair. This will ensure that the repair is neat and durable.
Consider the fabric type as well. Fabrics like denim or canvas are generally easier to repair compared to delicate materials such as silk or chiffon. Certain fabrics may require specific repair techniques or adhesive products suitable for them, so it is important to take note of this during the assessment.
Lastly, consider the location of the rip. Is it on a frequently stretched or stressed area, like a seam or joint? If so, it could impact the integrity of the repair, and you may need to reinforce the area during the fixing process.
By thoroughly assessing these factors, you will be able to gain a better understanding of the severity of the rip and make informed decisions regarding the repair approach. This will ultimately help you achieve a successful and long-lasting fix for your torn fabric.
Finding the Right Repair Technique
Repairing a rip in fabric can be done using various techniques, depending on the size and location of the rip. Here are several popular methods to consider:

1. Hand Sewing
If the rip is small and located in a less noticeable area, hand sewing can be a straightforward and effective method for repair. Use a needle and thread that closely match the fabric and stitch along the edges of the rip, bringing the torn edges neatly together.
2. Fusible Adhesive
Fusible adhesive, also known as fabric glue or fusible web, offers a quick and easy solution for fixing smaller rips. Apply the adhesive to the edges of the rip and press them together with a hot iron. This method is ideal for fabrics that may not hold up well to traditional sewing.
3. Patching
For larger tears or noticeable rips, patching is an effective method to consider. Cut a fabric patch that matches or complement the color and texture of the damaged fabric. Sew the patch over the rip using a needle and thread or a sewing machine to create a seamless appearance.
4. Invisible Mending
Invisible mending is a professional technique that involves weaving threads through the damaged fabric to recreate the original pattern. This method is best for high-quality or sentimental fabrics and may require the craftsmanship of a professional tailor or seamstress.
When choosing a repair technique, it’s important to consider the fabric type, the size of the rip, and your own sewing skills. Remember to always test any repair method on a small, inconspicuous area of the fabric before proceeding. With the right technique, you can restore your fabric to its original condition and extend its lifespan.

Step-by-Step Guide for Fixing a Rip
A rip in fabric can be frustrating, but with the right tools and a little patience, you can fix it yourself. Follow these step-by-step instructions to repair your damaged fabric and restore it to its original condition.
Materials You Will Need:
- Thread in a matching color
- Needle
- Pinning or sewing gauge
- Fabric scissors
- Fray stop glue
Step 1: Assess the Damage
Take a close look at the rip in your fabric. Determine the size of the hole and whether there are any frayed edges. This will help you understand the extent of the damage and plan your repair accordingly.
Step 2: Trim Frayed Edges
If you notice any frayed edges around the rip, carefully trim them with fabric scissors. This will prevent further fraying and make the repair process easier.
Step 3: Prepare your Thread and Needle
Select a matching thread and thread your needle. Make sure to double the thread for added strength. Tie a secure knot at the end of the thread.
Step 4: Pin or Mark the Rip
Using a pinning or sewing gauge, mark the edges of the rip to help keep them aligned during the sewing process. This will ensure a neater and more secure repair.

Step 5: Begin Sewing
Starting at one end of the rip, insert your needle into the fabric just below the marked edge. Take small, even stitches as you work your way along the rip, sewing the edges together. Be careful not to pull too tightly, as this may distort the fabric.
Step 6: Tie Off the Thread
Once you have sewn the entire rip, securely tie off the thread with a knot. Trim any excess thread close to the knot to avoid any visible loose ends.
Step 7: Apply Fray Stop Glue (Optional)
If desired, you can use fray stop glue to further prevent fraying along the repaired area. Apply a small amount of glue to the edges of the rip and let it dry completely before using the fabric.
With these simple steps, you can successfully fix a rip in fabric and give your beloved clothes or household items a new lease on life. Remember to take your time and exercise caution during the repair process to achieve the best results.


Meet Harrison Clayton, a distinguished author and home remodeling enthusiast whose expertise in the realm of renovation is second to none. With a passion for transforming houses into inviting homes, Harrison's writing at https://thehuts-eastbourne.co.uk/ brings a breath of fresh inspiration to the world of home improvement. Whether you're looking to revamp a small corner of your abode or embark on a complete home transformation, Harrison's articles provide the essential expertise and creative flair to turn your visions into reality. So, dive into the captivating world of home remodeling with Harrison Clayton and unlock the full potential of your living space with every word he writes.


