How to fit hinges on a door
Fitting hinges on a door may seem like a daunting task, but with the right tools and steps, it can be a straightforward process. Hinges are essential for the smooth opening and closing of a door, providing stability and security.
Step 1: Gather the necessary tools
Before beginning the installation, make sure you have all the required tools on hand. These typically include a pencil, tape measure, chisel, screwdriver, and a drill. It’s important to use the correct size of hinges for your door, so double-check before starting.
Step 2: Determine the hinge placement
Start by deciding on the position of the hinges. Measure and mark the spots on both the door and the door frame where the hinges will be installed. For a standard-sized door, it’s common to use three hinges, evenly spaced from top to bottom. Make sure the markings are accurate for a straight and level fit.

Step 3: Create mortises
Using a chisel, create the mortises for the hinges. These recesses are necessary for a flush installation. Place the hinge on the marked spot and trace around it with a pencil. Carefully chisel out the wood within the traced area to the appropriate depth, ensuring a snug fit for the hinge.
Step 4: Attach the hinges
Once the mortises are ready, place the hinges into their respective recesses. Align them properly and secure them in place with screws, using a screwdriver or a drill. Make sure the hinge is tightly fastened, as any looseness may affect the smooth operation of the door.
Remember, the process of fitting hinges on a door requires precision and patience. Take your time and double-check your measurements to ensure a perfect fit. With the right technique, your door will be properly hinged and ready to provide years of functionality and security.

Step-by-Step Guide to Fitting Hinges on a Door
Doors are an essential part of any building, and fitting hinges on a door is an important step to ensure proper functionality. Follow this step-by-step guide to learn how to fit hinges on a door.
Gather the Necessary Tools and Materials
Before you start fitting hinges on a door, make sure you have all the necessary tools and materials. You’ll need:
| Hinges |
| Screws |
| Screwdriver |
| Tape measure |
| Pencil |
| Chisel |
| Hammer |
Measure and Mark the Hinge Placement
Hold the door in the desired position and use a tape measure to determine the placement of the hinges. Most doors typically have three hinges, evenly spaced along the length of the door. Mark the screw hole locations with a pencil.
Chisel the Hinge Recesses
Using a chisel, create recesses in the door frame for the hinges. Start by carefully scoring the outline of the hinge, and then chisel deeper until the hinge can be flush with the door frame. Repeat this process for all the hinges.
Attach the Hinges to the Door
Position the hinges in the recesses and align them with the screw hole locations. Use a screwdriver to secure the hinges to the door using the provided screws. Make sure the screws are tightened securely, but be careful not to overtighten and strip the screw holes.

Attach the Door to the Frame
With the hinges attached to the door, carefully position the door in the frame. Align the hinges with the corresponding hinge recesses in the frame. Once aligned, secure the hinges to the frame using the screwdriver and screws.
And there you have it! You have successfully fitted hinges on a door. Ensure that the door swings freely once installed, and make any adjustments if necessary.
Remember to always follow safety guidelines and manufacturer instructions when working with tools and materials. If you’re uncertain about any steps, consider consulting a professional.
Tools and Materials
Before you begin fitting hinges on a door, it’s important to gather all the necessary tools and materials. Here’s a list of what you will need:
Tools:
-
Measuring tape: You will need a measuring tape to accurately measure the distance between the hinge recesses and ensure they are evenly spaced.
-
Chisel: A sharp chisel is vital for creating the hinge recesses in the door frame. Make sure it is sharp enough to create clean and precise cuts.
-
Screwdriver: Depending on the type of hinges you are using, you may need a flathead or Phillips screwdriver to attach the hinges to the door and frame.
-
Pencil or marker: Use a pencil or marker to mark the hinge recesses on the door frame to ensure accurate and neat cuts.
-
Hammer: A hammer may be needed to gently tap the chisel or screws into place for a secure fit.
-
Drill and drill bits: If your hinges require pilot holes, you will need a drill and the appropriate drill bits.
Materials:
-
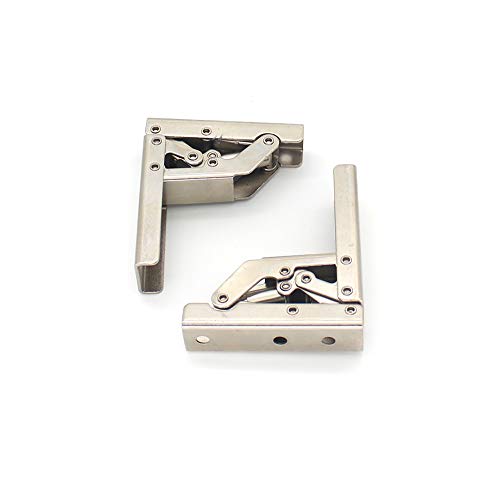
Hinges: Depending on the type and style of door you are fitting, choose hinges that are suitable and appropriate for your door’s weight and design.
-
Screws: Make sure to use screws that are long enough to securely fasten the hinges to both the door and the frame.
-
Wood filler: If any gaps or imperfections are created during the hinge fitting process, you may need wood filler to fill them in and create a smooth finish.
Make sure you have all the tools and materials listed above before you begin fitting hinges on your door. Having everything prepared will ensure a smooth and successful installation process.

Installing Hinges on the Door
When it comes to installing hinges on a door, there are a few important steps to follow. By taking the time to properly install hinges, you can ensure that your door operates smoothly and securely.
- Start by gathering all the necessary tools and materials: a drill, screws, hinge plates, and a screwdriver.
- Place the door on a stable surface that allows easy access to all sides.
- Decide where you want the hinges to be positioned on the door. Typically, hinges are installed on the upper edge, lower edge, and middle of the door for stability.
- Next, use a pencil to mark the locations for the hinge plates on the door.
- Carefully position the hinge plates on the marked spots and secure them in place using screws.
- If the door is heavy or if you want extra durability, it is recommended to use three hinges instead of two. In such cases, evenly space out the hinges along the edge of the door.
- Repeat the same process for installing hinge plates on the door frame, making sure they align perfectly with the ones on the door itself.
- Now, it’s time to attach the actual hinges to both the door and the door frame. Ensure that you align the hinges correctly and secure them with screws.
- Finally, do a test swing to check if the door opens and closes smoothly. If necessary, make any adjustments needed for a proper fit.
By following these step-by-step instructions, you can successfully install hinges on your door. It is important to take your time and double-check your work to ensure that the hinges are properly aligned and secure. With the hinges securely in place, your door will function properly and provide long-lasting durability.


Meet Harrison Clayton, a distinguished author and home remodeling enthusiast whose expertise in the realm of renovation is second to none. With a passion for transforming houses into inviting homes, Harrison's writing at https://thehuts-eastbourne.co.uk/ brings a breath of fresh inspiration to the world of home improvement. Whether you're looking to revamp a small corner of your abode or embark on a complete home transformation, Harrison's articles provide the essential expertise and creative flair to turn your visions into reality. So, dive into the captivating world of home remodeling with Harrison Clayton and unlock the full potential of your living space with every word he writes.


