How to fit door architrave
Door architrave is not just a decorative feature but also adds structural support to a door frame and hides any gaps or imperfections in the wall. Fitting door architrave may seem like a daunting task, but with the right tools and techniques, it can be easily accomplished by anyone with basic DIY skills.
Step 1: Selecting the Architrave
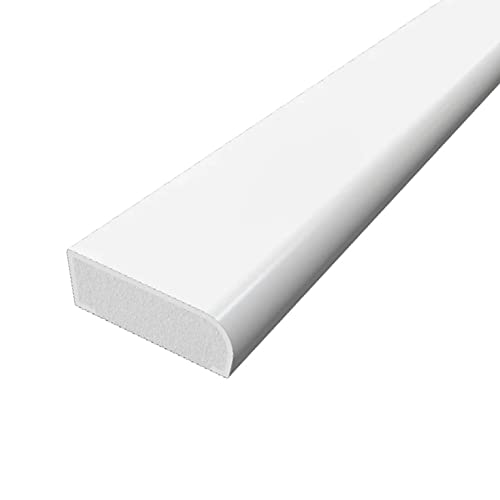
Before you start fitting the door architrave, make sure to select the right style and material that matches your interior design. There are various types of architrave available, including simple square-edged architrave, ogee architrave, and chamfered architrave. Choose one that suits your personal taste and the overall style of the room.
Note: It is recommended to purchase architrave that is slightly longer and wider than the door frame to allow for mistakes during the fitting process.
Step 2: Measuring and Cutting

Take accurate measurements of the height and width of the door frame, including any extension or protrusion. Take into consideration any unevenness or irregularities of the wall or skirting boards. Transfer these measurements onto the architrave and mark the cutting lines.
Pro tip: Use a miter saw or a coping saw to make precise cuts at a 45-degree angle for the corners. This will help create a professional and seamless finish.
Step 3: Dry Fitting and Adjustments
Before permanently fixing the architrave, dry fit the pieces around the door frame to ensure the measurements and angles are correct. Make any necessary adjustments by trimming, sanding, or reshaping the architrave using sandpaper, chisels, or a hand plane.
Pro tip: Use a spirit level to ensure that the architrave is straight and level.

Step 4: Fixing the Architrave
Apply an adhesive or sealant to the back of the architrave and carefully position it around the door frame. Firmly press it against the wall, making sure it is flush with the edges. If necessary, use a hammer and nails or screws to secure the architrave in place.
Note: Be careful not to overdrive the nails or screws as it may split the architrave. Fill any visible gaps or holes with wood filler and smooth it out with a putty knife.
By following these simple steps, you can easily fit door architrave and add a touch of elegance to your interior. Remember to take your time, measure accurately, and use the right tools for a professional-looking finish.
Why Door Architrave Matters
The door architrave is an important element in the overall appearance and function of a door. It is the decorative trim that surrounds the door frame and provides a finished look to the entranceway. While it may seem like a small detail, choosing the right door architrave can make a big difference in the overall aesthetics of the space.
Enhances the Door’s Appearance
Installing a stylish and well-designed door architrave can greatly enhance the appearance of a door. Whether you have a classic or modern style, there are architrave designs available to complement any interior or exterior design concept. The architrave adds depth and visual interest to an otherwise plain door frame and helps to create a focal point in a room.
Adds a Touch of Elegance and Sophistication
The right door architrave can bring a touch of elegance and sophistication to any door. It provides a polished finish and adds a sense of refinement to the overall space. By carefully selecting the style and material of the architrave, you can create a cohesive and harmonious look with the rest of your interior design elements.
Additionally, a well-chosen door architrave can also enhance the perceived value of your home. Potential buyers or visitors will take notice of the attention to detail and the thought put into the design choices, which can make a positive impression.
Protects Against Wear and Tear
Door architraves not only provide visual appeal but also serve a practical purpose. They act as a protective barrier, shielding the edges of the door frame from damage caused by everyday use. Without an architrave, the door frame is exposed and prone to chips, scratches, and general wear and tear.
Whether you have children, pets, or high traffic areas, a door architrave can help prolong the life of your door frame by offering an extra layer of protection. While wear and tear may still occur over time, the architrave will help to minimize its visibility and extend the longevity of the door and frame.

In conclusion, the door architrave is a significant component that shouldn’t be overlooked when considering the overall design and functionality of a door. Choosing the right architrave can greatly enhance the appearance, add elegance, and provide protection to your doors. So, take the time to select a door architrave that suits your style and needs, and enjoy the long-lasting benefits it brings.
Materials and Tools Needed
Before you begin fitting door architrave, make sure you have all the necessary materials and tools. Here is a list of what you will need:
Materials:
- Door architrave: Choose the style and size that matches your door.
- Pencil: Used for marking measurements and cutting lines.
- Screws or nails: Used to attach the architrave to the door frame.
- Wood filler: Used to fill any gaps or holes in the architrave.
- Sandpaper: Used to smoothen any rough edges.
- Paint or varnish: Used to finish the architrave and match the door.
Tools:
- Tape measure: Used to measure the dimensions of the door frame and architrave.
- Circular saw: Used to cut the architrave to the correct lengths.
- Chisel: Used to remove any existing architrave or trim.
- Pry bar: Used to pry off any old architrave or trim.
- Hammer or screwdriver: Used to secure the architrave to the door frame.
- Mitre saw: Used to cut the architrave at a precise angle for clean corners.
Having these materials and tools ready will ensure that you can begin fitting door architrave without any delays or interruptions.
How to Measure for Door Architrave
When fitting door architrave, it’s important to take accurate measurements to ensure a proper fit. Here are the steps to measure for door architrave:
Step 1: Measure the height of the door opening by placing a tape measure vertically from the floor to the top of the door frame. Make sure to measure both sides of the door frame and take the larger measurement as the height.

Step 2: Measure the width of the door opening by placing a tape measure horizontally from one side of the door frame to the other. Again, measure both sides and take the larger measurement as the width.
Step 3: Measure the depth of the door frame by placing a tape measure vertically inside the door frame, from the edge of the frame to the wall. This measurement will help determine the thickness of the architrave needed.
Additional Tips:
– It’s always a good idea to add a small amount of extra length to your measurements, just to be safe. You can always trim the architrave down to the correct size if necessary.
– If your architrave will wrap around the sides and top of the door frame, be sure to measure the width and height accordingly.
– Take note of any irregularities or obstructions around the door frame, such as skirting boards or uneven walls. These factors may affect the installation and overall fit of the architrave.

By following these steps and taking accurate measurements, you can ensure a proper fit when fitting door architrave.
Preparing the Door Frame
Before you start fitting the door architrave, you will need to prepare the door frame. This involves removing any existing architrave and ensuring that the frame is clean and free from any obstructions.
To remove the existing architrave, use a chisel or pry bar to gently pry it away from the frame. Be careful not to damage the frame or surrounding walls during this process. Once the architrave is removed, use a scraper or sandpaper to remove any old adhesive or paint residue from the frame.
Next, check the frame for any signs of damage or wear. If there are any cracks, dents, or rotting areas, repair or replace them before fitting the new architrave. This will ensure that the architrave has a solid and even surface to be fitted onto.
Additionally, measure the dimensions of the door frame to ensure that the architrave will fit properly. Measure the height and width of each side, as well as the top and bottom. These measurements will guide you in cutting the architrave to the correct size.

Finally, it is important to clean the door frame thoroughly before fitting the new architrave. Use a vacuum cleaner or a damp cloth to remove any dust or debris from the frame. This will help create a clean and professional finish once the architrave is fitted.
| Steps to prepare the door frame: |
| 1. Remove the existing architrave. |
| 2. Remove any adhesive or paint residue. |
| 3. Repair or replace any damaged areas of the frame. |
| 4. Measure the dimensions of the door frame. |
| 5. Clean the frame thoroughly. |
Installing the Door Architrave
Installing door architrave is a simple process that can greatly enhance the appearance of your door. Follow these steps to install the architrave:
Materials You Will Need:
- Architrave trim
- Pencil
- Measuring tape
- Mitre saw or mitre box
- Wood glue
- Finishing nails
- Hammer or nail gun
- Sandpaper
- Paint or varnish (optional)
Step 1: Measure and Cut the Architrave
Using a measuring tape, measure the height and width of the door frame. Mark the measurements on the architrave trim using a pencil. Use a mitre saw or mitre box to create mitered corners by cutting the trim at a 45-degree angle.
Step 2: Test the Fit
Hold the cut architrave trim against the door frame to ensure that it fits properly. Make any necessary adjustments to the trim by cutting off excess length or sanding down rough edges.
Step 3: Apply Wood Glue
Apply a thin layer of wood glue to the back of the architrave trim. This will help secure it to the door frame.
Step 4: Attach the Architrave
Position the architrave trim against the door frame and press firmly to ensure it adheres to the wood glue. Nail the trim into place using finishing nails. Use a hammer or nail gun to drive the nails through the trim and into the door frame. Repeat this process for each piece of architrave trim.
Step 5: Finishing Touches
Fill any nail holes with wood filler and sand the trim to create a smooth surface. If desired, you can paint or varnish the architrave to match your door or trim.
By following these simple steps, you can successfully install a door architrave and add a touch of elegance to your doorway.


Meet Harrison Clayton, a distinguished author and home remodeling enthusiast whose expertise in the realm of renovation is second to none. With a passion for transforming houses into inviting homes, Harrison's writing at https://thehuts-eastbourne.co.uk/ brings a breath of fresh inspiration to the world of home improvement. Whether you're looking to revamp a small corner of your abode or embark on a complete home transformation, Harrison's articles provide the essential expertise and creative flair to turn your visions into reality. So, dive into the captivating world of home remodeling with Harrison Clayton and unlock the full potential of your living space with every word he writes.


