How to empty a cassette toilet

Knowing how to properly empty a cassette toilet is essential for any camper or RV owner. A cassette toilet is a portable and self-contained toilet system that is commonly used in motorhomes, caravans, and camper vans. It provides a convenient and hygienic solution for using the bathroom while on the road.
Emptying a cassette toilet may seem like a daunting task for beginners, but with a little guidance, it can be done quickly and easily. The key to emptying a cassette toilet is to follow the proper steps and take necessary precautions to avoid any mess or unpleasant odours.
Before starting the emptying process, it is important to wear gloves and ensure that you have the necessary tools and cleaning supplies. This includes a cassette toilet fluid, water, a hose or bucket, and toilet paper.
To begin, locate the cassette toilet compartment in your vehicle. This is usually situated in a dedicated bathroom area or under a bench seat. Once you have found the compartment, carefully open the access door and remove the cassette toilet unit. It is important to handle the unit with care to prevent any spills or leaks.
Complete Guide: How to Empty a Cassette Toilet
Having a cassette toilet in your camper or caravan can provide convenience and freedom while on the road. However, it’s important to know how to properly empty and clean the cassette toilet to prevent unpleasant odours and maintain hygiene.
Step 1: Preparation
Before emptying the cassette toilet, make sure you have the necessary tools and equipment. Wear protective gloves and keep plastic bags or waste disposal bags handy. Also, ensure you have access to a proper waste disposal point or designated emptying area.
Step 2: Set up the area
Choose a well-ventilated location to empty the cassette toilet. Lay down a disposable sheet or newspaper to catch any spills or splashes that may occur during the emptying process.
Step 3: Remove the cassette

Locate the cassette access door, usually located outside the vehicle or camper, and open it. Carefully remove the cassette while keeping it upright to prevent any spills. Take note of the handle to carry or lower the cassette without any damage.
Step 4: Empty the waste
Find the designated waste disposal point and follow the instructions provided. Some disposal points might require you to connect a hose, while others may have a sealed hatch for direct emptying. Empty the contents of the cassette into the disposal point without overflowing or spilling any waste.
Step 5: Rinse and clean
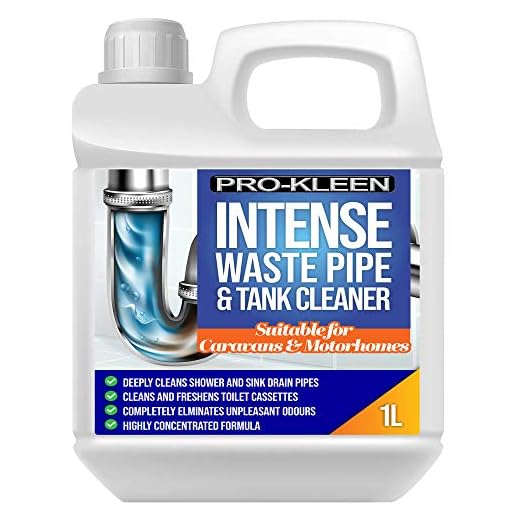
After emptying the waste, use a hose, bucket, or water container to rinse the inside of the cassette thoroughly. Shake the cassette gently to remove any remaining residue and flush out the hose or spout. Use toilet-specific cleaning agents or solutions to sanitise and deodorise the cassette before reuse.

Step 6: Replace the cassette
Once the cassette is completely clean and dry, carefully place it back into the cassette toilet. Use the handle provided to slide the cassette back into position accurately. Close the access door securely to ensure it is properly sealed.
Step 7: Dispose of gloves and waste bags
Dispose of the used gloves and any waste disposal bags in a designated waste bin or appropriate waste disposal area. Wash your hands thoroughly with soap and water after handling any waste materials.
Remember to check the user manual of your specific cassette toilet for any additional instructions or recommendations from the manufacturer. Regular maintenance and proper emptying of the cassette toilet will help keep it functioning optimally and prevent any unpleasant odours or issues during your travels.

Step-by-Step Instructions for Proper Maintenance
Properly maintaining your cassette toilet is essential for its efficiency and longevity. Follow these step-by-step instructions:
1. Wear Protective Gear: Before cleaning the cassette toilet, don disposable gloves to protect your hands from coming into direct contact with waste.
2. Empty the Tank: Place a waste bag or liner inside the waste tank before removing it from the cassette toilet. This will make the process cleaner and more sanitary. Next, carefully remove the waste tank from the toilet by unclipping it and pulling it out. Take it to an appropriate disposal site, such as a designated dumping point or campsite facility.
3. Rinse the Waste Tank: After emptying the waste tank, rinse it thoroughly with fresh water to remove any remaining residue. You may need to use a cleaning brush or hose to ensure all waste is removed effectively.
4. Clean the Toilet Bowl: Use a mild cleaner designed for cassette toilets to clean the toilet bowl. Apply the cleaner, scrub the bowl with a toilet brush, and flush with clean water. Do not use harsh chemicals or abrasive tools, as these can damage the toilet system.

5. Refill the Flush Tank: Fill the flush tank with fresh water and a recommended amount of sanitizing agent or chemical for cassette toilets. Follow the manufacturer’s instructions for the correct mixing ratio.
6. Reattach the Waste Tank: After the waste tank is clean and dry, reattach it to the toilet by aligning the clips and pushing it firmly into place. Make sure it is securely attached to prevent any leaks.
7. Test the System: Once all the necessary maintenance steps are completed, perform a test flush to ensure that the cassette toilet is working properly. Check for any leaks or unusual odors, and make adjustments as necessary.
By following these step-by-step instructions, you can maintain your cassette toilet in optimal condition, ensuring a hygienic and comfortable camping experience.


Meet Harrison Clayton, a distinguished author and home remodeling enthusiast whose expertise in the realm of renovation is second to none. With a passion for transforming houses into inviting homes, Harrison's writing at https://thehuts-eastbourne.co.uk/ brings a breath of fresh inspiration to the world of home improvement. Whether you're looking to revamp a small corner of your abode or embark on a complete home transformation, Harrison's articles provide the essential expertise and creative flair to turn your visions into reality. So, dive into the captivating world of home remodeling with Harrison Clayton and unlock the full potential of your living space with every word he writes.


