How to do lino printing

Lino printing is a popular and versatile printmaking technique that allows you to create unique and striking designs. Whether you’re a beginner or an experienced artist, lino printing offers endless creative possibilities. In this article, we will guide you through the steps of lino printing, from choosing the right materials to creating your first print.
Step 1: Gathering materials
Before you start lino printing, you will need to gather a few essential materials. You will need a lino block, cutting tools, a brayer, ink, paper, and a spoon or a printing press. Lino blocks can be purchased at art supply stores or online, and you can choose between traditional lino or easy-carve lino, depending on your preferences and experience level. Cutting tools are used to carve the design into the lino block, and you can find a variety of sizes and shapes to suit your needs.
Step 2: Designing your print
Once you have your materials ready, it’s time to design your print. You can start by sketching your design on paper or directly on the lino block using a pencil or a marker. Keep in mind that your design will be a mirror image of the final print, so make sure to plan accordingly. Simple shapes and bold lines work great for lino printing, but you can experiment with more complex designs as you gain confidence.

Don’t be afraid to let your creativity flow and try different techniques!
Materials needed for lino printing
Before starting your lino printing project, it’s important to gather all the necessary materials. Here is a list of the main supplies you will need:
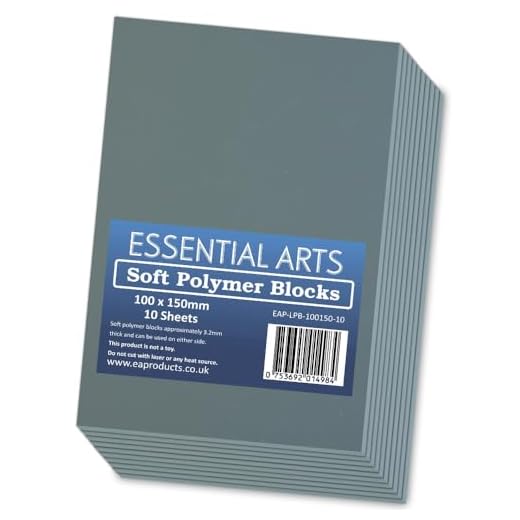
Lino
The first and most important material is a piece of lino. Lino is a type of linoleum that can be carved to create your design. You can purchase lino specifically made for printing in art supply stores.
Lino carving tools
To carve your design into the lino, you will need a set of lino carving tools. These tools typically consist of different blades that allow you to create various textures and details in your design. A basic set of carving tools usually includes a V-shaped gouge, a U-shaped gouge, and a flat chisel.
Ink
You will also need ink for lino printing. There are various types of ink you can use, including oil-based and water-based inks. It’s important to choose an ink that is suitable for linoleum printing and dries relatively quickly.

Roller
A brayer or roller is used to apply ink to the carved lino. Make sure to choose a roller that is wide enough to cover the whole lino block. It’s recommended to use a soft rubber or foam roller to achieve even ink application.
Paper
Last but not least, you will need paper to print your design on. There are specific printmaking papers available that work best for lino printing. These papers are usually thicker and have a smooth surface to capture your design’s details. You can also experiment with different types of paper to achieve different effects.
With these materials in hand, you will be ready to start your lino printing journey! Remember to always work in a well-ventilated area and protect your workspace with newspapers or a mat.
Preparing the lino block for printing
Before you start printing, it’s important to properly prepare your lino block to ensure the best results.
Here are the steps you should follow:

- Clean your lino block: Use a soft cloth or brush to remove any dust and debris from the surface. This will ensure smooth and clean prints.
- Sketch your design: Use a pencil or marker to lightly sketch your design onto the lino block. This will serve as a guide when you start carving.
- Carve your design: Use linoleum carving tools to carefully remove the areas you don’t want to print. Start with larger areas and gradually work your way to the smaller details. Take your time and be precise.
- Test your design: Once you’re done carving, make a few test prints to check if any adjustments are needed. This will help you ensure that the carved areas are printing as expected.
- Check for mistakes: Carefully inspect your carved design for any errors or missed spots. Minor mistakes can be corrected by carving additional areas or modifying the existing ones.
- Roll out your ink: Apply a generous amount of ink onto a smooth, flat surface using a roller. Roll the ink out until it forms a thin, even layer.
- Ink your lino block: Place your lino block face up and gently roll the inked roller over it. Make sure the entire surface is covered with ink, but avoid over-inking as it can result in smudged prints.
- Place paper on top: Carefully place a sheet of paper on top of your inked lino block. Press down firmly but evenly with your hands or a brayer to transfer the ink onto the paper.
- Peel off the paper: Gently lift the paper from the lino block to reveal your print. Allow the print to dry completely before handling or framing.
Following these steps will help you prepare your lino block for printing and achieve quality results in your lino printing process.
The Printing Process
Once you have gathered all your materials and prepared your design for lino printing, it’s time to start the printing process. Here, we will guide you step by step through the stages of lino printing.
1. Ink preparation
First, squeeze a small amount of printing ink onto a glass or metal palette. Use a palette knife or roller to spread the ink evenly over the surface, making sure to cover it entirely.
2. Inking the lino block
Now, roll the inked brayer (roller) gently onto the lino block. Apply even pressure to ensure the entire design gets adequately coated with ink. Make sure there are no blobs or uneven patches of ink on the block.
3. Placing the paper
Lay your printing paper on top of the inked lino block. Ensure that it covers the entire block and press it down firmly.

4. Printing
| Printing Method | Description |
|---|---|
| Hand rub | Using your hand, carefully rub the back of the paper onto the lino block, ensuring even pressure across the entire design. |
| Baren | If you have a baren, place it on the back of the paper and apply pressure with circular motions to transfer the ink from the lino block onto the paper. |
| Press | If you have a printing press, carefully place the block and paper together and run it through the press to achieve an even and professional print. |
5. Drying and finishing
Once you have printed your design, carefully remove the paper from the lino block and set it aside to dry. You can repeat the process to create multiple prints.
After the prints have fully dried, you can further enhance them by trimming them to size or adding additional details with colored pencils or paints.
That’s it! Now you know the basic steps of lino printing and can start creating your own beautiful prints.
Care and Maintenance of Lino Prints
Lino prints are a classic form of printmaking that can create stunning artwork. To ensure that your lino prints last for a long time, it’s important to properly care for and maintain them. Here are some tips:
| Handling | Storage |
| Handle your lino prints with clean hands to prevent dirt and oil transfer. | Store your lino prints in acid-free folders or sleeves to protect them from moisture and dust. |
| Use clean gloves or tissue paper when handling the prints to avoid direct contact. | Avoid exposing your lino prints to direct sunlight or harsh lighting to prevent fading and discoloration. |
| Avoid bending or folding the prints to maintain their shape and integrity. | Store your lino prints in a cool, dry place with stable humidity levels to prevent warping. |
Cleaning:

Cleaning your lino prints should be done with caution to avoid damaging the delicate surface. Use a soft, dry cloth or a duster to gently remove dust and dirt. If necessary, you can lightly dab a clean cloth with water or a mild cleaner specifically designed for artwork. Always test any cleaning solution on a small, inconspicuous area of the print first to ensure it doesn’t cause any damage.
Display:
When displaying your lino prints, keep them away from areas with high humidity, extreme temperatures, or excessive moisture. Avoid hanging them in places where they may be exposed to smoke or cooking fumes, as these can cause gradual discoloration or damage to the print.
Professional Preservation:
If your lino print is of significant value or importance, consider consulting with a professional art conservator or a framing specialist to discuss archival framing options. Archival framing materials and techniques can help protect your print from aging, deterioration, and environmental damage.
By following these care and maintenance tips, you can ensure that your lino prints remain vibrant and in excellent condition for years to come.


Meet Harrison Clayton, a distinguished author and home remodeling enthusiast whose expertise in the realm of renovation is second to none. With a passion for transforming houses into inviting homes, Harrison's writing at https://thehuts-eastbourne.co.uk/ brings a breath of fresh inspiration to the world of home improvement. Whether you're looking to revamp a small corner of your abode or embark on a complete home transformation, Harrison's articles provide the essential expertise and creative flair to turn your visions into reality. So, dive into the captivating world of home remodeling with Harrison Clayton and unlock the full potential of your living space with every word he writes.


