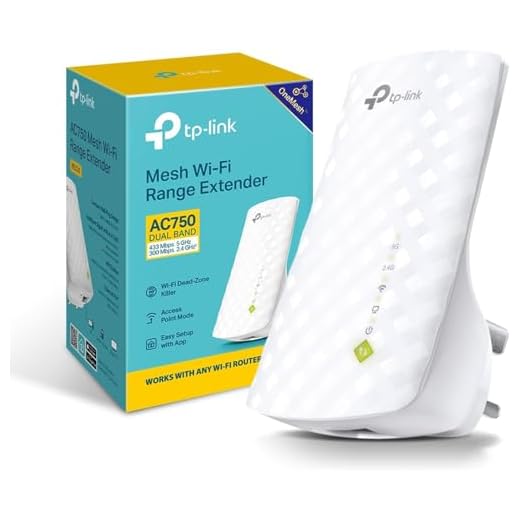
How to connect vodafone wifi booster

Are you tired of having a weak Wi-Fi signal in certain parts of your home or office? Vodafone Wi-Fi Booster might just be the solution you’re looking for! This innovative device extends the range of your Wi-Fi network, allowing you to enjoy strong and reliable internet connectivity throughout your entire space.
Connecting your Vodafone Wi-Fi Booster is a simple task that anyone can accomplish. In this article, we will guide you through the step-by-step process of setting up and connecting your booster to ensure smooth and uninterrupted internet access.
To begin, ensure that you have received the Vodafone Wi-Fi Booster package, which includes the booster itself, a power adapter, and an Ethernet cable. Before connecting the booster, it is crucial to find the optimal location where it can receive a strong wireless signal from your existing Wi-Fi router, as this will determine the effectiveness of the booster.
Once you have identified the ideal spot for placing the booster, plug it into a power outlet nearby using the provided power adapter. It is recommended to place the booster halfway between your router and the area where you experience the weakest Wi-Fi signal. This will help maximize its range and improve signal strength in those areas.
Step-by-step guide to connect Vodafone WiFi Booster
If you are looking for a way to extend the range and improve the strength of your Vodafone WiFi signal, the Vodafone WiFi Booster can be a great solution. Follow these steps to easily set up and connect your Vodafone WiFi Booster:

Step 1: Unpack the Vodafone WiFi Booster
Start by unpacking the Vodafone WiFi Booster from its packaging. Ensure that you have received all the necessary components, including the WiFi Booster unit and any accompanying cables or power adapters.
Step 2: Find the optimal location
Before connecting the Vodafone WiFi Booster, identify the ideal place in your home where the WiFi signal strength is weak or non-existent. This will typically be an area far away from the main WiFi router.
Step 3: Plug in the Vodafone WiFi Booster
Connect the Vodafone WiFi Booster to a power source using the provided power adapter. Make sure that the power source is stable and easily accessible. Wait for the WiFi Booster to power on and initialize.
Step 4: Connect the Vodafone WiFi Booster to your WiFi network
Using a device that is already connected to your Vodafone WiFi network, open a web browser and enter ‘http://booster’ into the address bar. If this doesn’t work, you can also try entering ‘http://192.168.1.1’ as the address.
On the login page, enter the default username and password, which are usually ‘admin’ for both fields. If you have changed the login details or are unsure, consult the user manual or contact Vodafone support.

Once logged in, follow the on-screen instructions to set up and configure your Vodafone WiFi Booster. You may need to select your existing WiFi network from a list of available networks and enter the network password.
Step 5: Position the Vodafone WiFi Booster
After successfully connecting the Vodafone WiFi Booster to your network, place it in the optimal location you identified in step 2. Make sure it is placed at a reasonable distance from the main WiFi router to avoid interference.
Step 6: Enjoy extended WiFi coverage
Once the Vodafone WiFi Booster is positioned correctly, it will start enhancing your WiFi signal and extending the coverage area. Test your WiFi connection in areas that previously had poor signal strength to confirm improved performance.
Keep in mind that you may need to repeat the setup process if you move the Vodafone WiFi Booster to a new location in the future.
Check the compatibility
Before connecting the Vodafone WiFi booster, it’s important to ensure that it is compatible with your existing WiFi network. This will ensure a seamless connection and optimal performance.

Step 1: Verify router compatibility
Check the compatibility requirements of the Vodafone WiFi booster with your router. Some boosters may only be compatible with specific router models or versions. This information can usually be found on the packaging or in the user manual of the WiFi booster.
Step 2: Check WiFi network specifications
Confirm that your WiFi network meets the required specifications for the Vodafone WiFi booster. This includes the network frequency (2.4 GHz or 5 GHz) and the WiFi standards supported (802.11ac, 802.11n, etc.). The WiFi booster may not work properly if your network does not meet these requirements.
Step 3: Consider the physical placement
Take into account the layout of your home or office and determine the optimal placement for the WiFi booster. Ensure that there are no physical obstructions, such as walls or furniture, that could interfere with the WiFi signal. The booster should be positioned within a reasonable distance from the main router to ensure a strong and stable connection.
Step 4: Consult the user manual
Review the user manual of the Vodafone WiFi booster for any additional compatibility requirements or recommendations. This will provide you with detailed instructions on connecting the booster to your network and troubleshooting any potential issues.
By following these steps, you can ensure that the Vodafone WiFi booster is compatible with your network and maximize its performance for optimal WiFi coverage and speed.

Unpack the WiFi Booster
When you receive your Vodafone WiFi Booster, the first step is to unpack it from the box and get it ready for setup.
Gather the necessary items
Before you begin, make sure you have all the items required to set up your WiFi Booster:
- WiFi Booster
- Power adapter
- Network cables
- Quick Start Guide
Inspect the WiFi Booster
Once you have gathered all the necessary items, carefully inspect the WiFi Booster for any physical damage during transit. Check for any bent or broken components.
Note: If you find any damage, make sure to contact Vodafone customer support for assistance before proceeding with the setup.
Connect the cables
Next, connect the network cables. Plug one end of the Ethernet cable into the LAN port on your WiFi Booster and the other end into the LAN port on your router or modem. Use the provided cables if necessary.

Important: Ensure that your router or modem is connected to the power supply and turned on before connecting the Ethernet cable.
Once the cables are securely connected, plug the power adapter into a power outlet and the other end into the power port on your WiFi booster.
Note: Make sure the WiFi Booster is placed somewhere with good signal reception and away from obstacles that could disrupt the WiFi signal.
Now that you have successfully unpacked the WiFi Booster and connected the necessary cables, you are ready to proceed with the next step of the setup process.
Connect the WiFi Booster to the power supply
To connect your Vodafone WiFi Booster to the power supply, follow these steps:

1. Find a suitable power outlet near where you want to place your WiFi Booster.
2. Plug the power adapter into the WiFi Booster’s Power port.
3. Insert the other end of the power adapter into the power outlet.
4. Make sure the power outlet is switched on.
5. Wait for the WiFi Booster’s Power indicator light to turn solid green, indicating it is receiving power.
6. If the Power indicator light doesn’t turn on, try a different power outlet or check the power adapter.
7. Once the Power indicator light is on, the WiFi Booster is connected to the power supply.
Your Vodafone WiFi Booster is now ready to be set up and connected to your existing WiFi network for a stronger and more reliable internet connection.
Set up the WiFi Booster
Connecting a Vodafone WiFi Booster to your home network is a simple process. Follow the steps below to get started:
| Step 1: | Plug the Vodafone WiFi Booster into a power outlet near your Vodafone router. |
| Step 2: | Wait for the power and signal LED lights on the WiFi Booster to turn solid green. |
| Step 3: | On your device, go to the WiFi settings and connect to “VodafoneWiFiBooster” network. |
| Step 4: | Open a web browser and go to “vodafonewifibooster.com” to access the Booster’s setup page. |
| Step 5: | Follow the on-screen instructions to set up the WiFi Booster. You will be asked to select your home network, enter the WiFi password, and create a new name and password for the Booster. |
| Step 6: | Once the setup process is complete, the WiFi Booster will restart. Wait for the solid green signal LED light before proceeding to the next step. |
| Step 7: | Now, connect your device to the newly created Booster network using the new name and password. |
| Step 8: | Test your internet connection to ensure that the Booster is working properly. |
By following these steps, you can easily set up and connect your Vodafone WiFi Booster to enhance your home network coverage and ensure stable WiFi signals in every corner of your house.
Connect to your home network
To connect your Vodafone WiFi booster to your home network, follow these simple steps:
- Plug in your Vodafone WiFi booster into an electrical socket ensuring it is within range of your existing WiFi network.
- Wait for the power light to turn solid green, indicating the booster is turned on and ready to connect.
- On your device, go to the WiFi settings and select the network name (SSID) of your Vodafone WiFi booster.
- When prompted, enter the password for the booster. You can find the password on the back of the booster or in the packaging.
- Wait for your device to connect to the Vodafone WiFi booster, indicated by a successful connection in your WiFi settings.
- Once connected, you can now enjoy a boosted WiFi signal in areas where your original network may have weaker coverage.
By following these steps, you should now be successfully connected to your home network using your Vodafone WiFi booster.


Meet Harrison Clayton, a distinguished author and home remodeling enthusiast whose expertise in the realm of renovation is second to none. With a passion for transforming houses into inviting homes, Harrison's writing at https://thehuts-eastbourne.co.uk/ brings a breath of fresh inspiration to the world of home improvement. Whether you're looking to revamp a small corner of your abode or embark on a complete home transformation, Harrison's articles provide the essential expertise and creative flair to turn your visions into reality. So, dive into the captivating world of home remodeling with Harrison Clayton and unlock the full potential of your living space with every word he writes.


