How to connect swann dvr to wifi router without cable

Swann DVR (Digital Video Recorder) is a powerful surveillance system that allows you to monitor your home or business. However, in order to access its features remotely or view the recorded footage on your smartphone or computer, you need to connect it to your WiFi network. Connecting your Swann DVR to the WiFi router without using a cable can be a convenient option, especially if your DVR is located far from your router.
But how exactly can you achieve this?
The first step is to ensure that your Swann DVR supports WiFi connection. Some older models may not have this capability, so it’s essential to check the specifications of your device. If your DVR supports WiFi, you can proceed with the following steps to connect it to your WiFi router without using a cable.
Step 1: Prepare your WiFi connection details
Before you start the setup process, make sure you have your WiFi network name (SSID) and password handy. You’ll need these details when configuring the WiFi connection on your DVR. The location of these settings varies depending on your DVR model and menu structure, so consult your user manual to find the appropriate section.

Step 2: Access the DVR settings
Connect your DVR to a monitor or TV and power it on. Use the provided remote control or front panel buttons to navigate to the settings menu. Once you’re in the settings menu, find the network settings section, usually under the ‘Network’ or ‘Setup’ tab.
Step 3: Configure the WiFi connection
In the network settings section, you’ll see options to connect your DVR to a WiFi network. Select the option to add a new WiFi connection and enter your WiFi network name and password when prompted. Make sure to double-check that you entered the details correctly, as any errors can prevent a successful connection.
Step 4: Test the connection and adjust settings if necessary

After you’ve entered the WiFi network details, your DVR will attempt to establish a connection with your router. Wait for a few moments, and if the connection is successful, you should see an indication on your DVR’s display or in the network settings menu. If the connection fails, make sure that your WiFi password is correct, your router is discoverable, and there are no other technical issues that could impact the connection.
Now you can enjoy the convenience of remotely accessing and monitoring your Swann DVR without the need for a physical cable connection!
Remember, the exact process may vary depending on your specific Swann DVR model, so always refer to your user manual for detailed instructions. Additionally, it’s worth mentioning that connecting your DVR to a WiFi network may introduce potential security risks, so ensure that you have proper security measures in place to safeguard your surveillance system.
Step-by-Step Guide on Connecting Swann DVR to Wi-Fi Router Without a Cable
If you’re looking to connect your Swann DVR to your Wi-Fi router without using a cable, you’re in the right place. This guide will walk you through the process step-by-step to help you achieve a successful wireless connection in no time.
Before You Begin:

- Ensure you have a Wi-Fi router with an available network connection.
- Your Swann DVR should have built-in Wi-Fi compatibility.
- Ensure you have the necessary login credentials for your Wi-Fi network.
- Make sure your mobile device or computer is connected to the same Wi-Fi network you want to connect your Swann DVR to.
Step 1: Finding the IP Address
- Connect your Swann DVR to a power source and turn it on. Connect your mobile device or computer to the same Wi-Fi network you want to connect your DVR to.
- Open a web browser and enter “http://ipaddress” into the address bar, replacing “ipaddress” with the default IP address of your DVR (this can usually be found in the user manual).
- A login page should appear. Enter the default username and password for your DVR (again, refer to the user manual for this information).
- Once logged in, navigate to the network settings and locate the IP address assigned to your DVR. Write down this IP address for future reference.
Step 2: Connecting DVR to Wi-Fi
- Disconnect your mobile device or computer from the Wi-Fi network temporarily.
- On your mobile device or computer, go to the Wi-Fi settings and connect to the Wi-Fi network named “XXXXX_2.4G/5G“, with “XXXXX” being the last six characters of your DVR’s MAC address (you can find the MAC address on the DVR’s label).
- Open a web browser and enter the IP address you wrote down earlier into the address bar.
- A login page for your DVR should appear. Enter the same default username and password used in Step 1.
- In the network settings, select your Wi-Fi network from the available list and enter the network password when prompted. Click “Apply” to save the changes.
Step 3: Reconnecting Mobile Device or Computer
- Disconnect from the Wi-Fi network named “XXXXX_2.4G/5G” on your mobile device or computer.
- Reconnect to your original Wi-Fi network.
Step 4: Verifying Connection
- Open the Swann DVR app on your mobile device or launch the Swann DVR software on your computer.
- Enter the IP address of your DVR (the one from Step 1) when prompted.
- If the connection is successful, you should now be able to access your Swann DVR wirelessly from your mobile device or computer.
Following these simple steps should help you connect your Swann DVR to your Wi-Fi router without using a cable. Always refer to the user manual provided by Swann for specific instructions and troubleshooting tips.
Preparation
Before connecting your Swann DVR to your Wi-Fi router without using a cable, there are a few things you need to gather and setup:
- Ensure you have a compatible Wi-Fi router that supports WPS (Wi-Fi Protected Setup) or Wi-Fi Direct. These are often found in modern Wi-Fi routers.
- Make sure your DVR supports Wi-Fi connectivity. Check the user manual or specifications to confirm this.
- Connect the DVR to a power source and turn it on. This step might seem simple, but it’s important to ensure the DVR has enough power to connect to the Wi-Fi network.
- Locate the network administrator password for your Wi-Fi network. This is typically found on the bottom of your router, in the router manual, or was set when you initially set up your Wi-Fi network.
- Figure out the Wi-Fi network name (SSID) of your router. You may find it helpful to make a note of this information to have it ready during the setup process.
- If there are other devices currently connected to the Wi-Fi router, temporarily disable or disconnect them. This will minimize any potential interference during the connection process.
Once you have gathered and completed the necessary preparation steps, you can proceed with the steps to connect your Swann DVR to your Wi-Fi network without using a cable.
Connecting Swann DVR to Wi-Fi Network
Connecting your Swann DVR to a Wi-Fi network allows you to access your surveillance footage remotely, giving you the flexibility to monitor your property from anywhere. This can be particularly useful when you’re away from home or if you have multiple locations to monitor.
Here are the steps to connect your Swann DVR to a Wi-Fi network:
Step 1: Check the compatibility
Before attempting to connect your Swann DVR to your Wi-Fi network, make sure that your DVR is compatible with Wi-Fi connectivity. Check the user manual or the manufacturer’s website to verify if it has built-in Wi-Fi capabilities or if you need to purchase a separate Wi-Fi adapter.

Step 2: Connect the Wi-Fi adapter (if necessary)
If your DVR doesn’t have built-in Wi-Fi, you’ll need to connect a Wi-Fi adapter to enable wireless connectivity. Follow the manufacturer’s instructions to properly connect the adapter to the DVR. Make sure to position the adapter in a location where it can receive a strong Wi-Fi signal.
Step 3: Access the DVR settings
Once you have connected the Wi-Fi adapter or confirmed that your DVR has built-in Wi-Fi capabilities, connect a monitor or TV to your DVR to access the settings. Use the DVR remote or control panel to navigate to the settings menu.
Step 4: Enable Wi-Fi connectivity
In the settings menu of your DVR, locate the “Network” or “Wi-Fi” option. Select it to access the network settings and enable Wi-Fi connectivity. Follow the on-screen instructions or refer to the user manual for your specific DVR model on how to enable Wi-Fi.
Step 5: Connect to your Wi-Fi network
After enabling Wi-Fi connectivity on your DVR, you should see a list of available Wi-Fi networks in the settings menu. Use the remote or control panel to select your Wi-Fi network from the list and enter the Wi-Fi password when prompted. Make sure to enter the correct password to successfully connect to the network.
Once connected, your Swann DVR will establish a connection with your Wi-Fi network. You can now access your surveillance footage remotely using the Swann app or compatible software on your smartphone, tablet, or computer.

Note: It’s recommended to secure your Wi-Fi network with a strong password to prevent unauthorized access to your DVR and surveillance footage.
With these steps, you can easily connect your Swann DVR to your Wi-Fi network, giving you convenient access to your surveillance system from any location with an internet connection.
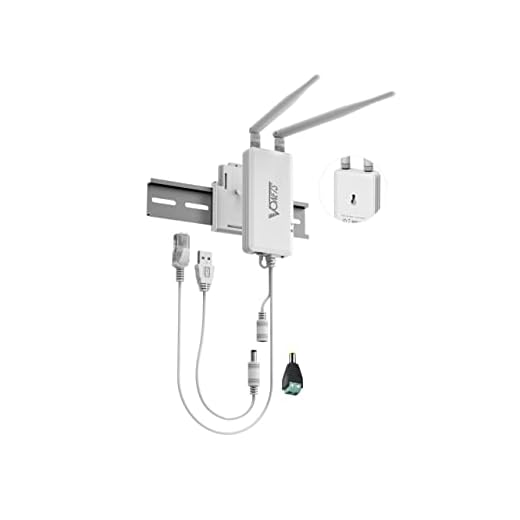
Wi-Fi Router Compatibility
Before attempting to connect your Swann DVR to a Wi-Fi router without a cable, it is important to ensure that your router is compatible with this type of connection. Not all routers support wireless setups for CCTV systems, so it is crucial to check the specifications of your router beforehand.
One important specification to look out for is the presence of a built-in Wi-Fi capability in your router. This will allow you to connect your DVR to the router wirelessly without the need for additional devices. Additionally, your router should support the necessary wireless protocol, such as 802.11n or 802.11ac.
If your router does not have built-in Wi-Fi or lacks the required wireless protocol, you may need to purchase an additional wireless adapter or bridge. These devices can be connected to your router to enable wireless connectivity for your CCTV system.

Before purchasing any additional devices, it is advised to consult the user manual or contact the manufacturer of your router to confirm compatibility. Some routers may have limitations or restrictions when it comes to connecting external devices.
Once you have confirmed that your router is compatible with wireless connections for CCTV systems and you have any necessary additional devices, you can proceed with the process of connecting your Swann DVR to your Wi-Fi router without the need for a cable.
Configuring Network Settings
Before you can connect your Swann DVR to a Wi-Fi router without a cable, you will need to configure the network settings on the DVR. This can be done by following the steps below:
- Power on your Swann DVR and connect it to a monitor or TV using the provided cables.
- Using the remote control or front panel buttons, navigate to the DVR’s main menu.
- Select the “Settings” or “Setup” option.
- Within the settings menu, find the “Network” or “Network Setup” option and select it.
- You will be prompted to set an IP address for your DVR. Choose the “Manual” or “Static” option.
- Enter the IP address that you want to assign to the DVR. Make sure it is within the range of your Wi-Fi router’s IP address range.
- Set the subnet mask, default gateway, and DNS server values based on your network configuration. If you are unsure of these values, consult your router’s manual or contact your internet service provider.
- Save the network settings and exit the menu.
Once you have configured the network settings on your Swann DVR, you can proceed to connect it to your Wi-Fi router without a cable. Refer to the user manual or manufacturer’s website for instructions specific to your DVR model.
Troubleshooting Connectivity Issues
If you are experiencing connectivity issues while trying to connect your Swann DVR to your WiFi router without a cable, here are some troubleshooting steps you can follow:
1. Double-check network settings
Make sure that your WiFi router is properly set up and working correctly. Check the network name (SSID) and password to ensure they are correct. Also, ensure that the network encryption settings (WPA, WPA2, etc.) in your router match the settings in the DVR.
2. Signal strength
Ensure that the Swann DVR and WiFi router are in close proximity to each other. This will help to achieve a stronger signal and improve the connection stability. Walls, metal objects, and other electronic devices can interfere with the WiFi signal, so try to eliminate any potential obstacles between the devices.
3. Restart the devices
Power off both your Swann DVR and WiFi router, and then power them back on. This simple step can reset any temporary glitches or conflicts that may be causing the connectivity issue.
4. Check the cables
Ensure that all cables, including Ethernet and power cables, are securely connected to both the Swann DVR and the WiFi router. Loose or disconnected cables can weaken the connection or cause intermittent connectivity problems.
If the issue persists after following these troubleshooting steps, it may be necessary to consult the user manual or contact the Swann technical support team for further assistance. They can provide more specific guidance based on the model and specifications of your DVR and router.
Tips for Optimal Wi-Fi DVR Connection
If you are looking to connect your Swann DVR to a Wi-Fi router without using a cable, it is important to follow these tips for the best and most reliable connection.
1. Place DVR and router in close proximity: To ensure a strong and stable Wi-Fi signal, it is recommended to position the DVR and your router in close proximity to each other. Avoid placing them too far apart or obstructing the signal with objects such as walls or furniture.
2. Use a high-quality Wi-Fi router: Investing in a high-quality Wi-Fi router can greatly improve the performance and reliability of your DVR Wi-Fi connection. Look for routers with multiple antennas and strong signal strength to ensure optimal signal coverage.
3. Check Wi-Fi signal strength: Before connecting your DVR to the Wi-Fi, use a Wi-Fi analyzer app or software to check the signal strength in the area where your DVR will be placed. This will help identify any potential weak spots or areas with interference.
4. Connect DVR to 5GHz Wi-Fi network: If your router supports both 2.4GHz and 5GHz frequency bands, it is advisable to connect your DVR to the 5GHz network. This frequency band usually offers faster speeds and less interference compared to the crowded 2.4GHz band.
5. Secure your Wi-Fi network: To ensure the security of your DVR’s Wi-Fi connection, it is essential to set up a strong password for your Wi-Fi network. This will prevent unauthorized access and ensure the privacy of your surveillance footage.
6. Update DVR firmware: Regularly check for firmware updates for your Swann DVR and install them as they become available. New firmware versions often include bug fixes and improvements that can enhance the Wi-Fi connectivity of your DVR.
7. Restart DVR and router: If you are experiencing Wi-Fi connectivity issues with your DVR, try restarting both the DVR and the router. This can help to refresh the connection and resolve any temporary glitches.
By following these tips, you can ensure a reliable and robust Wi-Fi connection between your Swann DVR and your Wi-Fi router, allowing you to monitor your surveillance footage seamlessly.


Meet Harrison Clayton, a distinguished author and home remodeling enthusiast whose expertise in the realm of renovation is second to none. With a passion for transforming houses into inviting homes, Harrison's writing at https://thehuts-eastbourne.co.uk/ brings a breath of fresh inspiration to the world of home improvement. Whether you're looking to revamp a small corner of your abode or embark on a complete home transformation, Harrison's articles provide the essential expertise and creative flair to turn your visions into reality. So, dive into the captivating world of home remodeling with Harrison Clayton and unlock the full potential of your living space with every word he writes.


