How to change a trv radiator valve

Changing a thermostatic radiator valve (TRV) can be a simple and effective way to improve the functionality and energy efficiency of your heating system. Whether you’re having issues with your current valve or simply want to upgrade to a more modern and efficient model, this step-by-step guide will walk you through the process.
First, it’s important to understand the role of a TRV in your heating system. A TRV is responsible for controlling the flow of hot water through your radiator, allowing you to adjust the temperature of each individual room. By regulating the heat output, you can save energy and reduce heating costs.
Before you begin, gather the necessary tools and materials. You’ll need an adjustable wrench, pliers, a cloth or towel, thread seal tape, and the replacement TRV. Turn off the central heating system and allow the radiator to cool down completely. Once it’s cool, place the towel or cloth underneath the radiator to catch any water or debris that may spill.
Next, use the wrench to gently loosen the lock shield valve located on the opposite side of the radiator from the TRV. Once loosened, use pliers to completely remove the lock shield valve. Be aware that water may begin to trickle out, so keep the towel or cloth handy to prevent any mess. With the lock shield valve removed, you can now remove the old TRV.
Step-by-step guide to replacing a trv radiator valve
Replacing a thermostatic radiator valve (TRV) is a relatively simple process that can help improve the efficiency of your heating system and control the temperature in a room. Here is a step-by-step guide on how to replace a TRV radiator valve:

| Step 1 | Turn off the central heating system |
| Step 2 | Close the lockshield valve on the opposite side of the radiator |
| Step 3 | Place a bowl or container beneath the radiator to catch any water that may leak |
| Step 4 | Using an adjustable spanner, carefully unscrew the nut connecting the TRV to the radiator body |
| Step 5 | Remove the old TRV from the radiator valve tail |
| Step 6 | Apply some PTFE tape to the thread of the new TRV, making sure to wrap it in a clockwise direction |
| Step 7 | Attach the new TRV to the radiator valve tail, ensuring it is properly tightened |
| Step 8 | Use the adjustable spanner to reconnect the nut and tighten it securely |
| Step 9 | Open the lockshield valve on the opposite side of the radiator |
| Step 10 | Turn on the central heating system and check for any leaks |
| Step 11 | Once the system is fully operational, adjust the new TRV to the desired temperature |
By following these steps, you can easily replace a TRV radiator valve and improve the performance and comfort of your heating system. Remember to always follow the manufacturer’s instructions and consult a professional if you are unsure about any aspect of the installation process.
Shut off the radiator
Before changing a TRV (Thermostatic Radiator Valve) radiator valve, it is important to shut off the radiator and make sure it is cooled down. This will prevent any water leaks and potential damage.
Here are the steps to shut off the radiator:
Step 1
Locate the main control valve usually situated on one end of the radiator. It is typically a small knob or lever.
Step 2
Turn the main control valve clockwise until it is fully closed. This will shut off the flow of hot water into the radiator.
Once the main control valve has been closed, you can proceed with changing the TRV radiator valve. Always remember to exercise caution when dealing with hot water and consult a professional if needed.
Drain the radiator
Before you begin changing the TRV radiator valve, it is important to drain the radiator to avoid any water leakage or damage. Follow these steps to properly drain the radiator:
1. Turn off the heating
Start by turning off the heating system to allow the water in the radiator to cool down. This will prevent any potential burns or scalding.
2. Locate the drain valve
Next, locate the drain valve at the bottom of the radiator. The drain valve is typically a small square or hexagonal fitting. Prepare a container in which to collect the expelled water.
3. Place the container
Place the container underneath the drain valve to catch the water as it is released. Make sure the container is large enough to hold the volume of water in the radiator.

4. Open the drain valve
Using a wrench or suitable tool, carefully open the drain valve by turning it counterclockwise. As you do so, the water will begin to flow out of the radiator and into the container. Be cautious of any splashing or sudden releases of hot water.
5. Fully drain the radiator
Allow the water to drain completely from the radiator. You may need to turn the drain valve slightly to control the flow. Once the radiator is empty, close the drain valve tightly by turning it clockwise to prevent any leaks.
Your radiator is now drained and ready for the next step in changing the TRV radiator valve.
Remove the old trv valve
To begin removing the old trv radiator valve, you will need a few basic tools:
- A wrench or spanner
- A towel or cloth
- A bucket or container to catch any water that may leak out
1. Turn off the heating system. Locate the isolation valve, usually found on the pipework directly below the radiator. Turn the valve clockwise to shut off the flow of water to the radiator.

2. Place a towel or cloth beneath the trv valve to catch any residual water. This will help to prevent any water from spilling onto the floor or carpet.
3. Use a wrench or spanner to loosen the nut connecting the trv valve to the valve body. Turn the wrench counterclockwise to loosen and remove the nut completely.
4. Once the nut is removed, gently wiggle and pull the old trv valve away from the valve body. As you do this, some water may leak out, so be prepared to catch any excess water in the bucket or container.
5. Inspect the valve body to make sure it is clean and free from any debris. Use a cloth or brush to clean the mating surface if necessary.
6. Dispose of the old trv valve appropriately, following your local regulations.

Now that you have successfully removed the old trv valve, you can proceed with installing the new trv radiator valve.
Install the new trv valve
Once you have removed the old TRV valve, you can proceed with installing the new one. Follow these steps:
1. Prepare the new TRV valve
Before you install the new TRV valve, make sure you have read the manufacturer’s instructions. Check the packaging for any additional tools or materials you may need to complete the installation.
2. Shut off the water supply
Locate the isolation valve associated with the radiator you are working on. Close the valve to shut off the water supply to the radiator. This will prevent any water from entering the system while you are installing the new valve.
3. Drain the radiator
Next, you will need to drain the radiator of any remaining water. Place a bucket or towel under the radiator to catch any water that may come out. Once the radiator is drained, you can proceed with the installation.

4. Install the new valve
|
Start by applying plumber’s tape to the threads of the new valve. This will help create a watertight seal. Screw the new valve onto the valve body, ensuring it is tight but not overtightened. Use a wrench if necessary, but be careful not to damage the threads. |
|

5. Test for leaks and reassemble
Turn the water supply back on and carefully check for any leaks around the new valve. If you notice any leaks, tighten the valve slightly until the leaking stops.
Once you are confident there are no leaks, you can start reassembling the radiator and the associated pipework. Follow the manufacturer’s instructions for any additional steps or precautions to take during reassembly.

By following these steps, you should be able to successfully install a new TRV valve and continue enjoying an efficient and well-functioning radiator in your home.
Test and adjust the new TRV valve
Once you have successfully replaced the old TRV radiator valve with a new one, it is important to test and adjust the new valve to ensure proper functionality and efficiency in heating your home. Follow these steps to test and adjust the new TRV valve:
Step 1: Verify temperature control
Turn the heating system on and set the thermostat to a temperature higher than the current room temperature. This will activate the new TRV valve and allow you to verify if it is controlling the radiator temperature properly.
Step 2: Observe heating functionality
Keep an eye on the radiator to see if it heats up as expected. The new TRV valve should allow hot water from the heating system to flow into the radiator and distribute heat. If the radiator fails to heat up or does not reach the desired temperature, it may indicate a problem with the valve installation.
Step 3: Adjust the TRV valve settings
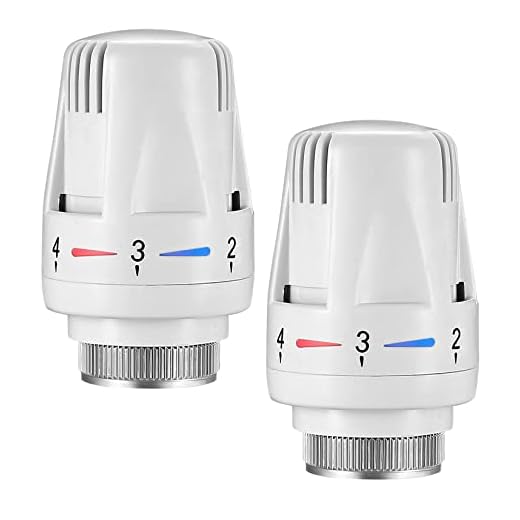
If the radiator heats up but does not reach the desired temperature or if the room temperature is too high, you may need to adjust the TRV valve settings. Locate the adjustment dial or lever on the valve and make minor adjustments as needed. Some valves may have numbers or temperature indicators to help you set the desired temperature accurately.
Step 4: Allow time for adjustment
After making adjustments, allow some time for the TRV valve to respond and for the radiator to stabilize at the new temperature. This may take around 30 minutes or longer depending on the heating system and room size.
Repeat steps 1-4 as necessary until the TRV valve and radiator are functioning optimally and your desired temperature is consistently maintained.
Always refer to the manufacturer’s instructions and guidelines for specific information about adjusting and troubleshooting your particular TRV valve model.


Meet Harrison Clayton, a distinguished author and home remodeling enthusiast whose expertise in the realm of renovation is second to none. With a passion for transforming houses into inviting homes, Harrison's writing at https://thehuts-eastbourne.co.uk/ brings a breath of fresh inspiration to the world of home improvement. Whether you're looking to revamp a small corner of your abode or embark on a complete home transformation, Harrison's articles provide the essential expertise and creative flair to turn your visions into reality. So, dive into the captivating world of home remodeling with Harrison Clayton and unlock the full potential of your living space with every word he writes.


