How to attach sleeping bag to backpack
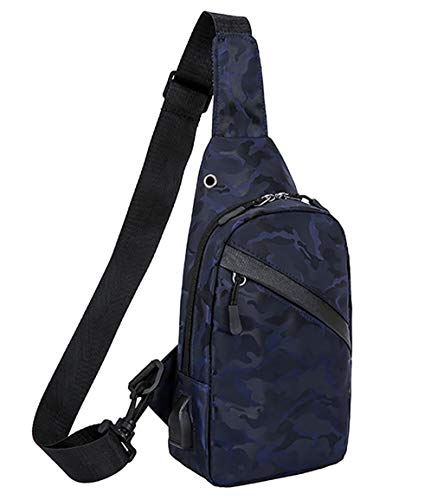
When you’re heading out for a camping or hiking trip, having a properly packed backpack is essential. One crucial item to include is a sleeping bag. However, fitting a sleeping bag into your backpack can be a challenge, especially if you don’t have much space left. Luckily, there are several methods you can use to attach your sleeping bag to your backpack, ensuring that it is secure and easily accessible during your outdoor adventure.
Method 1: Bottom Compression Straps
If your backpack is equipped with compression straps at the bottom, you can utilize them to attach your sleeping bag. Begin by rolling up your sleeping bag tightly and securing it with compression straps. Then, attach the rolled sleeping bag to the bottom of your backpack, adjusting the straps for a tight fit. This method not only keeps your sleeping bag secure but also helps distribute the weight evenly, improving your overall balance.
Note: Make sure to place your sleeping bag in a waterproof stuff sack before attaching it to protect it from moisture and ensure a dry night’s sleep.
Method 2: Side and Front Attachment Points

If your backpack has side or front attachment points, you can use them to secure your sleeping bag externally. Fold your sleeping bag lengthwise and fasten it using the attachment points. Make sure to double-check the stability of the attachment to prevent it from coming loose during your trek. This method is especially convenient if you want quick access to your sleeping bag, as you won’t have to dig through your backpack to find it.
Remember: Before attaching your sleeping bag externally, check the weather conditions. If rain or snow is expected, it’s advisable to pack your sleeping bag inside your backpack to keep it dry.
By following these methods, you can successfully attach your sleeping bag to your backpack, maximizing the space available and ensuring a comfortable outdoor sleeping experience. Experiment with different techniques and find one that works best for your backpack and sleeping bag combination. Enjoy your adventures in the great outdoors!
How to Securely Attach Your Sleeping Bag to Your Backpack
When preparing for a backpacking trip, it is important to make sure that your gear is securely attached to your backpack. One essential item to attach is your sleeping bag. Having your sleeping bag properly secured not only prevents it from falling off during your hike, but also allows for easier access when setting up camp for the night. Follow these steps to securely attach your sleeping bag to your backpack.
Step 1: Choose the Right Backpack
Before attaching your sleeping bag, make sure you have the right backpack for the job. Look for a backpack with external attachment points, such as loops or straps, that can be used to secure your sleeping bag externally. Internal attachment points are also helpful, as they allow you to organize your gear inside the pack.

Step 2: Roll or Compress Your Sleeping Bag
Prior to attachment, you will need to roll or compress your sleeping bag. This minimizes its size and makes it easier to secure to your backpack. Start by folding your sleeping bag in half widthwise and then roll it tightly from one end to the other. Some sleeping bags come with compression sacks that allow you to easily compress them into a smaller size.
Step 3: Secure the Sleeping Bag to Your Backpack
| External Attachment Points | Internal Attachment Points |
|---|---|
|
|
If your backpack doesn’t have external or internal attachment points, you can also use bungee cords, carabiners, or lash straps to secure your sleeping bag. Just make sure they are tightened properly to prevent the sleeping bag from slipping off.
By following these steps, you can ensure that your sleeping bag is securely attached to your backpack, providing convenience, easy access, and peace of mind during your backpacking adventures.
Choosing the Right Sleeping Bag for Your Backpacking Adventure
When preparing for a backpacking adventure, one of the most important things to consider is choosing the right sleeping bag. A comfortable and appropriately rated sleeping bag can make a significant difference in your overall camping experience. Here are some factors to consider when selecting a sleeping bag for your backpacking trip:
Temperature Rating
The temperature rating of the sleeping bag is crucial in ensuring your comfort and safety during the night. It is essential to check the expected weather conditions and choose a sleeping bag with a rating that matches the lowest anticipated temperature. For example, if you are going to an area where the temperature can drop to 5°C, it would be best to choose a bag with a temperature rating of -5°C or lower to ensure warmth during the night.

Insulation Type
There are two common types of sleeping bag insulation: down and synthetic. Down insulation is known for its excellent warmth-to-weight ratio and compressibility, making it ideal for keeping you warm with minimal weight in your backpack. However, down insulation may lose its warmth-retaining capabilities when exposed to moisture, so synthetic insulation can be a more reliable choice if you anticipate wet conditions during your trip.
Synthetic insulation offers good insulation properties even when damp and usually comes at a more affordable price point. They are also hypoallergenic, making them a better option for campers with allergies. However, it is important to note that synthetic insulation tends to be bulkier and heavier than down insulation.
Bag Size and Weight
The size and weight of the sleeping bag are crucial factors, especially for backpackers. Look for a sleeping bag that is compact, lightweight, and easy to compress. This will ensure that it doesn’t take up much space in your backpack and won’t add unnecessary weight to your load.
Consider the length and width of the sleeping bag to ensure a comfortable fit. Some bags are specifically designed for men, women, or individuals with different height ranges. Make sure to choose a bag that suits your specific needs to maximize comfort during your backpacking adventure.
By considering the temperature rating, insulation type, and size and weight of the sleeping bag, you can make an informed decision and choose the right sleeping bag for your backpacking adventure. Remember, a good night’s sleep is essential for enjoying your outdoor experience to the fullest. Happy backpacking!

Preparing Your Backpack for the Sleeping Bag
Preparing your backpack for your sleeping bag is an important step to ensure a comfortable and organized outdoor experience. Here are some steps to follow:
Gather your supplies
Before you begin, gather the necessary supplies. This includes your backpack, sleeping bag, and any additional items such as compression or stuff sacks.
Clean your backpack
Make sure your backpack is clean before you start packing your sleeping bag. Remove any debris or dirt from the inside and outside of your backpack, and shake it out to remove any excess dust.
Choose a sleeping bag stuff sack
If your sleeping bag does not come with a stuff sack, choose a compression or stuff sack that is appropriate for the size and shape of your sleeping bag. Make sure the sack is large enough to accommodate your sleeping bag without excessive compression.
Compression versus stuff sack
If you choose to use a compression sack, be careful not to compress your sleeping bag too much, as this can damage the insulation over time. A stuff sack allows for better loft and long-term insulation performance.

Pack your sleeping bag
Start by laying your sleeping bag flat on the ground or a clean surface. If your sleeping bag has a hood, make sure it is tucked inside the bag. Roll your sleeping bag tightly, starting from the foot end and moving towards the head end.
Insert your sleeping bag into the stuff sack
Once your sleeping bag is tightly rolled, carefully insert it into the stuff sack. Use compression straps or cords to secure the sack tightly. Make sure not to accidentally tear or damage the sack when tightening the straps.
Attach the stuff sack to your backpack
Choose a suitable location on your backpack to attach the stuff sack. This could be in the bottom compartment, in the main compartment, or strapped to the outside of the backpack. Make sure the stuff sack is secure and won’t come loose during hiking or other activities.
Following these steps will help you properly prepare your backpack for your sleeping bag. It ensures a properly packed backpack and a comfortable campsite set up for a restful night’s sleep.
Rolling Up Your Sleeping Bag Properly
Properly rolling up your sleeping bag is essential for easy attachment to your backpack and to ensure it stays dry and clean. Follow the steps below to roll up your sleeping bag correctly:

1. Shake out and air your sleeping bag
Before rolling up your sleeping bag, give it a good shake to remove any debris. Open it up fully and lay it on a flat surface to air it out for a few minutes, allowing any moisture or sweat to evaporate.
2. Fold in any excess fabric
Check for any excess fabric or padding, and fold it in neatly towards the center of the sleeping bag. This will create a more compact roll.
3. Start rolling from the foot end
Starting from the foot end of the sleeping bag, tightly roll it up towards the head end. Keep the roll as tight as possible to save space in your backpack.
4. Compression straps or stuff sack
Once the sleeping bag is rolled up, use compression straps or a stuff sack to further secure it. Compression straps are adjustable straps that wrap around the rolled sleeping bag to keep it compact. A stuff sack is a bag that the rolled sleeping bag can be stuffed into to keep it compressed.
5. Attach to your backpack
Depending on the design of your backpack, you can attach the rolled sleeping bag to the exterior using bungee cords, straps, or carabiners. Ensure it is well-secured to prevent it from shifting or falling off during your hike.

By properly rolling up your sleeping bag, you can save space in your backpack and ensure it stays clean and dry during your outdoor adventures.
Attaching the Sleeping Bag Inside Your Backpack
When setting off on a camping or hiking trip, properly attaching your sleeping bag to your backpack is essential to ensure a comfortable and hassle-free journey. In this guide, we will walk you through the steps to attach your sleeping bag securely inside your backpack.
Step 1: Prepare Your Backpack
Before attaching the sleeping bag, make sure your backpack is prepared and packed correctly. Ensure all your gear and essentials are organized in separate compartments and readily accessible. This will help you determine the best placement for your sleeping bag.
Step 2: Compression Sack or Stuff Sack
To keep your sleeping bag compact, it is recommended to use a compression sack or stuff sack. These sacks help reduce the size of your sleeping bag, making it easier to attach to your backpack.
Step 3: Locate the Sleeping Bag Compartment
Most hiking backpacks have a separate compartment specifically designed for a sleeping bag. Locate this compartment, which is usually at the bottom or the bottom-front of the backpack.
Step 4: Secure the Sleeping Bag
Once you have found the sleeping bag compartment, place your compressed sleeping bag into it. Make sure it fits snugly and does not move around too much. If the backpack does not have a dedicated compartment, opt for placing the sleeping bag in the main compartment but keep it separated from other gear using a waterproof liner or a plastic bag.
Step 5: Compression Straps
Most hiking backpacks will have compression straps on the sides, which are designed to further secure and stabilize your load. Gently tighten these straps over the sleeping bag compartment to prevent it from shifting during your hike.
Step 6: Test the Stability
With your sleeping bag attached, take a brief walk or test the stability of your backpack. Make sure there is no excessive shifting or imbalance caused by the sleeping bag compartment. If needed, readjust the compression straps for a secure and comfortable fit.
By following these steps, you can attach your sleeping bag securely inside your backpack, ensuring a well-packed and balanced load throughout your camping or hiking expedition.
Using Compression Straps to Secure the Sleeping Bag to the Exterior of Your Backpack
Sleeping bags can take up a lot of space in your backpack, so finding a way to attach them to the exterior can provide you with more room inside for other essential gear. One effective method is to use compression straps to secure your sleeping bag.
Step 1: Choose the Right Straps
When selecting compression straps, look for durable, adjustable options that are designed for outdoor use. These straps typically have a buckle or clip mechanism for easy fastening and releasing. Aim for straps that are at least 1 inch wide to ensure reliable and secure attachment.
Step 2: Prepare Your Backpack
Before attaching your sleeping bag, make sure your backpack is packed properly. Compression straps work best when the internal compartments are fully loaded and the weight is evenly distributed. This provides a solid surface for attaching the sleeping bag.
Step 3: Roll Up Your Sleeping Bag
Roll up your sleeping bag tightly to make it more compact and easier to attach. Start rolling from one end, squeezing out any excess air as you go. You can secure the rolled-up sleeping bag with its own straps or use additional bungee cords or elastic bands if necessary.
Step 4: Attach the Straps
Take your rolled-up sleeping bag and position it horizontally on the lower part of your backpack’s exterior. Feed the compression straps through the loops or webbing located on the bottom, sides, or top of your backpack. Adjust the straps to ensure they are snug but not overly tight.
Note: Some backpacks come with dedicated sleeping bag compartments or attachment points specifically designed for this purpose. If your backpack has these features, take advantage of them for a more secure attachment.
Step 5: Secure and Tighten
With the straps in place, fasten them securely to prevent the sleeping bag from coming loose during your hike. Double-check the tightness to ensure that the compression straps are holding the sleeping bag firmly in place. It should be snug against the backpack without creating unnecessary strain on the straps.
Step 6: Test for Stability
Give your backpack a gentle shake and test the stability of the attached sleeping bag. If it wiggles or feels loose, readjust the compression straps accordingly. The sleeping bag should remain tightly secured to the backpack while you move.
Using compression straps to attach your sleeping bag to the exterior of your backpack can open up valuable space inside and make your hiking or camping trips more convenient. Follow these steps to ensure a secure and stable attachment, and enjoy your outdoor adventures with ease!
Tips for Keeping Your Sleeping Bag Clean and Dry During the Trip
When going on a camping trip, it’s important to take steps to keep your sleeping bag clean and dry. Here are some tips to help you with that:
1. Use a Sleeping Bag Liner
Before getting into your sleeping bag, consider using a sleeping bag liner. These lightweight liners can add an extra layer of protection to your bag by keeping it free from dirt, sweat, and oils. At the same time, liners can also provide some additional warmth.
2. Store Your Sleeping Bag Properly
When not in use, make sure to store your sleeping bag properly to keep it clean and dry. Avoid leaving it compressed in its stuff sack for extended periods, as this can damage the insulation. Instead, hang it up or store it loosely in a larger storage bag to maintain its loft.
3. Keep Your Sleeping Area Clean
Before setting up your tent, choose a sleeping area that is clean and free from sharp objects that could puncture your sleeping bag. Clear away any debris, rocks, or branches that could potentially damage the fabric.
4. Use a Ground Sheet
Consider using a ground sheet or a footprint underneath your tent to provide an extra layer of protection against moisture. This can help prevent dampness from seeping into the bottom of your tent and ultimately reaching your sleeping bag.
5. Avoid Wearing Dirty Clothes to Bed
Before getting into your sleeping bag, make sure to change into clean clothes. Wearing dirty clothes can transfer dirt and oils onto your sleeping bag, making it dirty and less hygienic.
6. Air Out Your Sleeping Bag
Regularly airing out your sleeping bag can help to eliminate any moisture buildup, keeping it dry and fresh. When the weather permits, hang your sleeping bag outside, or unzip it and let it air out inside your tent or shelter during the day.
By implementing these tips, you can keep your sleeping bag clean and dry during your camping trips, ensuring that you have a comfortable and enjoyable sleeping experience in the great outdoors.

How to clean water flosser

Meet Harrison Clayton, a distinguished author and home remodeling enthusiast whose expertise in the realm of renovation is second to none. With a passion for transforming houses into inviting homes, Harrison's writing at https://thehuts-eastbourne.co.uk/ brings a breath of fresh inspiration to the world of home improvement. Whether you're looking to revamp a small corner of your abode or embark on a complete home transformation, Harrison's articles provide the essential expertise and creative flair to turn your visions into reality. So, dive into the captivating world of home remodeling with Harrison Clayton and unlock the full potential of your living space with every word he writes.


