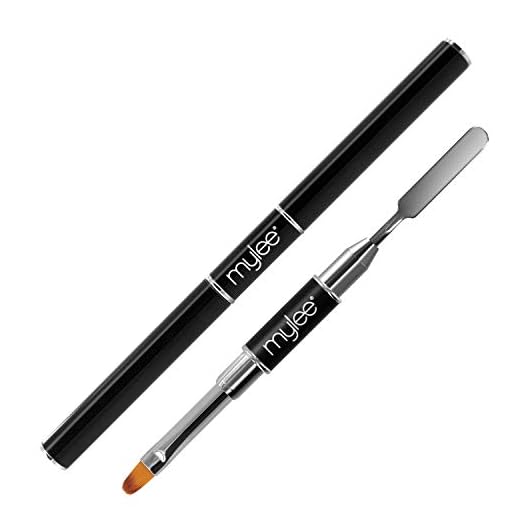
How to apply mylee builder gel

Are you a nail enthusiast looking to achieve salon quality results at home? Look no further than Mylee Builder Gel! This innovative product has taken the nail industry by storm, providing a simple and effective way to create stunning gel nails that last. But how do you apply Mylee Builder Gel to achieve the best results?
Before diving into the application process, it’s important to understand what exactly Mylee Builder Gel is. This versatile gel is designed to sculpt, shape, and extend your natural nails, giving you the perfect canvas for your gel polish. Whether you want to add length or create unique nail designs, Mylee Builder Gel is the ultimate solution.
Now, let’s get down to business and explore the step-by-step process of applying Mylee Builder Gel. Before starting, ensure that your nails are clean and prepped. Begin by gently buffing the surface of your nails to remove any shine and create a rough texture for better adhesion. Next, apply a thin layer of Mylee Base Coat and cure it in a UV or LED lamp.
Once the base coat is dry, it’s time to apply the Mylee Builder Gel. Start by taking a small bead of gel with a brush and place it on the tip of your nail. Use gentle strokes to sculpt and shape the gel, paying attention to cuticle area and sidewalls. For added strength and length, you can apply another layer of gel if desired. Cure each layer in the lamp for the recommended time as specified on the packaging.
Preparing Your Nails
Before applying mylee builder gel, it is essential to prepare your nails properly. Taking the time to prepare your nails will ensure a smooth application and a long-lasting manicure. Follow these steps to get your nails ready:
- Clean your nails: Start by removing any old nail polish using a gentle nail polish remover. Make sure to completely remove all traces of polish.
- Shape your nails: Use a nail file to shape your nails to your desired length and shape. Whether you prefer a square or rounded shape, filing your nails will ensure they are even and symmetrical.
- Buff your nails: Gently buff the surface of your nails using a nail buffer. This will help to smooth out any ridges or imperfections, creating a clean canvas for the builder gel.
- Push back your cuticles: Using a cuticle pusher or an orangewood stick, carefully push back your cuticles. This will create a larger nail bed to work with and prevent the builder gel from lifting.
- Remove debris: Cleanse your nails using a lint-free wipe and alcohol to remove any oils or debris. This step is crucial as it will ensure proper adhesion of the builder gel.
By completing these steps, your nails will be ready for the mylee builder gel application. Taking the time to prepare your nails will ensure a professional-looking manicure and a long-lasting result.
Clean and File Your Nails
Before applying mylee builder gel, it is important to start with clean and properly shaped nails. Follow these simple steps to prepare your nails:
|
Step 1: |
Remove any existing nail polish using a non-acetone nail polish remover. This will help achieve a clean nail surface for the builder gel to adhere to. |
|
Step 2: |
Gently file your nails into your desired shape using a nail file. Remember to file in one direction to prevent any splitting or damage to the nails. |
|
Step 3: |
Buff the surface of your nails with a nail buffer to smooth out any ridges or imperfections. This will create a better canvas for the builder gel application. |
|
Step 4: |
Soak your nails in warm water for a few minutes to soften cuticles. Use a cuticle pusher or an orangewood stick to gently push back the cuticles. Be careful not to cut or damage the cuticles, as they play an important role in protecting the nails. |
|
Step 5: |
Clean your nail beds by wiping them with a lint-free nail wipe or a cotton pad soaked in nail cleanser. Ensure that any oils or residues are thoroughly removed to provide a clean and dry surface for the mylee builder gel application. |


By following these steps to clean and file your nails, you will be well-prepared to apply the mylee builder gel for a successful and long-lasting manicure.
Push back the cuticles
Before applying the Mylee builder gel, it’s important to properly prepare your nails by pushing back the cuticles. This ensures that the gel adheres to your nails without any obstacles and creates a smooth and professional finish.
Here’s a step-by-step guide on how to push back your cuticles:

- Start by soaking your nails in warm water for a few minutes. This helps soften the cuticles and makes them easier to work with.
- Gently dry your hands and nails with a towel.
- Apply a cuticle oil or cream to moisturize the cuticles and make them more pliable.
- Using a cuticle pusher or orangewood stick, gently push back the cuticles on each nail. Be careful not to apply too much pressure or push too deeply, as this can damage the nail bed.
- If you encounter any stubborn or overgrown cuticles, you can carefully trim them with a cuticle nipper. However, be extremely cautious not to cut too much or injure yourself.
- Once you’ve pushed back and trimmed the cuticles, rinse your hands and nails with warm water to remove any remaining cuticle oil or cream.
- Gently dry your nails again with a towel before proceeding with the application of the Mylee builder gel.
Remember, it’s essential to take your time and be gentle while pushing back your cuticles. Rushing this step or being too rough can lead to nail damage or infection. Once your cuticles are properly pushed back, you’re ready to move on to the next steps of applying the Mylee builder gel.
Applying the Builder Gel
Applying builder gel is a crucial step in achieving strong and long-lasting artificial nails. Follow these simple steps to apply the mylee builder gel:
- Prepare your nails by removing any old polish and filing them into your desired shape.
- Push back your cuticles and gently buff the surface of your nails to create a smooth canvas.
- Cleanse your nails with a nail cleanser or alcohol to remove any dust or oil.
- Apply a thin coat of mylee base coat and cure it under a UV or LED lamp for the specified time.
- Using a gel brush, carefully apply a thin layer of mylee builder gel to your nails. Start from the cuticle area and gently brush towards the tip of the nail, making sure to avoid the skin or cuticles.
- Once you have applied the builder gel, cure your nails under a UV or LED lamp for the specified time.
- Repeat the previous step to apply another layer of builder gel for added strength. Be sure to cure your nails again after each layer.
- After applying the desired number of builder gel layers, apply a thin coat of mylee top coat and cure it under a UV or LED lamp for the specified time.
- Finally, cleanse your nails with a nail cleanser to remove any sticky residue.
Note: It is essential to follow all the manufacturer’s instructions and curing times for optimal results. Proper application and curing will ensure a durable and flawless finish.
A good builder gel application requires practice, so don’t get disheartened if it’s not perfect the first time. With time and experience, you’ll achieve salon-quality results at home!
Apply a thin layer of base coat
Before applying the mylee builder gel, it is important to prepare your nails properly. Start off by removing any old nail polish and filing your nails to your desired shape and length. Once your nails are ready, give them a good clean to remove any oils or debris that may affect the application process.

Now, it’s time to apply the base coat. The base coat serves as a foundation for the mylee builder gel, helping to create a smooth and even surface on your nails. It also protects your natural nails from staining and adds longevity to your manicure.
To apply the base coat, start by gently pushing back your cuticles with a cuticle pusher or an orangewood stick. This will help to create a clean and tidy look. Then, take a small amount of mylee base coat on a brush and apply a thin layer onto your nails, starting from the cuticle area and working your way towards the tip.
Make sure to apply the base coat evenly and avoid any streaks or excess product. A thin layer is sufficient to create a strong bond between your natural nails and the mylee builder gel. If you apply too much, the gel may not adhere properly and could result in lifting or peeling.
Tips:
- If you prefer a more opaque and solid base, you can apply a second coat of the base gel after the first one is cured.
- Allow each layer of the base coat to fully dry/cure before moving on to the next step.
- For a professional finish, use a UV/LED lamp to cure the base coat according to the manufacturer’s instructions.


Meet Harrison Clayton, a distinguished author and home remodeling enthusiast whose expertise in the realm of renovation is second to none. With a passion for transforming houses into inviting homes, Harrison's writing at https://thehuts-eastbourne.co.uk/ brings a breath of fresh inspiration to the world of home improvement. Whether you're looking to revamp a small corner of your abode or embark on a complete home transformation, Harrison's articles provide the essential expertise and creative flair to turn your visions into reality. So, dive into the captivating world of home remodeling with Harrison Clayton and unlock the full potential of your living space with every word he writes.


