How long to cook fresh chicken kiev in air fryer

Chicken Kiev is a delicious and indulgent dish that combines the flavors of tender chicken, fragrant garlic butter, and crispy golden breadcrumbs. While traditionally cooked by either frying or baking, using an air fryer can result in a healthier and equally delectable version of this classic dish.
When it comes to cooking fresh chicken kiev in an air fryer, the cooking time is an important factor to consider in order to achieve that perfect combination of juicy chicken and crispy coating. The cooking time may vary depending on the size and thickness of the chicken kiev, as well as the make and model of your air fryer.
Generally, it is recommended to preheat your air fryer to around 400°F (200°C) for a few minutes before cooking the chicken kiev. Once preheated, carefully place the chicken kiev in the air fryer basket, making sure to leave enough space between each piece to allow for proper air circulation.
For a fresh chicken kiev, the optimal cooking time in an air fryer is typically around 15-18 minutes. During the cooking process, it is advisable to flip the chicken kiev halfway through to ensure even browning on all sides. The internal temperature of the chicken kiev should reach 165°F (74°C) to ensure it is thoroughly cooked and safe to eat.
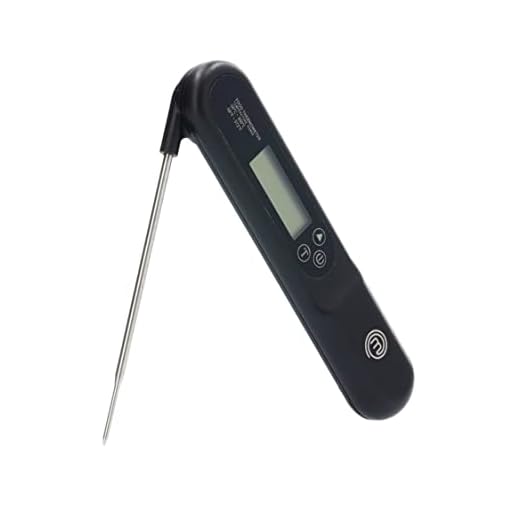
Remember, these cooking times are guidelines and may need to be adjusted based on the specificities of your air fryer and the thickness of the chicken kiev. It is always recommended to check for doneness by using a meat thermometer and making sure the chicken is cooked all the way through before serving.
Preparing fresh chicken kiev
Before cooking fresh chicken kiev in the air fryer, it is important to follow a few simple preparation steps to ensure a tasty and tender result.
Ingredients:
| 4 boneless, skinless chicken breasts |
| 4 garlic cloves, minced |
| 4 tablespoons butter, softened |
| 1 tablespoon fresh parsley, chopped |
| 1 tablespoon fresh dill, chopped |
| 1 teaspoon lemon zest |
| 1 teaspoon salt |
| ½ teaspoon black pepper |
| 1 cup breadcrumbs |
| 2 eggs, beaten |
| 1 tablespoon olive oil |
Instructions:
1. Begin by flattening the chicken breasts. Place each chicken breast between two sheets of plastic wrap and gently pound with a meat mallet until they are about ¼ inch thick.
2. In a bowl, combine the minced garlic, softened butter, chopped parsley, chopped dill, lemon zest, salt, and black pepper. Mix well until all the ingredients are thoroughly combined.
3. Take each flattened chicken breast and spread approximately 1 tablespoon of the herb butter mixture evenly over one side of the chicken.
4. Roll the chicken breast tightly, starting from one of the long sides, until it is completely rolled up into a cylinder shape. Secure the rolled chicken breast with cooking twine or toothpicks to prevent it from opening up during cooking.
5. In one shallow dish, place the beaten eggs. In another shallow dish, place the breadcrumbs.
6. Dip each rolled chicken breast first into the beaten eggs, coating it completely, and then into the breadcrumbs, pressing gently to ensure an even coating.
7. Set the rolled chicken breasts aside and preheat the air fryer to 375°F (190°C) for 5 minutes.
8. Once preheated, drizzle the olive oil into the air fryer basket and arrange the rolled chicken breasts in a single layer, making sure they are not touching each other.
9. Cook the chicken kiev in the air fryer at 375°F (190°C) for approximately 18-20 minutes, or until the chicken is golden brown and reaches an internal temperature of 165°F (74°C).
10. Carefully remove the chicken kiev from the air fryer and let them rest for a few minutes before serving.
Now you know how to prepare delicious fresh chicken kiev in the air fryer. Enjoy your meal!
Tips for Selecting the Right Chicken
Choosing the right chicken is essential for a delicious and satisfying meal. Here are some tips to help you select the best chicken:
1. Look for freshness: Ensure the chicken you choose is fresh and hasn’t expired. Check the expiration date on the package and make sure there are no signs of spoilage such as a bad smell or slimy texture.
2. Opt for organic or free-range: Organic or free-range chicken is usually of higher quality and has been raised in a healthier environment. It is often tastier and more tender compared to conventionally raised chicken.
3. Consider the size: Consider the size of the chicken you need for your recipe. Smaller chickens are usually more tender and cook quicker, while larger chickens are great for serving a crowd or for roasting.
4. Check the color: Look for chicken with a pinkish hue. Avoid chicken that is gray or has any signs of discoloration.
5. Examine the packaging: Ensure the chicken is packed properly and isn’t leaking any liquids. Damaged or compromised packaging can indicate potential contamination.
6. Buy from a reliable source: Purchase chicken from a reputable butcher or well-known source to ensure quality and food safety.
By following these tips, you can choose the right chicken for your air fryer chicken kiev recipe and ensure a delicious and enjoyable meal!
Gathering the rest of the ingredients
To cook fresh chicken kiev in an air fryer, you will need the following additional ingredients:
Ingredients:
| Ingredients | Quantity |
|---|---|
| Fresh chicken breasts | 4 |
| Butter | 8 tablespoons |
| Garlic cloves | 4 |
| Fresh parsley | 4 tablespoons (chopped) |
| All-purpose flour | 1 cup |
| Eggs (beaten) | 2 |
| Breadcrumbs | 1 cup |
| Salt | To taste |
| Black pepper | To taste |
| Vegetable oil or cooking spray | As needed |
Make sure you have all these ingredients ready before starting the cooking process. Having everything prepared in advance will help ensure a smooth and efficient cooking experience.
Using an air fryer to cook
The air fryer is a versatile kitchen appliance that can be used to cook a wide range of foods. It works by circulating hot air around the food, giving it a crispy outer layer while keeping the inside moist and tender.
Benefits of using an air fryer
- Healthier cooking method: Air fryers require little to no oil, making it a healthier alternative to deep frying.
- Quick and convenient: Air fryers cook food faster than traditional ovens, reducing cooking time. Additionally, they are easy to use and require minimal preheating.
- Uniform cooking: The hot circulating air in the fryer ensures that the food is evenly cooked and eliminates the need for flipping.
- Mess-free: Since no oil is used, there are no splatters or greasy surfaces to clean up afterwards.
Tips for using an air fryer
- Preheat the air fryer: To ensure consistent and even cooking, it is recommended to preheat the air fryer before adding food.
- Do not overcrowd the basket: Leave enough space between the food items to allow the hot air to circulate properly.
- Use the right temperature and cooking time: Different foods require different cooking temperatures and times. Refer to the air fryer’s instruction manual or recipe guides for specific guidelines.
- Toss or turn the food: While air fryers are designed to cook food evenly without flipping, occasionally tossing or turning the food can result in even crispiness.
- Monitor the cooking process: Keep an eye on the food while it is cooking to ensure it does not overcook or burn.
By following these tips and exploring different recipes, you can make the most of your air fryer and enjoy delicious, crispy meals with less oil and hassle.
Setting the temperature and time
When cooking fresh chicken kiev in an air fryer, it is important to set the temperature and time correctly for optimal results. Here is a guide to help you:
- Preheat the air fryer: Preheating ensures that the air fryer is at the desired temperature when you start cooking the chicken kiev. Set the air fryer to 400°F (200°C) and allow it to preheat for about 5 minutes.
- Prepare the chicken kiev: While the air fryer is preheating, prepare the chicken kiev by coating it with a thin layer of olive oil or melted butter. This will help the chicken kiev achieve a crispy and golden-brown exterior.
- Cooking time: Place the prepared chicken kiev in the air fryer basket in a single layer. Cook the chicken kiev at 400°F (200°C) for 15 minutes, flipping halfway through the cooking time. This will ensure that the chicken kiev is evenly cooked and reaches the recommended internal temperature of 165°F (74°C).
- Check for doneness: After the cooking time is up, check the chicken kiev for doneness. The exterior should be crispy and golden brown, and the interior should be cooked through with no pink meat. If needed, cook for an additional 2-3 minutes to ensure it is fully cooked.
- Serve and enjoy: Once the chicken kiev is cooked to perfection, carefully remove it from the air fryer and let it rest for a few minutes before serving. This allows the juices to redistribute, resulting in a tender and flavorful chicken kiev. Serve with your favorite sides and enjoy!
By setting the temperature and time correctly, you can achieve perfectly cooked fresh chicken kiev in your air fryer. Experiment with different spices and coatings to customize the flavor to your liking. Happy cooking!
Coating the chicken with breadcrumbs
Once you have prepared the chicken Kiev by stuffing it with the delicious garlic and herb butter filling, it’s time to coat it with breadcrumbs to give it a crispy, golden exterior.
Start by adding a generous amount of breadcrumbs to a shallow bowl or plate. You can use regular breadcrumbs or try different variations like panko breadcrumbs for extra crunch. To enhance the flavor, you can also mix in some grated Parmesan cheese or dried herbs like parsley or oregano.

Next, take the stuffed chicken Kievs and gently roll them in the breadcrumbs, making sure to coat all sides evenly. Press the breadcrumbs firmly onto the surface to help them adhere to the chicken. For an extra crispy coating, you can repeat this step a second time.
Once the chicken Kievs are well coated, place them on a clean plate. It’s a good idea to let them rest for a few minutes to allow the breadcrumbs to adhere to the chicken properly.
Now your chicken Kievs are ready to be air fried to perfection. The coating of breadcrumbs will turn into a crispy outer crust that complements the juicy chicken and flavorful butter filling. Quickly and evenly cooking the chicken in the air fryer will ensure a crunchy coating without any greasy mess.
Now that you know how to properly coat the chicken with breadcrumbs, you can easily achieve a delicious and crispy chicken Kiev in your air fryer. Enjoy this classic dish made healthier with the convenient cooking method of an air fryer!


