How To Use Dremel Soldering Iron

Dremel soldering iron is a versatile tool that can be used for a variety of soldering projects. Whether you’re a beginner or an experienced solderer, this tool can be a valuable addition to your toolkit. In this article, we will guide you through the steps of using a Dremel soldering iron and provide you with some tips to help you get the best results.
Step 1: Prepare the soldering iron
Before you begin, make sure that your Dremel soldering iron is in good working condition. Check the tip to see if it is clean and properly shaped. If it is dirty or worn out, you may need to replace it. Also, ensure that the soldering iron is properly heated up. Allow it to fully heat up according to the manufacturer’s instructions.
Step 2: Prepare the soldering area

Next, prepare the area where you will be soldering. Make sure that it is clean, well-ventilated, and free from any flammable materials. It is always a good idea to use a soldering mat or a heat-resistant surface to protect your work area from any potential damage.
Step 3: Apply flux and tin the tip
Before you start soldering, apply a small amount of flux to the surface you will be soldering. Flux helps to clean the surface and remove any oxidation that may prevent the solder from sticking properly. Once the flux is applied, tin the tip of your soldering iron by melting a small amount of solder onto it. This will help to improve the heat transfer and make soldering easier.
Step 4: Begin soldering
Now, you are ready to start soldering. Hold the soldering iron like a pen and touch the tip to the joint you want to solder. Allow the joint to heat up for a few seconds and then touch the solder to the joint. The solder should melt and flow onto the joint, creating a strong bond. Be careful not to apply too much solder or overheat the joint, as this can cause damage.

Step 5: Clean the tip and store the soldering iron
After you have finished soldering, clean the tip of your Dremel soldering iron by wiping it on a damp sponge or soldering tip cleaner. This will remove any excess solder and help to maintain the tip’s shape. Finally, store the soldering iron in a safe place, away from children and pets.
By following these steps and practicing your soldering skills, you will be able to effectively use a Dremel soldering iron for a variety of projects. Remember to always prioritize safety and take your time to ensure accurate and durable soldering connections.
Safety precautions for using Dremel Soldering Iron
Safety should always be the top priority when using any electrical tool, including the Dremel Soldering Iron. By following these safety precautions, you can minimize the risk of accidents and ensure a safe soldering experience:

1. Read the user manual
Before using the Dremel Soldering Iron, carefully read and understand the instructions provided in the user manual. Familiarize yourself with the tool’s features, operating procedures, and safety guidelines.
2. Wear safety gear
Always wear safety goggles and heat-resistant gloves while soldering to protect your eyes and hands from potential hazards. In addition, wear appropriate clothing that covers your arms and avoid loose-fitting clothing that can easily catch fire.
3. Use in a well-ventilated area
Ensure that you use the Dremel Soldering Iron in a well-ventilated area or work under a fume extractor. Soldering can release toxic fumes, so adequate ventilation is essential to prevent inhalation of harmful gases.
4. Keep the workspace clear
Clear any flammable materials, such as papers, fabrics, or liquids, from your workspace. Maintain a clutter-free area to prevent accidental fires or damage to the soldering iron and nearby objects.
5. Unplug when not in use
Always unplug the Dremel Soldering Iron when it is not in use. This reduces the risk of accidental contact with the heated tip and prevents unauthorized use, especially if there are children or pets around.

6. Handle with care
Exercise caution when handling the soldering iron, as the tip can reach high temperatures. Avoid touching the hot tip and always use the provided stand or holder when not actively soldering.
7. Allow time to cool down
After using the Dremel Soldering Iron, allow it to cool down before storing or performing any maintenance tasks. Attempting to handle or clean the tool while it is still hot can lead to burns or other injuries.
Remember, these safety precautions are general guidelines, and it is important to follow specific instructions provided by Dremel for safe and proper usage of their soldering iron.
Choosing the right solder and flux for Dremel Soldering Iron
When it comes to using a Dremel Soldering Iron, selecting the correct solder and flux is crucial to achieve a strong and reliable solder joint. Here are some tips to help you choose the right materials for your soldering projects.
1. Selecting the solder:
There are different types of solder available, such as lead-free solder, rosin-core solder, and flux-core solder. The type you choose depends on your specific needs and preferences.
Lead-free solder: This type of solder is recommended for electronic works and projects that need to comply with safety regulations. It is an environmentally friendly option that contains no lead.
Rosin-core solder: This solder contains a flux core, making it convenient for quick soldering jobs. It is commonly used for electrical applications.
Flux-core solder: Similar to rosin-core solder, flux-core solder has a flux core inside. It is suitable for creating strong and durable connections.
2. Understanding flux:
Flux is a substance that chemically cleans the surfaces to be soldered and prevents oxidation during the soldering process. It is essential for achieving a good solder joint. There are two main types of flux:
Rosin flux: Rosin flux is commonly used in electronics soldering. It is mildly acidic and is usually applied in a solid form, as a flux core in solder wire.

Water-soluble flux: Water-soluble flux is less common but offers the advantage of being easy to clean. It is best suited for applications where post-solder cleaning is required, such as circuit boards.
When selecting flux, ensure that it is compatible with the type of solder you are using. Always follow the manufacturer’s guidelines for the correct application of flux.
By choosing the appropriate solder and flux for your Dremel Soldering Iron, you can greatly enhance the quality and durability of your soldering projects. Experiment with different types and brands to find what works best for your specific needs.
Cleaning and maintaining your Dremel Soldering Iron
Proper cleaning and maintenance of your Dremel Soldering Iron is essential to ensure its longevity and optimal performance. Regular maintenance will also prevent the buildup of solder residue and dirt, which can affect the quality of your soldering joints. Follow these guidelines to keep your Dremel Soldering Iron in top shape:
1. Preparing for cleaning
Before you start cleaning your Dremel Soldering Iron, make sure it is unplugged and has completely cooled down. Never attempt to clean or maintain the soldering iron while it is hot, as it can cause burns or other safety hazards.

2. Cleaning the tip
The soldering iron tip is the most critical part and requires regular cleaning. Use a wet sponge or a brass sponge to clean the tip. Gently wipe the tip to remove any solder residue or other contaminants. Avoid using abrasive materials or excessive force, as this can damage the tip.
3. Removing stubborn residue
If the tip has stubborn residue that is difficult to remove with a sponge, you can use a solder tip cleaner. These cleaners are available in the form of wire or paste. Follow the manufacturer’s instructions to effectively clean the tip and remove any built-up residue.
4. Cleaning the body
Regularly clean the body of the soldering iron to remove any dust or dirt that may accumulate over time. Use a soft, lint-free cloth or a small brush to gently wipe the surface. Avoid using any harsh chemicals or solvents, as they can damage the plastic housing.
5. Checking the power cord
Periodically inspect the power cord for any signs of damage, such as fraying or exposed wires. If you notice any issues, discontinue use and replace the power cord immediately. Damaged cords can be a safety hazard and should not be used.
6. Storage and organization
Proper storage of your Dremel Soldering Iron is crucial to prevent damage and ensure longevity. Use a designated holder or stand to keep the soldering iron upright when not in use. This will prevent accidental damage to the tip and protect the power cord from twisting or bending excessively.
| Cleaning Tips | Maintenance Tips |
|---|---|
| Use distilled water for cleaning the tip. | Regularly inspect and replace worn-out tips. |
| Avoid touching the hot tip with bare hands. | Store the soldering iron in a cool and dry place. |
| Never use abrasive materials on the tip. | Keep the soldering iron away from flammable materials. |
| Dispose of soldering iron waste responsibly. | Follow the manufacturer’s recommendations for maintenance. |
By following these cleaning and maintenance practices, you can ensure that your Dremel Soldering Iron remains in the best possible condition and delivers high-quality soldering results.
Step-by-step guide on how to solder with Dremel Soldering Iron
Soldering with a Dremel Soldering Iron is a simple and efficient way to join and repair electronic components. Whether you are a beginner or an experienced soldering enthusiast, this step-by-step guide will help you get started and achieve clean and strong solder joints.
Step 1: Prepare your materials
Before you begin, make sure you have all the necessary materials on hand. This includes a Dremel Soldering Iron, solder wire, flux, soldering sponge or brass wire cleaner, and the electronic components you want to solder.
Step 2: Set up your workspace
Find a well-ventilated area with good lighting to work in. Make sure your workspace is clean and free from clutter. Set up your soldering iron stand and ensure it is stable and secure.
Step 3: Heat up your soldering iron
Plug in your Dremel Soldering Iron and turn it on. Allow it to heat up for a few minutes until the tip reaches the desired temperature. The appropriate temperature will depend on the type and size of the electronic components you are soldering.
Step 4: Clean the soldering iron tip
Before soldering, it is essential to clean the soldering iron tip. Wipe the tip on a damp sponge or brass wire cleaner while the iron is hot. This will remove any oxidation or debris from the tip and ensure optimal heat transfer during soldering.
Step 5: Apply flux to the joint
Using a flux pen or brush, apply a small amount of flux to the joint you intend to solder. Flux helps to remove oxidation and improves the flow of solder, resulting in a stronger solder joint.
Step 6: Heat the joint
Position the soldering iron tip so that it touches both the component lead and the solder pad. Apply gentle pressure and heat the joint for a few seconds to ensure good heat transfer.
Step 7: Feed the solder
Slowly feed a small amount of solder wire onto the joint. The solder should melt and flow smoothly onto the joint, creating a strong bond. Avoid adding too much solder, as it can lead to solder bridges or cold joints.
Step 8: Remove the soldering iron
Once the solder has flowed evenly onto the joint, remove the soldering iron while keeping the joint steady. Hold the joint still until the solder cools and solidifies completely.
Step 9: Inspect your solder joint
After soldering, visually inspect your joint to ensure it is clean and without any defects. A good solder joint should have a shiny appearance and a smooth, cone-shaped fillet.
Remember to practice proper safety precautions when soldering, such as wearing safety glasses, avoiding flammable materials, and unplugging the soldering iron when not in use. With practice and attention to detail, you can become proficient at soldering with your Dremel Soldering Iron.
Tips and tricks for using Dremel Soldering Iron effectively
Using a Dremel soldering iron can be a great way to join electrical components and make repairs. To ensure you get the most out of your Dremel soldering iron, here are some tips and tricks to keep in mind:
| Tips | Tricks |
|---|---|
| Ensure proper heat setting | Use the appropriate tip |
| Always clean the tip | Use flux for better results |
| Practice good soldering technique | Use a soldering iron stand |
| Allow sufficient cooling time | Use a damp sponge to clean the tip |
| Avoid excessive solder | Use heat-resistant materials for protection |
| Protect surrounding components | Pre-tin wires and components |
Ensuring you have the proper heat setting for your soldering iron is crucial for achieving good results. Too much heat can damage components, while too little heat may result in weak joints. Consult the manufacturer’s guidelines or experiment with different settings to find the optimal temperature for your specific project.
Using the appropriate tip for your soldering task is also important. Dremel soldering irons usually come with various tips for different purposes, such as fine point tips for precision work or chisel tips for larger connections. Choosing the right tip will help you achieve cleaner and more efficient soldering.
Keeping the tip of your soldering iron clean is essential for good heat transfer and quality soldering. Regularly wipe off excess solder and residue with a damp sponge or brass wire cleaner. This will prevent build-up and ensure the tip remains in good condition for extended use.
Using flux can greatly improve the quality of your soldering connections. Flux helps to remove oxides from the surface of the components and promotes better wetting of the solder. Apply a small amount of flux to the joint before soldering for smoother and more reliable results.
Practicing good soldering technique is crucial for achieving strong and reliable connections. Make sure to heat the joint sufficiently, apply solder to the heated joint, and allow it to flow evenly. Avoid overheating or underheating, as these can lead to weak joints or damage to the components.
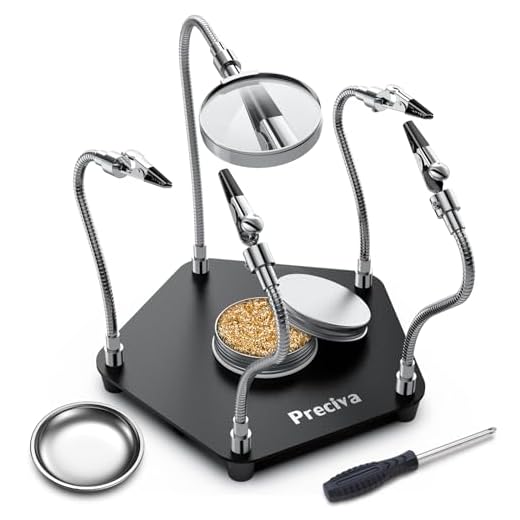
Investing in a soldering iron stand is a good idea to prevent accidents and ensure safety. A soldering iron stand provides a stable base for the iron when not in use and prevents it from rolling or falling off the work surface. This can help prevent burns and damage to the iron or surrounding objects.
After soldering, allow sufficient cooling time for the joint to solidify before handling it. This will help avoid accidental movement or disruption of the joint, which could weaken the connection. Using a heat-resistant material, such as a silicone mat or ceramic tile, to place the soldered components on during cooling can provide added protection.
Avoid using excessive solder when making connections. Too much solder can create messy and unreliable joints. Instead, aim for a small, neat amount of solder that covers the joint surface evenly. This will result in stronger and more visually appealing soldering connections.
When soldering, it’s important to protect sensitive components nearby. Use heat sinks, such as small clamps or alligator clips, to draw heat away from delicate components to prevent damage. This will help ensure surrounding components remain undamaged during the soldering process.
For better solder flow and improved adhesion, pre-tinning wires and components can be very useful. Pre-tinning involves applying a small amount of solder to the surface of the wire or component before making the final joint. This ensures a cleaner and more reliable connection when soldering the components together.
By following these tips and tricks, you can use your Dremel soldering iron effectively and achieve high-quality soldering results. Remember to always prioritize safety and practice good soldering technique for the best outcomes.
Troubleshooting common issues with Dremel Soldering Iron
If you are experiencing any issues with your Dremel soldering iron, there are several common problems that you can troubleshoot. By identifying the problem and following the appropriate steps, you can often resolve the issue and get your soldering iron working again.
| Issue | Possible Solutions |
|---|---|
| No Heat |
|
| Tip Not Heating Up |
|
| Poor Soldering Results |
|
| Unable to Hold Temperature |
|
If you have followed these troubleshooting steps and are still experiencing issues with your Dremel soldering iron, it is recommended to reach out to Dremel customer support for further assistance. They will be able to provide you with additional guidance and help you resolve the problem.
Questions and answers
What is a Dremel soldering iron and what is it used for?
A Dremel soldering iron is a versatile tool that combines the functions of a soldering iron and a power tool. It is used for soldering electronic components, creating jewelry, and making intricate designs on various materials.
Can I use a Dremel soldering iron for large-scale projects?
A Dremel soldering iron is more suitable for small to medium-sized projects due to its compact size and lower power compared to a traditional soldering iron. However, it can still be used for larger projects with more patience and precision.


Meet Harrison Clayton, a distinguished author and home remodeling enthusiast whose expertise in the realm of renovation is second to none. With a passion for transforming houses into inviting homes, Harrison's writing at https://thehuts-eastbourne.co.uk/ brings a breath of fresh inspiration to the world of home improvement. Whether you're looking to revamp a small corner of your abode or embark on a complete home transformation, Harrison's articles provide the essential expertise and creative flair to turn your visions into reality. So, dive into the captivating world of home remodeling with Harrison Clayton and unlock the full potential of your living space with every word he writes.


