How To Solder Wires With A Soldering Iron

Soldering wires is a useful skill to have for any DIY enthusiast or electronics hobbyist. Whether you’re repairing a broken device or building a circuit from scratch, knowing how to solder wires properly is essential for creating strong and reliable connections.
Using a soldering iron may seem intimidating at first, but with a little practice and the right technique, you’ll be able to join wires together with ease. In this article, we’ll walk you through the step-by-step process of soldering wires, from preparing the wires to applying the solder.
Step 1: Prepare the wires
Before you begin soldering, it’s important to prepare the wires by stripping off a small section of the insulation. Use wire strippers or a sharp blade to carefully remove about 1/4 inch of the insulation from the end of each wire. Be careful not to cut through the wire itself. Once the insulation is removed, twist the exposed strands of wire together to prevent them from fraying during the soldering process.
Tip: If you’re unsure about how much insulation to remove, it’s always better to remove less rather than more. You can always trim off additional insulation later if needed.

Step 2: Heat up the soldering iron
After preparing the wires, it’s time to heat up the soldering iron. Plug in the soldering iron and allow it to warm up for a few minutes. Most soldering irons have LED indicators that will let you know when they’re hot enough to use. Make sure to place the soldering iron in a safe stand or holder when not in use to prevent accidents.
Note: Soldering irons can get extremely hot, so it’s important to handle them with care and avoid touching the heated tip.
Step 3: Apply solder to the heated wires
Once the soldering iron is hot, you’re ready to solder the wires together. Hold the soldering iron in one hand and the solder wire in the other hand. Touch the heated tip of the soldering iron to the wires, allowing them to heat up. Then, touch the solder wire to the heated wires, not to the soldering iron. The heat from the wires will melt the solder, creating a strong joint. Be careful not to use too much solder, as it can create a messy and unreliable connection.

Pro tip: If the solder doesn’t melt or flow smoothly, it may be due to insufficient heat or dirty wires. Make sure the tip of the soldering iron is clean and tinned properly, and ensure that the wires are clean and free from any dirt or debris.
By following these steps and practicing the soldering technique, you’ll be able to solder wires like a pro in no time. Remember to always work in a well-ventilated area, wear safety goggles, and take necessary precautions to prevent burns and injuries. Happy soldering!
Why is Soldering Wires Important?
Soldering wires is an essential skill in electrical and electronic work. It involves melting a metal alloy called solder to create a strong and permanent electrical connection between two or more wires. Whether you are working on a DIY project or repairing electronics, soldering wires correctly is crucial for several reasons.
1. Electrical Conduction
When wires are soldered together, the solder forms a conductive bond between them, ensuring the efficient flow of electrical current. This is especially important in applications where a secure and reliable connection is vital, such as in circuit boards or automotive wiring. Soldering provides a low-resistance path for electricity, preventing overheating and reducing the risk of electrical failures or short circuits.
2. Mechanical Strength
Soldering creates a strong mechanical bond between wires, preventing them from coming loose or separating. The solder fills any gaps or spaces between the wires, providing stability and resilience to vibrations, impacts, and movements. This makes soldered connections more durable and resistant to stresses compared to other methods, such as using wire nuts or crimping connectors.

3. Space Efficiency
Soldered connections are compact and take up less space compared to using other types of connectors. This is particularly beneficial in tight spaces or when working on small electronic devices where every millimeter counts. Soldered wires can be neatly arranged and easily routed through confined areas, optimizing the overall design and functionality of the system.
| Advantages of Soldering Wires | Disadvantages of Using Other Connectors |
|---|---|
| Low-resistance electrical conduction | Higher resistance and potential for voltage drops |
| Strong mechanical bond | Loose connections and wire separation |
| Compact and space-efficient | Bulkier and less flexible |
| Can be used in various applications | Limited compatibility with certain wire types |
In conclusion, soldering wires ensures a reliable electrical connection, offers mechanical strength and durability, and provides space efficiency. It is a widely used method in electrical and electronic work, offering numerous advantages over other connection methods.
The Benefits of Soldered Connections
Soldering is a widely used technique for joining electrical wires together. It involves melting a filler metal, known as solder, onto the joint, creating a strong and reliable connection. There are several benefits to using soldered connections, making it the preferred method for many electrical projects.
1. Electrical Conductivity
One of the main advantages of soldered connections is their excellent electrical conductivity. The solder creates a low-resistance path for electricity to flow, ensuring that the signal or power is efficiently transmitted through the wires. This is crucial in applications where high performance or precision is required, such as electronics circuits or audio systems.
2. Mechanical Strength
Soldered connections offer superior mechanical strength compared to other methods, such as using wire nuts or electrical tape. The solder bonds the wires together, creating a solid joint that is resistant to movement, vibration, and accidental pulling. This reliability is essential in situations where the wires may be subject to stress or tension, providing a long-lasting and durable connection.

Soldered connections also have the advantage of being compact and space-saving. The small amount of solder used takes up minimal space, allowing for more efficient wiring layouts in tight spaces or complex projects.
3. Corrosion Resistance
The solder used in soldering is typically made from a mix of metals, such as tin and lead, which are corrosion-resistant. This means that soldered connections are less likely to be affected by environmental factors, such as moisture or oxidation, that can degrade the performance of the joint over time. The solder acts as a barrier, protecting the wires from these corrosive agents and ensuring the integrity of the connection.
Overall, soldered connections provide numerous benefits that make them the go-to choice for joining wires in electrical projects. Their excellent electrical conductivity, mechanical strength, and corrosion resistance contribute to their reliability and longevity. Learning how to solder wires with a soldering iron is a valuable skill for anyone working with electronics or electrical systems.
The Tools You’ll Need
Before you start soldering wires, it’s important to gather the necessary tools. Here are the essential tools you’ll need:
1. Soldering Iron
The most important tool for soldering wires is a soldering iron. This device will provide the heat necessary to melt the solder and create a strong bond between the wires. Make sure to choose a soldering iron with an appropriate wattage for the job you will be doing.
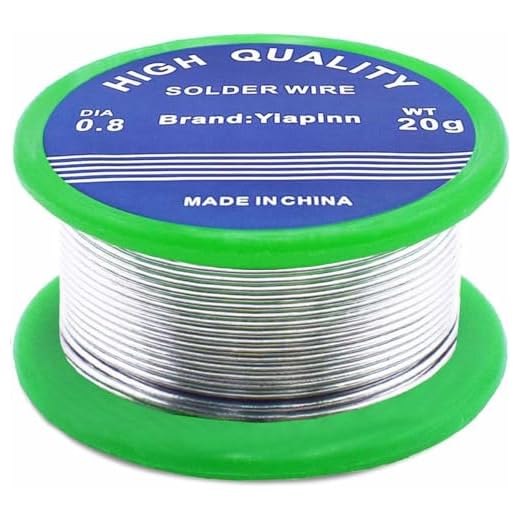
2. Solder
Solder is the material that will join the wires together. It is a metal alloy that melts at a low temperature and solidifies when it cools down. There are different types of solder available, so choose the one that is suitable for your project.
3. Soldering Stand
A soldering stand is a stand that holds the soldering iron when it is not in use. It helps prevent accidents by keeping the hot iron in a safe and stable position. Look for a stand with a heat-resistant base and a spring holder to hold the soldering iron securely.
4. Soldering Tip Cleaner
Over time, the soldering tip can become oxidized and accumulate residue, affecting its performance. A soldering tip cleaner is a tool that helps clean the tip of the soldering iron, ensuring better heat transfer and a cleaner solder joint.
5. Helping Hands
Helping hands are a useful tool that holds the wires in place while you solder them together. They usually consist of two alligator clips attached to a weighted base, allowing you to position and secure the wires easily.
6. Wire Strippers
Wire strippers are used to remove the insulation from the ends of the wires. They have different-sized holes to accommodate various wire gauges, making it easy to strip the necessary length of insulation from the wire.

7. Heat-Shrink Tubing
Heat-shrink tubing is used to insulate the soldered connection and provide mechanical protection. It is a tube that shrinks when heat is applied, creating a tight, secure seal around the solder joint. Cut the heat-shrink tubing to an appropriate length before soldering.
In addition to these tools, it’s also a good idea to have a sponge or wet cloth for cleaning the soldering iron tip, as well as safety goggles to protect your eyes from any potential splashes or sparks.
Step-by-Step Guide to Soldering Wires
Properly soldering wires together is an essential skill for anyone working with electronics. Whether you are repairing a device or creating a new circuit, soldering wires is a reliable and efficient way to create a strong electrical connection. Follow these steps to learn how to solder wires with a soldering iron:
| Step 1 | Prepare the wires by stripping the insulation from the ends. Use wire strippers to remove about 1-2 inches of insulation from each wire. |
| Step 2 | Twist the exposed wire strands together to ensure a solid connection. This will prevent any loose or frayed wires that could cause a weak solder joint. |
| Step 3 | Heat the soldering iron and apply a small amount of solder to the tip. This will help the heat transfer to the wires more effectively. |
| Step 4 | Hold the soldering iron in one hand and the solder in the other. Touch the tip of the soldering iron to the twisted wire strands while applying the solder to the opposite side of the joint. The solder will melt and flow around the wires, creating a strong bond. |
| Step 5 | Continue soldering the joint until the solder flows smoothly around the wires and covers the entire joint. Be careful not to overheat the wires, as this can lead to damage or a weak connection. |
| Step 6 | Allow the soldered joint to cool and solidify before handling it. This will ensure a strong and stable connection. |
| Step 7 | After the joint has cooled, insulate the soldered area with heat shrink tubing or electrical tape. This will protect the wires and prevent any accidental contact with conductive materials. |
With these steps, you should be able to confidently solder wires together using a soldering iron. Remember to practice good soldering techniques and always prioritize safety when working with electronics.
Common Mistakes to Avoid
When soldering wires with a soldering iron, it’s important to be aware of some common mistakes that beginners often make. By avoiding these errors, you can ensure that your solder joints are strong and secure.

1. Insufficient Heating:
One common mistake is not allowing the soldering iron to heat up sufficiently before attempting to solder. It’s crucial to give the iron enough time to reach the proper temperature. Otherwise, the solder may not melt properly, resulting in weak connections.
2. Excessive Heat:
On the other hand, applying excessive heat for too long can be detrimental as well. Overheating the wires can damage the insulation or even melt the wire itself, compromising the integrity of the connection. It’s important to find the right balance and apply heat only as needed.
3. Lack of Flux:
Flux is a substance that helps the solder flow and bond to the wires. Some beginners overlook the importance of using flux and attempt to solder without it. This can result in poor solder joints that are not as strong or durable. Always apply a small amount of flux to ensure a proper solder joint.
4. Insufficient Cleaning:
Before soldering, it’s crucial to clean the wires to remove any dirt, grease, or oxidation that may interfere with the soldering process. Failing to clean the wires properly can lead to weak solder joints that may eventually fail. Use sandpaper or a wire brush to clean the wires before soldering.
5. Rushing the Process:
Soldering requires patience and precision. Rushing the process can result in careless mistakes and poor solder joints. Take your time, ensure that the wires are properly aligned, and apply heat and solder carefully. Rushing can lead to unnecessary errors and potentially unsafe connections.
By avoiding these common mistakes, you can improve your soldering skills and create strong, reliable connections between wires. Remember to practice and take the time to master the techniques, and soon you’ll be soldering wires like a pro!
Tips and Tricks for Successful Soldering
When it comes to soldering wires with a soldering iron, there are a few tips and tricks that can greatly improve your success rate. Whether you are a beginner or an experienced solderer, these tips will help you achieve more reliable and professional results.
Choose the Right Solder and Flux
Using the right solder and flux is crucial for successful soldering. Make sure to choose a solder with the appropriate composition for the job at hand. Lead-free solder is a popular choice as it is environmentally friendly. Additionally, using flux will help the solder flow more easily and create a stronger bond.
Prepare the Wires
Before soldering, it’s important to prepare the wires properly. Strip the insulation from the ends of the wires, leaving around 1/4 inch of exposed wire. Use a wire stripper to ensure a clean and precise cut, and twist the wire strands together to prevent fraying.
- If the wire strands are heavily oxidized or coated with dirt, sanding them lightly with fine-grit sandpaper can improve the soldering process.
- Tinning the wires by applying a thin layer of solder to the exposed wire strands can also aid in achieving a better solder joint.
Heat Control
Controlling the heat of your soldering iron is crucial for successful soldering. Too much heat can damage the wires and components, while too little heat can result in a weak solder joint.
- Make sure your soldering iron is at the correct temperature for the solder you are using.
- Keep the soldering iron tip clean and well-tinned to ensure efficient heat transfer.
Torch Method
When soldering larger wires or heavy-duty cables, the torch method can be used for better heat distribution and faster soldering. Simply apply heat from a torch flame evenly to both ends of the wires, and then introduce the solder once the wires are hot enough.
Practice and Patience
Soldering is a skill that improves with practice. Don’t be discouraged if your first attempts are not perfect. Take your time, follow the steps carefully, and practice on scrap wires or old electronic components before attempting important projects.
By following these tips and tricks, you will greatly increase your chances of successful soldering. Remember, practice makes perfect, so keep improving your skills and techniques with each soldering project. Happy soldering!
Questions and answers
What materials do I need to solder wires with a soldering iron?
To solder wires with a soldering iron, you will need the following materials: a soldering iron, solder wire, wire strippers, heat shrink tubing (optional), and a heat source such as a lighter or a heat gun (if using heat shrink tubing).
How do I prep the wires before soldering?
Before soldering, you need to prepare the wires by stripping off a small portion of the insulation at the end using wire strippers. Ensure that you expose enough bare wire for the connection, but do not strip too much insulation.


Meet Harrison Clayton, a distinguished author and home remodeling enthusiast whose expertise in the realm of renovation is second to none. With a passion for transforming houses into inviting homes, Harrison's writing at https://thehuts-eastbourne.co.uk/ brings a breath of fresh inspiration to the world of home improvement. Whether you're looking to revamp a small corner of your abode or embark on a complete home transformation, Harrison's articles provide the essential expertise and creative flair to turn your visions into reality. So, dive into the captivating world of home remodeling with Harrison Clayton and unlock the full potential of your living space with every word he writes.


