How To Solder Wires Together Without A Soldering Iron

When it comes to working with electronics, soldering wires together is a common task. However, not everyone has access to a soldering iron or knows how to use one. But don’t worry! There are alternative methods you can use to join wires together without a soldering iron. In this article, we will explore some of these methods and guide you through the process.
Strip the wires: The first step in soldering wires together is to strip the insulation off the ends of the wires you want to join. You can use a wire stripping tool or a sharp knife to carefully remove about 1/4 inch of insulation from each wire. Be careful not to cut into the wire strands.
Twist the wires: Once the wires are stripped, twist the exposed wire strands of each wire together. This will help create a solid connection between the wires. Make sure the twisted wires are secure and tight.
Use electrical tape: If you don’t have a soldering iron, electrical tape can be used as an alternative. After twisting the wires together, wrap electrical tape tightly around the exposed wire strands. Make sure to cover all the exposed wire to prevent any short circuits. Electrical tape provides insulation and helps secure the connection.
Wire connectors: Another option is to use wire connectors. Wire connectors come in various types and sizes, such as butt connectors or twist-on wire connectors. Simply insert the twisted wires into the wire connector and twist or crimp it tightly. Wire connectors provide a secure and insulated connection between wires without the need for soldering.
Heat shrink tubing: Heat shrink tubing is another useful alternative to soldering. After twisting the wires together, slide a piece of heat shrink tubing over the connection. Use a heat source like a lighter or a heat gun to shrink the tubing, creating a tight seal around the wires. Heat shrink tubing adds an extra layer of insulation and prevents the wires from coming loose.
While these methods are not as ideal as soldering, they can be effective temporary solutions or alternative methods for those without a soldering iron. However, it is important to note that these alternatives may not provide as strong or durable connections as soldering does. Therefore, it is always recommended to use a soldering iron when working on permanent or high-quality projects.
What is a soldering iron and why you may need an alternative
A soldering iron is a handheld tool used for joining two electrical components or wires together. It is commonly used in electronics and electrical work to create a secure and strong connection by melting and flowing solder onto the joint.
Why you may need an alternative to a soldering iron?
While soldering irons are commonly used for joining wires together, there may be situations where you do not have access to one or prefer not to use it. Some reasons why you may need an alternative to a soldering iron include:
- Lack of a soldering iron: If you do not have a soldering iron or do not have immediate access to one, you can explore alternative methods to join wires together.
- Inability to use a soldering iron: In some situations, using a soldering iron may not be feasible or safe. For example, if you are working in a sensitive environment where open flames or high heat sources are prohibited.
- Temporary connection: If you need to create a temporary connection between wires or components, using a soldering iron may be unnecessary. In such cases, alternative methods can provide a quick and easy solution.
- Exploring different techniques: Trying out different techniques and alternative methods can help expand your knowledge and skills in electrical work. It can also be useful in situations where the use of a soldering iron is not preferred.
By understanding what a soldering iron is and why you may need an alternative, you can explore different techniques and methods to join wires together in situations where a soldering iron is not available or not the preferred option.

Using a Butane Torch
If you don’t have a soldering iron, you can still solder wires together using a butane torch. Here’s a step-by-step guide:
- Make sure you have all the necessary safety gear, including protective eyewear and gloves.
- Prepare the wires you want to solder by stripping off the insulation from the ends.
- Apply flux to the stripped ends of the wires. Flux helps to remove oxidation and improve the solder flow.
- Twist the exposed wire ends together to create a secure connection.
- Heat the twisted wire connection with the butane torch, making sure to evenly distribute the heat.
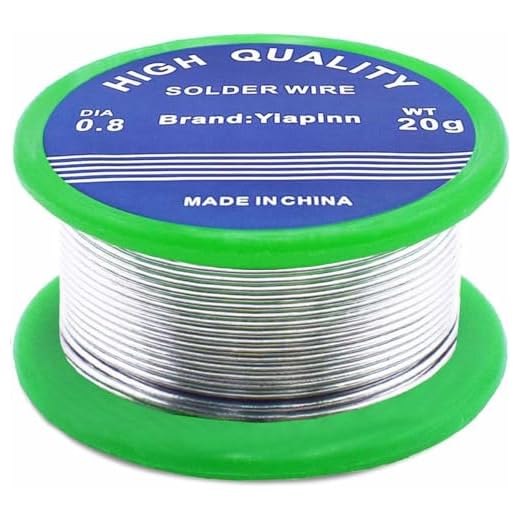
- Once the wire connection is heated, touch the solder wire to the joint and allow it to melt and flow onto the wires.
- Remove the torch and allow the solder to cool and solidify.
- Inspect the solder joint to ensure it is strong and secure.
- Test the connection by gently tugging on the wires to check for any signs of looseness.
Using a butane torch for soldering wires together can be an effective alternative when a soldering iron is not available. Just remember to take proper safety precautions and practice good soldering techniques for the best results.
Step 1: Preparing your materials
Before you start soldering wires together without a soldering iron, it’s important to gather all the necessary materials. Here’s what you’ll need:
1. Wires: Select the wires you want to connect. Make sure they are of the appropriate length and gauge for your project.
2. Wire strippers: These tools will help you remove the insulation from the wires, exposing the bare metal.

3. Electrical tape: You’ll need some electrical tape to secure the connection and insulate the wires.
4. Heat source: Instead of a soldering iron, you can use alternative heat sources such as a lighter, candle, or even a stove burner.
5. Flux: Flux is not always necessary, but it can help improve the quality of the solder joint.
Tip: Ensure you are working in a well-ventilated area and take necessary safety precautions when using an alternative heat source.
Step 2: Heating the torch and wires
Once you have gathered all the necessary tools and materials, it’s time to start heating the torch and wires for the soldering process. Follow these steps to ensure a successful soldering job:

- Attach the flame nozzle to the torch according to the manufacturer’s instructions.
- Check that the gas supply is turned on and adjust the flame to a medium intensity.
- Hold the torch in one hand and the wires to be soldered together in the other hand.
- With the flame directed at the midpoint of the wires, begin heating the area evenly and gradually.
- Move the torch in a circular motion to distribute the heat uniformly along the wires.
- Continue heating until the wires start to emit a faint red glow.
It’s important to note that overheating the wires can result in damage, so avoid excessive heating. Additionally, always take necessary safety precautions while handling the torch, such as wearing protective gloves and working in a well-ventilated area.
Step 3: Applying solder
After preparing the wire connections, it’s time to apply solder to create a solid and reliable bond. Follow these steps to solder wires together without a soldering iron:
Gather the necessary materials
Before starting, make sure to have the following materials ready:
| – Solder |
| – Flux |
| – Heat source (such as a mini torch or gas lighter) |
| – Heat-resistant surface or a clamp to hold the wires |
| – Safety goggles or glasses |
Apply flux to the wire connections
Flux helps to remove oxidation and impurities from the wire surface, allowing the solder to adhere properly. Apply a small amount of flux to the wire connections using a flux brush or toothpick.
Heat the wire connections
Using a heat source, such as a mini torch or gas lighter, carefully heat the wire connections. Be cautious not to overheat the wires to avoid damage. Make sure to heat evenly on all sides of the connection.

Apply solder to the heated wire connections
Once the wire connections are heated, touch the solder to the connections. The heat will melt the solder, and it will flow and bond with the wires. Ensure that the solder covers the entire connection for a strong joint.
Do not touch or disturb the connections until the solder has cooled and solidified.
It is important to note that soldering wires without a soldering iron may not provide as reliable or durable connections as soldering with a proper tool. Consider using this method only if a soldering iron is not available or if the wires are disposable or low-voltage.
Using a Hot Glue Gun
If you don’t have a soldering iron on hand, another method you can use to solder wires together is with a hot glue gun. While it may not provide as strong or permanent of a connection as soldering, it can be a quick and easy solution in a pinch.
Here’s how you can use a hot glue gun to solder wires together:

Step 1: Prepare the wires
First, strip about half an inch of insulation from each wire that you want to join. Make sure the exposed wire is clean and free from any debris or corrosion.
Step 2: Apply hot glue
Next, heat up your hot glue gun and apply a small amount of hot glue to one of the exposed wire ends. Be careful not to use too much glue, as it can create a messy and unreliable connection.
Step 3: Join the wires
Quickly press the other exposed wire end onto the hot glue before it cools and hardens. Ensure that the wires are tightly pressed together to create a good electrical connection.
Step 4: Allow it to cool
Let the hot glue cool and harden completely before handling the soldered connection. This will ensure the glue has solidified and provides some level of mechanical stability.
It’s important to note that using a hot glue gun to join wires is not as secure as soldering, especially for high current or sensitive applications. Therefore, it’s best to use this method as a temporary fix and seek a proper soldering solution when possible.

Step 1: Preparing your materials
When soldering wires together without a soldering iron, it’s important to have the right materials ready. Here’s what you’ll need:
Materials:
- Wire strippers
- Electrical tape or heat shrink tubing
- Lighter or matches (if using heat shrink tubing)
- Flux (optional, but recommended)
- Soldering wire
- Alligator clips or helping hands (optional, but helpful)
Having these materials prepared and organized before you start will make the soldering process much smoother. Ensure that your wire strippers are capable of stripping the insulation off the wires you’ll be working with.
If you’re using heat shrink tubing, make sure you have a lighter or matches on hand. This will be used to shrink the tubing once it’s in place on the wires.
Flux is not always necessary, but it can help improve the soldering process by removing oxidation from the wire surfaces and promoting better adhesion. If you have flux available, apply a small amount to the wires before soldering.
Finally, don’t forget about the soldering wire itself. Make sure you have enough on hand to complete the soldering job and choose a soldering wire that is appropriate for the type of wire you’ll be working with.
Step 2: Heating the glue gun and wires
Once you have gathered the necessary materials for soldering wires without a soldering iron, it’s time to heat up the glue gun and prepare the wires. Follow the steps below to safely heat the glue gun and wires:
1. Plug in the glue gun
Start by plugging in the glue gun and allowing it to heat up. It usually takes a few minutes for the glue gun to reach its operating temperature. Make sure to place it on a heat-resistant surface to avoid any accidents.
2. Prepare the wires
While the glue gun is heating up, prepare the wires that you want to solder together. Strip the insulation off the ends of the wires using wire strippers or a sharp utility knife. This will expose the bare metal of the wires, allowing them to be joined together.
Important: Make sure to only strip off a small portion of the insulation, about half an inch or so, to avoid exposing too much wire. Excessive bare wire can lead to short circuits or electrical hazards.
3. Clean the bare metal of the wires
After stripping off the insulation, take a piece of fine-grit sandpaper or a wire brush and gently clean the exposed metal of the wires. This will remove any oxidation or dirt, ensuring a better connection when joining the wires together.
4. Apply hot glue to the wires
By now, the glue gun should be heated up and ready to use. Squeeze the trigger of the glue gun to apply a small amount of hot glue onto the exposed metal of one of the wires.
5. Join the wires together
While the hot glue is still molten, press the exposed metal of the other wire onto the hot glue. Apply some pressure to ensure a strong bond between the wires.
Tip: You can use a clamp or a helping hand tool to hold the wires in place until the hot glue cools down and solidifies.
Note: Hot glue is not as strong as solder, so this method should only be used for low voltage or temporary connections. If you require a more permanent and reliable connection, consider using a soldering iron instead.
Questions and answers
Is it possible to solder wires together without a soldering iron?
Yes, it is possible to solder wires together without a soldering iron using alternative methods such as using a soldering gun, a butane torch, or a battery-powered soldering iron.
Can I use a soldering gun to join wires together?
Yes, a soldering gun can be used to join wires together. A soldering gun is similar to a soldering iron but operates at a higher temperature and is often used for heavy-duty soldering tasks. To use a soldering gun, heat the tip and apply solder to the wires to create a secure connection.


Meet Harrison Clayton, a distinguished author and home remodeling enthusiast whose expertise in the realm of renovation is second to none. With a passion for transforming houses into inviting homes, Harrison's writing at https://thehuts-eastbourne.co.uk/ brings a breath of fresh inspiration to the world of home improvement. Whether you're looking to revamp a small corner of your abode or embark on a complete home transformation, Harrison's articles provide the essential expertise and creative flair to turn your visions into reality. So, dive into the captivating world of home remodeling with Harrison Clayton and unlock the full potential of your living space with every word he writes.


