How To Solder Metal Together With Soldering Iron

When it comes to joining metal pieces together, soldering is a popular and effective technique. Soldering iron is a tool commonly used for this purpose. Whether you are a beginner or an experienced DIY enthusiast, it’s important to know the proper steps and techniques for soldering metal with a soldering iron.
Step 1: Prepare your materials
Before starting the soldering process, gather all the necessary materials. This includes the metal pieces you want to join, soldering iron, solder, flux, and safety equipment such as goggles and gloves. Make sure the metal pieces are clean and free from any dirt, grease, or debris.
Step 2: Heat up the soldering iron
Plug in the soldering iron and let it heat up. It usually takes a few minutes for the iron to reach the desired temperature. While waiting, put on your safety equipment to protect yourself from any potential hazards.

Step 3: Apply flux
Flux is a substance that helps the solder bond with the metal surface. Apply a small amount of flux to the area where you want to join the metal pieces. Be sure to cover the entire surface evenly with flux.
Step 4: Heat the metal
With the soldering iron at the right temperature, touch the tip of the iron to the metal surface. Move the iron in a circular motion to evenly distribute the heat. This will help the solder to flow and create a strong bond between the metal pieces.
Step 5: Apply solder
Once the metal is heated, touch the solder wire to the heated area. The solder will melt and flow into the joint, creating a strong and secure connection between the metal pieces. Avoid using too much solder as it can result in a messy joint.
Step 6: Remove excess solder
After soldering, inspect the joint and remove any excess solder using a soldering iron or soldering wick. This will give your joint a clean and professional look.
Step 7: Let it cool
Allow the soldered joint to cool down before handling it. Avoid touching the joint while it’s still hot, as it can cause burns or damage to the joint.

By following these steps and practicing the proper techniques, you can successfully solder metal together with a soldering iron. Remember to always prioritize safety and work in a well-ventilated area. With time and practice, you will become more confident and skilled in soldering metal.
Getting Started with Soldering Iron
Soldering metal together with a soldering iron is a useful skill to have for any DIY enthusiast or electronics hobbyist. Whether you’re repairing a broken electronic device or creating your own circuit board, soldering can help you achieve secure and reliable connections.
Before you start soldering, it’s important to gather the necessary tools and ensure you have a safe working environment. Here’s a checklist of what you’ll need:
| Soldering iron: | A soldering iron is the main tool you’ll be using to melt solder and make connections. Choose a soldering iron with a power rating appropriate for your project. |
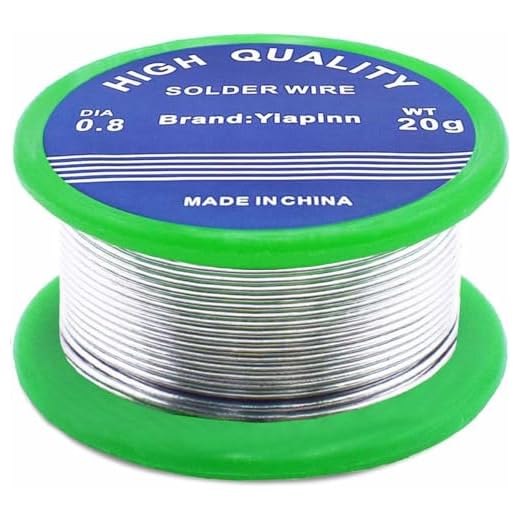
| Solder: | There are various types of solder available, but for most electronics projects, a rosin-core solder with a diameter of 0.032 inches (0.8mm) works well. Make sure the solder is lead-free if you’re working on a project that requires it. |
| Soldering stand: | A soldering stand or holder provides a safe place to rest your soldering iron when not in use. This helps prevent accidental burns or damage to your work surface. |
| Flux: | Flux is a chemical compound that helps clean and prepare the surfaces to be soldered. It improves the solder flow and helps create a stronger bond. |
| Sponge or brass tip cleaner: | A wet sponge or brass tip cleaner is used to clean the soldering iron tip and remove any excess solder or flux residue. |
| Safety glasses: | When soldering, it’s important to protect your eyes from any potential splashes or debris. Wear safety glasses to prevent eye injuries. |
Once you have all the necessary tools, find a well-ventilated area to work in, away from flammable materials. Make sure to read and follow the manufacturer’s instructions for your soldering iron, as different models may have specific operating procedures.
Now that you’re ready to start soldering, it’s important to practice good technique. Heat the soldering iron to the appropriate temperature and ensure the tip is clean and properly tinned (coated with a thin layer of solder). This helps ensure good heat transfer and solder flow.

When soldering, touch the tip of the iron to both the component lead and the pad or surface you’re soldering to. Once the metal is hot enough, touch the solder wire to the joint, allowing it to melt and flow around the connection. Keep the soldering iron in contact with the joint until the solder solidifies, then remove the iron and let the joint cool.
Remember to always solder in a well-lit area and be mindful of your hand placement to avoid accidental burns. Practice on scrap materials before working on your actual project to gain confidence and refine your technique.
Soldering metal together with a soldering iron can be a rewarding and essential skill for many DIY projects. By following these tips and practicing regularly, you’ll become more proficient in creating strong and durable soldered connections.
Learn about the essential tools and equipment needed for soldering metal
Before you begin soldering metal, it is important to familiarize yourself with the various tools and equipment that are necessary for a successful soldering process. Having the right tools will ensure that your solder joints are secure and well-formed.
| Tool | Description |
|---|---|
| Soldering Iron | A soldering iron is the most important tool for soldering. It consists of a heated metal tip that melts the solder and allows you to join metal parts together. Make sure to choose a soldering iron with adjustable temperature settings for different types of metals. |
| Solder | Solder is a metal alloy with a low melting point that is used to create a bond between metal surfaces. It comes in different forms, such as wire or paste, and in various compositions. Choose the appropriate type of solder for your project, considering the metal being soldered and the application. |
| Flux | Flux is a chemical substance that promotes solder flow and helps prevent oxidation during the soldering process. It is typically applied to the metal surfaces before soldering. Flux comes in different types, such as rosin-based or water-soluble, and should be chosen based on the solder and metal being used. |
| Soldering Stand | A soldering stand is a tool used to hold the soldering iron when it is not in use. It prevents accidental burns and damage to your work surface by providing a safe place to rest the hot iron. Make sure to choose a stand that is stable and has a heat-resistant base. |
| Wet Sponge or Brass Wire Cleaner | A wet sponge or brass wire cleaner is used to clean the soldering iron tip between soldering tasks. It helps remove excess solder, oxides, and other contaminants, ensuring a clean and efficient soldering process. |
| Heat-resistant Work Surface | A heat-resistant work surface is essential to protect your work area from heat damage. It should be made of a material that can withstand high temperatures, such as ceramic or silicone. This surface will also provide stability for your soldering project. |
| Safety Equipment | When soldering metal, it is crucial to prioritize safety. Wear safety glasses to shield your eyes from solder splatters and fumes. Additionally, consider wearing heat-resistant gloves to protect your hands from burns. Keep a fire extinguisher nearby in case of any accidents. |
By having these essential tools and equipment, you will be well-prepared to solder metal effectively and achieve professional-looking results. Remember to always follow safety guidelines and practice proper soldering techniques for the best outcome.

Preparing the Metal Surface
Before you can start soldering metal together with a soldering iron, it is important to properly prepare the metal surface. This will ensure a strong and lasting bond between the metal pieces.
Clean the Metal Surface
The first step in preparing the metal surface is to clean it thoroughly. Use a degreaser or a mild detergent to remove any dirt, oil, or grease from the surface. This can be done by scrubbing the metal surface gently with a soft brush or cloth. Rinse the metal with clean water and dry it completely before proceeding to the next step.
Remove Oxidation
Oxidation can hinder the solder from bonding properly with the metal surface. To remove any oxidation, you can use fine-grit sandpaper or a wire brush to gently sand the surface. Make sure to sand in one direction to create a uniform texture. After sanding, wipe away any residue with a clean cloth.
Apply Flux
Flux is a chemical compound that helps to clean the metal surface and promote solder flow. Apply a thin layer of flux to the areas that will be soldered using a flux brush or a cotton swab. Be careful not to apply too much flux, as it can cause the solder to splatter or create a messy joint.
Once the metal surface is properly prepared, you are ready to proceed with soldering. Remember to follow proper safety precautions, such as wearing safety goggles and working in a well-ventilated area. With a properly prepared surface, you can confidently solder metal together with a soldering iron.

Clean and prepare the metal surfaces for a strong solder joint
Before starting the soldering process, it is crucial to ensure that the metal surfaces are clean and well-prepared. This will help create a strong solder joint that is less likely to fail or break over time.
Cleaning the metal surfaces
To begin, use a clean cloth or tissue to wipe away any dirt, dust, or debris from the metal surfaces. Make sure to remove any grease, oil, or fingerprints as well, as these can interfere with the soldering process.
If the metal surfaces are particularly dirty or greasy, you can use an appropriate cleaning agent such as isopropyl alcohol or acetone. Apply a small amount of the cleaning agent to a cloth or cotton swab and gently wipe the metal surfaces until they are thoroughly clean. Be careful not to use too much cleaning agent, as it can damage certain metals or components.
Prepping the metal surfaces
Once the metal surfaces are clean, it is important to prepare them for soldering. This involves roughening or scoring the surfaces to improve adhesion and ensure a strong bond.
One method for prepping the metal surfaces is to use sandpaper or a metal file to gently roughen the areas to be soldered. Be sure to use a fine-grit sandpaper or file to avoid scratching or damaging the metal.

Alternatively, you can use a wire brush or abrasive pad to scrub the metal surfaces, creating a roughened texture. This method is especially useful for larger or hard-to-reach areas.
Note: When roughening the metal surfaces, make sure to remove any oxidation or corrosion that may be present. These can prevent proper soldering and compromise the strength of the joint.
Applying flux
After cleaning and prepping the metal surfaces, it is recommended to apply a flux before soldering. Flux helps remove oxidation, promotes better heat transfer, and enhances the flow of solder.
Apply a thin layer of flux to the metal surfaces using a small brush or applicator. Make sure to cover the areas to be soldered evenly. Avoid applying too much flux, as it can result in excess residue or a poor solder joint.
By cleaning and preparing the metal surfaces properly, you can ensure a strong and reliable solder joint that will stand the test of time.
Heating the Soldering Iron
Before you start soldering metal together, it is important to ensure that your soldering iron is properly heated. Heating the soldering iron ensures that it reaches the necessary temperature to melt the solder and create a strong bond between the metal pieces.
Here are some steps to effectively heat your soldering iron:
- First, make sure your soldering iron is clean and free from any dirt, debris, or old solder. If there is any buildup on the tip of the iron, use a damp sponge or soldering tip cleaner to remove it.
- Next, plug in your soldering iron and turn it on. Allow it to heat up for a few minutes until it reaches the desired temperature. Most soldering irons have adjustable temperature settings, so make sure to set it accordingly.
- While the soldering iron is heating up, prepare your workspace by setting up a heat-resistant surface or soldering mat to protect your work area.
- Once the soldering iron is heated, check the temperature by touching the tip lightly to a scrap piece of metal or solder. If the solder melts quickly and evenly, the iron is at the right temperature.
- If the solder does not melt properly or the iron takes a long time to heat up, you may need to adjust the temperature or check for any issues with the soldering iron.
- Always remember to handle the soldering iron with caution, as the tip can become extremely hot and cause burns. Use appropriate safety equipment such as heat-resistant gloves and safety glasses.
By following these steps, you can ensure that your soldering iron is properly heated and ready for soldering metal together. This will help you achieve clean and strong solder joints for your projects.
Properly heat the soldering iron to the right temperature for soldering
Before beginning the soldering process, it is crucial to ensure that the soldering iron is heated to the correct temperature. This step is vital to create a strong and secure solder joint.
The ideal temperature for soldering varies depending on the materials being soldered and the type of solder being used. Generally, temperatures ranging from 300°C to 350°C (572°F to 662°F) are suitable for most soldering tasks. However, it is recommended to consult the manufacturer’s guidelines for specific recommendations.
To heat the soldering iron properly, follow these steps:
- Plug in the soldering iron and turn it on. It is advisable to use a soldering iron with temperature control, allowing you to set the desired temperature.
- Allow the soldering iron to heat up for a few minutes, ensuring that it reaches the set temperature.
- During the heating process, it is essential to place the soldering iron on a suitable stand to prevent accidents, such as burns or damage to the work surface.
- Once the soldering iron has reached the desired temperature, it is ready to be used for soldering.
In addition to heating the soldering iron to the correct temperature, it is crucial to maintain that temperature throughout the soldering process. Constantly monitor the iron’s temperature and adjust it as needed to prevent overheating or cooling.
Important: When not in use, always remember to turn off and unplug the soldering iron to prevent accidents and extend its lifespan.
Properly heating the soldering iron to the right temperature is a crucial step in achieving successful soldering. It ensures a reliable connection and minimizes the risk of damage to the components being soldered. Take the time to heat the soldering iron correctly for optimal soldering results.
Applying the Solder
Once the metal pieces are properly cleaned and prepped, it’s time to apply the solder. The soldering iron should be heated to the appropriate temperature before starting the soldering process.
Begin by applying a small amount of soldering flux to the joint area. Flux helps to remove any oxidation on the metal surface and ensures a strong bond between the solder and the metals.
Hold the soldering iron with one hand and the solder with the other hand. Touch the tip of the soldering iron to the joint area to heat the metals. Once the joint area reaches the proper temperature, touch the solder to the joint. The heat will melt the solder and it will flow into the joint, creating a secure connection.
Keep in mind that too much heat can damage the metals or create weak joints, while insufficient heat may not allow the solder to melt properly. It is important to find the right balance and practice proper technique to achieve good results.
Move the solder along the joint, allowing it to flow and cover the entire joint area. Be careful not to move the metal pieces during the soldering process, as this can result in a weak joint. Maintain steady pressure and let the solder flow naturally.
After applying the solder, let the joint cool down naturally. Avoid blowing on the joint to speed up the cooling process, as this can cause the solder to become brittle and weaken the joint.
Once the joint has cooled down, inspect it to ensure a strong and proper connection. If necessary, use a brush or sandpaper to remove any excess solder or smooth out the surface.
Remember to always work in a well-ventilated area and take proper safety precautions when using a soldering iron.
Questions and answers
What materials do I need to solder metal together with a soldering iron?
You will need a soldering iron, solder, flux, heat-resistant gloves, safety goggles, a sponge, and soldering wick or a desoldering pump.
Can I use any type of soldering iron to solder metal?
No, it is recommended to use a soldering iron specifically designed for metal soldering, as it needs to reach higher temperatures than standard soldering irons used for electronics.
Do I need to clean the metal surfaces before soldering them together?
Yes, it is important to clean the metal surfaces with a wire brush or sandpaper to remove any dirt, rust, or oxidation. This will ensure a strong and clean solder joint.
What is the correct technique for soldering metal together with a soldering iron?
The correct technique involves heating the metal surfaces with the soldering iron, applying flux to the joint, melting solder onto the joint, and allowing it to flow and bond the metal surfaces together. It is important to apply heat evenly and avoid overheating the metal.
Can I use soldering iron to solder different types of metal together?
Yes, you can use a soldering iron to solder different types of metal together. However, it is important to choose the appropriate solder and flux for the specific types of metal you are working with.


Meet Harrison Clayton, a distinguished author and home remodeling enthusiast whose expertise in the realm of renovation is second to none. With a passion for transforming houses into inviting homes, Harrison's writing at https://thehuts-eastbourne.co.uk/ brings a breath of fresh inspiration to the world of home improvement. Whether you're looking to revamp a small corner of your abode or embark on a complete home transformation, Harrison's articles provide the essential expertise and creative flair to turn your visions into reality. So, dive into the captivating world of home remodeling with Harrison Clayton and unlock the full potential of your living space with every word he writes.


