How To Solder Electronics Without Soldering Iron

Soldering is a widely-used technique in the world of electronics. It involves melting a metal alloy, called solder, to join two or more metal components together. While a soldering iron is typically used for this process, there are situations where you may not have access to one. In such cases, it’s useful to know alternative methods of soldering electronics without a soldering iron.
Method 1: Using a Torch
If you have a small butane torch or a kitchen torch, you can use it as a substitute for a soldering iron. First, clean the metal components you want to solder with a fine sandpaper or steel wool to remove any oxidation or dirt. Apply a small amount of flux to the joint area, which will help the solder adhere better. Then, heat the joint using the torch flame until it reaches the melting point of the solder. Once the solder melts, quickly remove the flame and allow the joint to cool.
Note: Using a torch can be tricky, as it requires careful control of the heat. Ensure that you work in a well-ventilated area and exercise caution to avoid overheating the components or causing damage.
Method 2: Using a Hot Air Gun
A hot air gun, typically used for paint stripping or shrink wrapping, can also be used for soldering electronics. Start by setting the hot air gun to a low temperature and directing the airflow towards the joint area. Gradually increase the temperature until the solder on the joint starts to melt. At this point, introduce the solder wire to the joint and allow it to flow and bond the components together. Finally, remove the hot air gun and allow the joint to cool.
Caution: Always wear protective gloves and safety goggles when using a hot air gun, as it can generate high temperatures and cause burns.
Method 3: Using Conductive Adhesives
In instances where heating the components is not possible, conductive adhesives offer an alternative solution. These adhesives contain conductive particles that allow for electrical conductivity between the components. Apply a small amount of the adhesive to the joint, ensuring it covers the entire connection area. Press the components firmly together and wait for the adhesive to dry. Conductive adhesives are particularly useful for delicate electronics or situations where high temperatures could be damaging.
Note: Conductive adhesives may not provide the same level of strength and reliability as soldered connections, so they are best used in low-stress applications or as temporary solutions.

By employing these alternative methods, you can solder electronics without a soldering iron in situations where one is not available. Whether using a torch, hot air gun, or conductive adhesive, be sure to follow safety precautions and work in a well-ventilated area. Remember that these methods may not produce the same level of results as traditional soldering, so it’s always best to use proper soldering equipment when possible.
What is soldering
Soldering is a technique used to join two or more metal components together using a filler metal, known as solder. It is commonly used in electronics to form a permanent bond between electronic components, such as wires, circuit boards, and connectors.
The soldering process involves heating the solder to its melting point and applying it to the joint to be soldered. As the solder cools and solidifies, it forms a strong and conductive bond between the metal components. The solder acts as a bridge, allowing electrical current to flow between the connected components.
Soldering is essential in electronics as it provides a reliable and lasting connection. It not only forms a mechanical bond but also ensures electrical continuity, preventing loose connections that can lead to malfunctioning or failure of electronic devices.
Types of soldering
There are several types of soldering techniques used in electronics:

- Through-hole soldering: This is the most common soldering technique, where components are inserted into holes on a circuit board and soldered on the opposite side.
- Surface mount soldering: This technique involves soldering components directly to the surface of the circuit board, eliminating the need for drilled holes.
- Reflow soldering: Reflow soldering uses a solder paste that contains flux and tiny solder balls. The components are placed on the board, and the board is heated to melt the solder and form the connections.
- Hand soldering: Hand soldering is the process of soldering using a soldering iron and solder wire, where the operator controls the temperature and applies the solder manually.
Each soldering technique has its advantages and is suited for different applications and component types.
Soldering equipment
To perform soldering, various tools and equipment are required:
- Soldering iron: The soldering iron is the main tool used to heat the solder and the joint to be soldered.
- Solder: Solder is a metal alloy, usually composed of tin and lead or other metals, that melts at a lower temperature than the metals being joined.
- Flux: Flux is a chemical compound used to clean and prepare the surfaces to be soldered, promoting better solder adhesion.
- Sponge or solder wick: These are used to clean the soldering iron tip and remove excess solder.
- Soldering stand: A stand is used to hold the soldering iron during use and prevent accidental burns or damage to the work surface.
Having the right equipment and using proper techniques is crucial for successful soldering and ensuring reliable connections in electronic circuits.
Method 1: Using a Candle
To solder electronics without a soldering iron, you can use a candle as an alternative heat source. While this method may not be as precise or efficient as using a soldering iron, it can be helpful in emergency situations or when you don’t have access to proper soldering tools.
Before you begin, gather the necessary materials, including the components you want to solder, soldering wire, flux, and a candle.

Step 1: Prepare the Components
Clean the components you want to solder by removing any dirt, dust, or oxidation. Make sure the surfaces are smooth and free of any debris.
Step 2: Apply Flux
Apply flux to the areas that need to be soldered. Flux helps to remove oxidation and improve the soldering process by promoting better heat transfer.
Step 3: Heat the Wire

Hold the soldering wire close to the flame of the candle. Allow it to heat up until it starts melting and forms a small bead of solder on the tip.
Step 4: Create the Connection
Once the soldering wire is melted, carefully touch it to the components you want to solder. Hold it in place for a few seconds to allow the solder to flow and create a strong bond.
Step 5: Inspect the Solder Joint
After soldering, inspect the joint to ensure it is properly formed and looks secure. If necessary, reheat and apply additional solder to strengthen the connection.

While this method can work in a pinch, it is important to note that it may not provide the same level of reliability and durability as soldering with a proper tool. It is always recommended to use a soldering iron for electronic soldering whenever possible.
Materials needed
1. Conductive adhesive: This is an alternative to soldering and can be used to create a conductive bond between components. It is a type of glue that contains conductive particles, allowing it to conduct electricity. Make sure to choose a conductive adhesive that is compatible with the materials you are working with.
2. Wire strippers: These are tools used to remove the insulation from the ends of wires, exposing the metal conductor. This is necessary to create a secure connection between components.
3. Heat gun: A heat gun can be used to apply heat to the conductive adhesive, helping it to solidify and create a strong bond. Make sure to use the heat gun carefully and follow the manufacturer’s instructions.
4. Helping hands: These are tools that can hold components in place, making it easier to work with them. Helping hands usually have adjustable arms and clips that can hold components securely.

5. Flux: Flux is a substance that helps to remove oxidation from the surfaces of components, ensuring a clean and strong connection. It is applied to the surfaces before using the conductive adhesive.
6. Isopropyl alcohol: This is used to clean the surfaces of components before applying the flux. It helps to remove any dirt or grease that could interfere with the bond.
7. Microscope or magnifying glass: These tools can be used to inspect the connections and ensure their quality. They are especially useful for working with small components or intricate circuits.
8. Desoldering wick or pump: In case you need to remove a component or fix a mistake, desoldering wick or pump can be used to remove the solder from the connections.
9. Safety equipment: Always wear safety goggles and work in a well-ventilated area when working with adhesives, flux, and heat guns. Protect your hands with gloves and work on a heat-resistant surface.
Method 2: Using a Hot Plate
In addition to a soldering iron, another method you can use to solder electronics is by using a hot plate. A hot plate is a flat, electric heating surface that provides a controlled temperature for soldering components together.
Materials Needed:
- A hot plate
- Soldering paste or flux
- Desoldering pump or wick
- Solder wire
- Components to solder
- Heat-resistant surface
- Safety goggles
- Heat-resistant gloves
Steps:
- Set up your hot plate on a stable, heat-resistant surface.
- Put on your safety goggles and heat-resistant gloves to protect yourself from potential harm.
- Apply soldering paste or flux to the areas where you want to join the components. This will help the solder flow and create a stronger bond.
- Place the components on the hot plate, ensuring they are properly aligned.
- Turn on the hot plate and adjust the temperature according to the instructions provided with your soldering paste or flux.
- Wait for the hot plate to reach the desired temperature.
- Once the hot plate is heated, touch the solder wire to the component and let it melt. The heat from the hot plate will help the solder flow and create a strong connection between the components.
- Remove the solder wire and allow the joint to cool. Repeat this step for each component you want to solder.
- After the joints have cooled, use a desoldering pump or wick to remove any excess solder or stray solder joints.
- Inspect your solder joints to make sure they are clean, secure, and free from any defects.
Using a hot plate can be an effective alternative to a soldering iron, especially for large components or when you don’t have access to a soldering iron. However, it’s important to follow safety precautions and use heat-resistant materials to protect yourself and your work area.
Materials needed
Before you begin soldering without a soldering iron, you will need to gather the following materials:
- A heat source: You will need something that can generate enough heat to melt solder. This could be a candle, a lighter, or a gas stove. Make sure to use caution and work in a well-ventilated area.
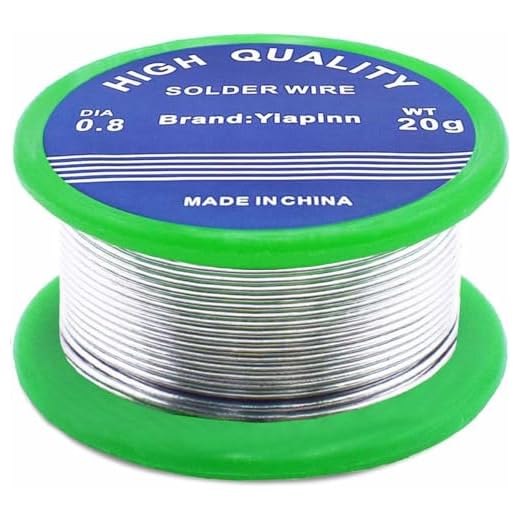
- Solder: Choose a solder that matches the type of electronics you are working with. For most electronics, a rosin-core solder with a diameter of 0.032 inches (0.8 mm) should work well.
- Flux: Flux helps facilitate the flow of solder and improves the strength of the joint. You can use rosin flux or a flux pen for easy application.
- Copper wire: You will need some copper wire to create connections between the components. Make sure the wire is clean and free from any insulation.
- Wire strippers: These will be needed to remove the insulation from the copper wire. Make sure to choose wire strippers that are suitable for the gauge of wire you are using.
- Alligator clips: These clips will help you hold the components and wires in place during soldering.
- Heat-resistant surface: It is important to work on a heat-resistant surface to prevent any damage or accidents. A ceramic tile or a metal plate can work well as a soldering surface.
- Safety equipment: To protect yourself during soldering, it is essential to wear safety goggles and work in a well-ventilated area. It is also recommended to have a fire extinguisher nearby, just in case.
Once you have gathered all the necessary materials, you will be ready to start soldering electronics without a soldering iron. Make sure to familiarize yourself with the soldering process and take appropriate safety precautions.
Method 3: Using a Torch
Using a torch is another alternative method to solder electronics without a soldering iron. This method requires caution and careful handling as it involves an open flame. Follow these steps to solder using a torch:
Step 1: Prepare the materials and tools needed for the soldering job, which include a torch, solder, flux, and the electronic components to be soldered.
Step 2: Ensure proper safety measures by using safety glasses, a fire-resistant work surface, and working in a well-ventilated area.
Step 3: Apply flux to both the soldering joint and the soldering wire. Flux helps remove oxides and contaminants on the surfaces, allowing the solder to flow more easily.
Step 4: Hold the torch flame close to the joint, but not directly touching it. Move the torch in a circular motion to evenly heat the joint and prevent overheating of any one spot.
Step 5: Once the joint is heated enough, touch the soldering wire to the joint. The heat from the torch will melt the solder and allow it to flow into the joint.
Step 6: Continue applying solder until the joint is properly filled and connected. Avoid using excessive amounts of solder, as it can lead to short circuits or poor connections.
Step 7: Wait for the solder to cool and solidify before moving or handling the soldered joint. This will ensure a strong and reliable connection.
Note: Using a torch for soldering requires skill, practice, and caution. It may not be suitable for delicate electronic components or small soldering jobs. It is important to have proper training and experience before attempting this method.
Materials needed
When it comes to soldering electronics without a soldering iron, there are a few materials that you will need to have on hand:
1. Conductive adhesive
Conductive adhesive is a special type of adhesive that contains conductive particles. It is used to create an electrical connection between two components without the need for soldering. This adhesive is typically available in gel or paste form.
2. Copper tape
Copper tape is a thin strip of copper that is often used for grounding and shielding purposes in electronics. It can also be used to create a temporary electrical connection between two components. Make sure to choose a tape that has a strong adhesive backing for better durability.
3. Heat shrink tubing
Heat shrink tubing is a type of plastic tubing that shrinks when heat is applied, creating a tight and protective seal around wires or components. It can be used to insulate and protect temporary connections made without soldering.
4. Wire strippers
Wire strippers are essential tools for removing the insulation from wires. They typically have multiple cutting and stripping holes to accommodate different wire sizes.
5. Wire clippers
Wire clippers, also known as wire cutters, are used to cut wires to the desired length. Make sure to choose a pair of wire clippers that can handle the thickness of the wire you are working with.
6. Small pliers
Small pliers are useful for holding and manipulating small components during the soldering process. They can also be used for twisting wires together to create temporary connections.
7. Safety goggles
Safety goggles are essential for protecting your eyes from any potential hazards during the soldering process. Make sure to choose goggles that provide proper eye protection and fit comfortably.
Having these materials on hand will ensure that you have everything you need to solder electronics without a soldering iron. Remember to always work in a well-ventilated area and follow safety precautions to avoid any accidents.
Questions and answers
Can I solder electronics without a soldering iron?
Yes, there are alternative methods to solder electronics without using a soldering iron. One method is using a soldering gun or soldering torch, which produces heat to melt the solder. Another method is using conductive adhesive or conductive paint to create connections between components.
What are the advantages of using a soldering iron?
A soldering iron provides a precise and controlled way to melt solder and create strong connections between electronic components. It is the most commonly used tool for soldering because of its efficiency and versatility.
Is it possible to solder electronics using a heat gun?
Yes, a heat gun can be used to solder electronics by controlling the temperature and airflow. It is important to use a heat gun with adjustable settings and a nozzle attachment to direct the heat to the solder joint.
Can I solder electronics without any heat?
Yes, it is possible to solder electronics without heat by using conductive adhesives or conductive tapes. These materials create a strong bond between components without the need for soldering. However, it is important to note that this method may not be suitable for all types of electronic connections.


Meet Harrison Clayton, a distinguished author and home remodeling enthusiast whose expertise in the realm of renovation is second to none. With a passion for transforming houses into inviting homes, Harrison's writing at https://thehuts-eastbourne.co.uk/ brings a breath of fresh inspiration to the world of home improvement. Whether you're looking to revamp a small corner of your abode or embark on a complete home transformation, Harrison's articles provide the essential expertise and creative flair to turn your visions into reality. So, dive into the captivating world of home remodeling with Harrison Clayton and unlock the full potential of your living space with every word he writes.


