How To Solder Brass With Soldering Iron

Learning how to solder brass with a soldering iron is a valuable skill for any DIY enthusiast or hobbyist. Soldering is a technique that involves joining two or more metal pieces together by melting a filler metal, known as solder, and allowing it to flow into the joint.
Brass, a popular metal alloy made of copper and zinc, is commonly used in various applications due to its durability and attractive appearance. However, soldering brass requires specific techniques and equipment to ensure a strong and reliable bond.
Before starting the soldering process, it is essential to gather the necessary tools and materials. These usually include a soldering iron with a suitable wattage for the project, soldering flux, soldering wire, sandpaper or brass brush, and safety equipment such as gloves and safety glasses.
Once you have gathered your supplies, it is crucial to clean the brass pieces thoroughly using sandpaper or a brass brush. This helps remove any dirt, oxidation, or protective coatings that may hinder the solder from adhering properly. After cleaning, apply a small amount of soldering flux to the areas you wish to join.
Now, heat your soldering iron to the appropriate temperature, usually between 300 to 400 degrees Celsius (570 to 750 degrees Fahrenheit) depending on the type of solder you are using. Hold the soldering iron in one hand and the solder wire in the other.

Place the tip of the soldering iron onto the joint area and allow it to heat the brass for a few seconds. Once the brass reaches the desired temperature, touch the solder wire to the joint area and wait for it to melt and flow into the joint. Move the solder wire along the joint to ensure proper coverage and bond formation.
As you continue soldering, remember to keep the soldering iron tip clean by wiping it on a wet sponge or brass cleaner periodically. This helps prevent solder accumulation and ensures efficient heat transfer.
Finally, allow the joint to cool completely before handling it. Inspect the soldered joint for any irregularities or weak spots, and if necessary, reheat and adjust as needed. Properly soldered brass joints should have a smooth, even appearance with no gaps or cracks.
Soldering brass with a soldering iron requires practice and patience, but once mastered, it opens up a whole new world of possibilities for DIY projects and repairs. So, grab your soldering iron and start honing your soldering skills today!
Important Safety Precautions for Soldering Brass
When soldering brass with a soldering iron, it is crucial to prioritize safety to prevent accidents and injury. By following the necessary precautions, you can ensure a safe and effective soldering process.
1. Use Protective Gear
Always wear safety goggles to protect your eyes from sparks and potential splatters. Additionally, it is advisable to use heat-resistant gloves to shield your hands from burns due to the high temperatures involved in soldering.
2. Work in a Well-Ventilated Area
Soldering brass produces fumes that can be harmful when inhaled. Therefore, it is essential to work in a well-ventilated area or use a fume extractor to remove the fumes. Adequate ventilation will help ensure a clean and safe working environment.
3. Keep Flammable Materials Away
Brass soldering requires the use of a torch or soldering iron, which generates heat and flame. To prevent accidents and fires, always keep flammable materials, such as paper, fabric, and solvents, away from your work area.
4. Use Proper Soldering Tools
Make sure to use the appropriate soldering tools and equipment for soldering brass. A soldering iron with adjustable temperature control is recommended to prevent overheating and ensure precise soldering. Inspect your tools for damage or defects before each use.
5. Prevent Electric Shock
When using a soldering iron, be mindful of the electrical hazards it poses. Keep the power cord and any exposed wires away from water or other liquids to avoid electric shock. Ensure that the soldering iron is properly grounded, and never touch the soldering tip during operation or immediately after use.

6. Use a Fireproof Surface
Place your soldering iron and other hot objects on a fireproof surface to prevent accidental fires or damage to your work area. Avoid working on flammable materials such as wooden tables or countertops.
7. Allow Cooling Time
After soldering brass, always allow sufficient time for the soldering iron and soldered joints to cool down before handling them. Hot surfaces can cause severe burns if touched too soon.
| Note: |
|---|
| It is highly recommended to read and follow the manufacturer’s instructions and guidelines for your specific soldering iron and soldering brass to ensure optimal safety and performance. |
Choosing the Right Soldering Iron
When it comes to soldering brass, selecting the right soldering iron is crucial for achieving successful results. Here are some key factors to consider when choosing a soldering iron for your brass soldering projects:
Temperature Control
The soldering iron you choose should have adjustable temperature control. Brass typically requires a higher temperature to properly melt the solder, so a soldering iron with temperature control between 600°F (315°C) and 700°F (370°C) is recommended. This will ensure that the solder flows smoothly and creates a strong bond with the brass.
Power Output
Consider the power output of the soldering iron. Higher wattage soldering irons heat up faster and maintain a more consistent temperature while soldering. For soldering brass, a soldering iron with a power output of at least 40 watts is recommended to provide enough heat for efficient soldering.

Additionally, a soldering iron with a long heating element is beneficial as it allows for better heat distribution and reduces the chances of overheating the brass or adjacent components.
Tips and Accessories
Make sure the soldering iron you choose has compatible tips for soldering brass. A chisel or screwdriver-shaped tip is generally suitable for soldering larger brass components, while a fine pointed tip works well for smaller, intricate soldering tasks.
It is also helpful to have additional accessories such as soldering stands or holders to safely hold the soldering iron when not in use. A heat-resistant mat or pad can protect your work surface from accidental damage.
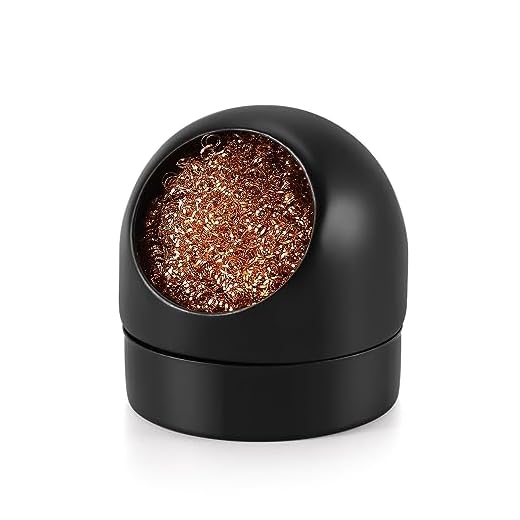
Lastly, check if the soldering iron comes with a soldering iron cleaning sponge or brass wool. Keeping the tip of the soldering iron clean improves heat transfer and solder flow, leading to better soldering results.
By considering these factors, you can choose a soldering iron that is well-suited for soldering brass and ensure successful soldering results.

Preparing the Brass Surface
Before soldering brass with a soldering iron, it is important to properly prepare the surface of the brass to ensure a strong and durable bond. Follow these steps to prepare the brass surface:
- Clean the brass: Start by cleaning the brass surface with a suitable cleaner or degreaser to remove any dirt, grease, or oxidation. Use a soft cloth to apply the cleaner and gently rub the surface until it appears clean. Rinse the brass with water and allow it to dry completely.
- Sand the brass: Using fine-grit sandpaper or steel wool, sand the surface of the brass to create a rough texture. This will help the solder adhere to the brass more effectively. Sand in a circular motion to ensure even coverage and remove any remaining debris or oxidation.
- Apply flux: Flux is essential for soldering brass, as it helps the solder flow smoothly and improves adhesion. Apply a small amount of flux to the sanded surface of the brass. Use a flux brush to spread the flux evenly, covering the entire area that will be soldered.
By properly preparing the brass surface, you will create optimal conditions for soldering and achieve a strong and long-lasting solder joint.
Applying Flux for Better Bonding
When soldering brass with a soldering iron, it is important to apply flux to ensure a better bonding between the brass and the solder. Flux helps to remove oxidation and impurities from the brass surface, allowing the solder to flow more easily and create a stronger bond.
There are different types of flux available, such as liquid flux and paste flux. Liquid flux is often used for larger areas, while paste flux is better for smaller, intricate soldering jobs.
To apply the flux, follow these steps:

| 1. | Prepare the brass surface by cleaning it thoroughly. Use a fine-grit sandpaper or a wire brush to remove any tarnish or dirt. |
| 2. | Apply a small amount of flux onto the brass surface. If using liquid flux, use a brush or a dropper to spread it evenly. If using paste flux, use a small applicator or your soldering iron’s tip. |
| 3. | Heat the brass surface with the soldering iron. The flux will begin to bubble and turn into a liquid, indicating that it is working. |
| 4. | Allow the flux to fully activate and remove any oxidation or impurities for around 30 seconds. |
| 5. | Once the flux has done its job, you can begin soldering. Apply the solder to the brass surface, making sure it flows smoothly and creates a secure bond. |
Remember to work in a well-ventilated area when soldering, as flux can produce fumes that may be harmful if inhaled. Always follow safety precautions and wear protective gear as necessary.
By applying flux before soldering brass with a soldering iron, you can ensure a stronger bond and a more successful soldering project.
Soldering Brass with a Soldering Iron
Soldering brass with a soldering iron is a practical skill that can be useful for various DIY projects or repairs. Whether you are a beginner or have some experience with soldering, learning how to solder brass can open up new possibilities for your crafting and home improvement endeavors.
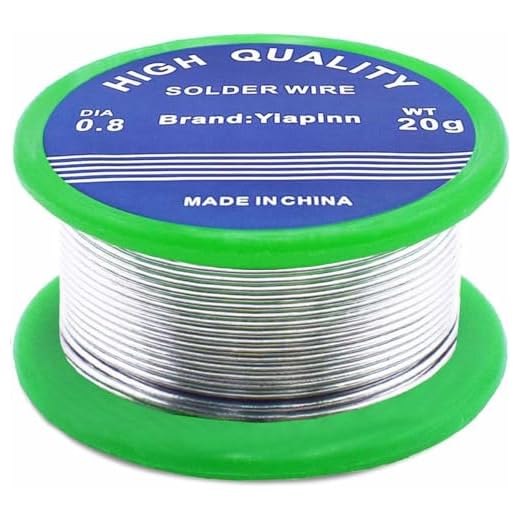
Materials Needed
Before getting started, gather the following materials:
| Soldering iron | A high-wattage soldering iron with adjustable temperature is recommended. |
| Solder | Use a solder that is specifically made for brass, such as a silver solder or a brass solder with a low melting point. |
| Flux | Flux helps promote the flow of solder and prevents oxidation during the soldering process. |
| Clean cloth | Having a clean cloth or sponge handy to wipe the soldering iron tip will keep it free from debris and flux buildup. |
| Safety gear | Wear safety goggles and work in a well-ventilated area to protect yourself from potential hazards. |
Step-by-Step Guide
Follow these steps to successfully solder brass with a soldering iron:
- Prepare the brass: Make sure the brass pieces you intend to solder are clean and free from any grease, dirt, or oxidation. Use a file or sandpaper to remove any surface impurities and create a smooth joint area.
- Apply flux: Apply a small amount of flux to the joint area. Flux acts as a cleaning agent and helps the solder flow smoothly.
- Heat the soldering iron: Plug in your soldering iron and wait for it to heat up. Adjust the temperature according to the type of solder you are using. Higher melting point solders require higher temperatures.
- Position the soldering iron: Hold the soldering iron in one hand, while holding the solder wire in the other hand. Position the soldering iron tip near the joint area.
- Melting the solder: Touch the tip of the soldering iron to the joint area and wait until it gets hot enough to melt the solder. Touch the solder wire to the joint area and allow it to flow into the joint, creating a strong bond.
- Inspect and clean: After soldering, inspect the joint to ensure it is properly bonded. Use a clean cloth or sponge to wipe off excess flux and solder residue.
Remember to practice soldering on scrap brass pieces to gain confidence and improve your technique before working on your actual project. With some patience and practice, you’ll be able to create clean and sturdy soldered joints in brass.
Questions and answers
What kind of soldering iron should I use for soldering brass?
When soldering brass, it is recommended to use a soldering iron with a variable temperature control. This will allow you to adjust the temperature based on the thickness of the brass and the type of solder you are using.
What type of solder should I use for soldering brass?
For soldering brass, it is best to use a solder that is specifically designed for use with metals, such as a lead-free solder with a rosin flux core. This type of solder will provide a strong and durable bond.
What safety precautions should I take when soldering brass?
When soldering brass, it is important to take certain safety precautions. First, make sure you are working in a well-ventilated area to avoid inhaling any fumes. Additionally, wear safety glasses to protect your eyes from any flying solder or flux. Lastly, be mindful of the heat from the soldering iron and avoid touching it directly with your bare hands.
Can I solder brass without using flux?
While it is possible to solder brass without using flux, it is not recommended. Flux helps to remove any oxidation or impurities from the surface of the brass, allowing the solder to flow more easily and create a stronger bond. Without flux, the solder may not adhere properly to the brass and the joint may be weak or prone to breaking.

Meet Harrison Clayton, a distinguished author and home remodeling enthusiast whose expertise in the realm of renovation is second to none. With a passion for transforming houses into inviting homes, Harrison's writing at https://thehuts-eastbourne.co.uk/ brings a breath of fresh inspiration to the world of home improvement. Whether you're looking to revamp a small corner of your abode or embark on a complete home transformation, Harrison's articles provide the essential expertise and creative flair to turn your visions into reality. So, dive into the captivating world of home remodeling with Harrison Clayton and unlock the full potential of your living space with every word he writes.


