How To Solder A Circuit Board With A Soldering Iron

Soldering a circuit board with a soldering iron is an essential skill for any electronics enthusiast or DIY hobbyist. Whether you are repairing a broken device or creating your own electronic project, knowing how to solder a circuit board will come in handy.
Soldering is the process of joining together two or more electronic components using a heated soldering iron and solder. It creates a strong and reliable connection between the components, allowing the flow of electricity.
Before you start soldering, it’s important to gather the necessary tools and materials. You will need a soldering iron, solder, flux, soldering stand, wire cutters, and a sponge or wet sponge for cleaning the soldering iron tip.
Once you have all the tools ready, the first step is to prepare the circuit board and the components you want to solder. Make sure the board is clean and free from any dirt or debris. Cut the component’s leads to the desired length and position them on the board.
Next, heat up the soldering iron and apply a small amount of solder to the tip to ensure good heat transfer. Place the soldering iron tip on the joint where the component lead and the circuit board pad meet. Gently touch the solder to the joint, allowing it to flow and create a solid connection.
Continue soldering each joint, making sure the solder flows smoothly and creates shiny, cone-shaped connections. Avoid applying excessive heat or too much solder, as it can cause damage to the components or create short circuits.
Once you have finished soldering all the joints, let the circuit board cool down. Inspect your work, looking for any solder bridges or cold joints. Use wire cutters to trim any excess component leads and clean the soldering iron tip by wiping it on a damp sponge.
Soldering a circuit board with a soldering iron may seem intimidating at first, but with practice and patience, it becomes a valuable skill. Remember to always work in a well-ventilated area, wear safety goggles, and follow proper safety precautions to avoid injury.
Now that you have learned the basics of soldering a circuit board with a soldering iron, you can confidently tackle your electronic projects and repairs with ease!
Choosing the Right Soldering Iron
When it comes to soldering a circuit board, choosing the right soldering iron is crucial. The soldering iron is the tool that heats up and melts the solder, allowing you to make connections on the board. Here are some factors to consider when selecting a soldering iron:

Temperature control: Look for a soldering iron with adjustable temperature control. Different soldering projects may require different temperatures, so having the ability to adjust the temperature will ensure that you can work with a range of components and materials.
Wattage: The wattage of a soldering iron determines how quickly it can heat up and maintain the desired temperature. For general circuit board soldering, a soldering iron with a wattage between 20W and 60W is usually sufficient. Higher wattage irons may be necessary for larger or more complex projects.
Soldering iron tip: The tip of the soldering iron is the part that makes contact with the board and transfers heat to the solder. It’s important to choose a soldering iron with a tip that is appropriate for the size of the components you will be working with. A fine tip is typically used for small, delicate components, while a larger tip may be needed for larger components.
Durability: Look for a soldering iron that is built to last. A durable soldering iron will be able to withstand frequent use without losing its effectiveness. It’s also a good idea to choose a soldering iron with a replaceable tip, so you can easily replace it if it becomes worn or damaged.
Ergonomics: Consider the ergonomics of the soldering iron. Look for a soldering iron with a comfortable grip that is easy to hold and maneuver. This will make it more comfortable to use for extended periods of time and help prevent hand fatigue.

Price: Finally, consider your budget when choosing a soldering iron. While it’s important to invest in a good quality soldering iron, there are options available at various price points. Balancing your budget with the features and quality that you need will help you find the right soldering iron for your needs.
By considering these factors, you can choose the right soldering iron for your circuit board soldering projects. Remember to take your time and do your research before making a purchase, as investing in a high-quality soldering iron will greatly improve your soldering results.
Preparing the Circuit Board
Before you start soldering, it’s important to properly prepare your circuit board. This will ensure that the solder joints are strong and secure. Here are the steps to follow:
- Clean the board: Use a soft brush or compressed air to remove any dust or debris from the circuit board. This will help create a clean surface for soldering.
- Inspect the components: Check all the components on the board to make sure they are in good condition and properly aligned. Look for any loose or damaged parts that may need to be replaced before soldering.
- Tin the soldering iron tip: Before you start soldering, it’s important to make sure the tip of your soldering iron is properly tinned. This means applying a thin layer of solder to the tip to help facilitate heat transfer during soldering.
- Secure the board: It’s important to firmly secure the circuit board in place before you start soldering. This can be done using a specialized circuit board holder or by using clamps to hold the board in place on your work surface.
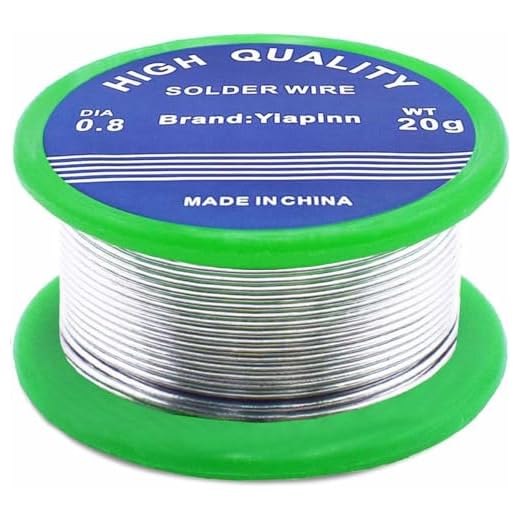
- Prepare the solder: Cut a length of solder wire and unwind it from the spool. Make sure the solder is easy to access and within reach while you’re soldering.
By properly preparing your circuit board before soldering, you can ensure that the solder joints are strong and reliable, leading to a successful soldering project.
Preparing the Soldering Iron
Before you begin soldering a circuit board, it’s important to properly prepare your soldering iron. Follow these steps to ensure that your soldering iron is ready for use:

- Ensure that your soldering iron is clean and free of any debris. Use a damp sponge or soldering iron tip cleaner to remove any solder residue or oxidation from the tip of the iron.
- Inspect the soldering iron tip for any signs of damage or wear. If the tip is damaged or corroded, it may need to be replaced before you can effectively solder a circuit board.
- Secure the soldering iron in a soldering iron stand or holder to prevent it from rolling or falling while not in use. This will also help protect your work surface from any heat damage.
- Check that the soldering iron is at the correct temperature for soldering. Each circuit board and solder type may require a different temperature setting. Consult the manufacturer’s instructions or soldering guide for the recommended temperature range.
- If necessary, adjust the temperature of your soldering iron according to the requirements of the circuit board and solder you are using. Allow the soldering iron to reach the desired temperature before proceeding.
By properly preparing your soldering iron, you can ensure that your soldering process goes smoothly and that you achieve clean and reliable solder joints on your circuit board.
Applying Flux to the Circuit Board
Flux is an essential material for soldering and helps improve the solder joint’s quality. It is designed to remove oxidation from the metal surfaces, prevent oxidation during the soldering process, and promote the flow of solder.
Before you start soldering, it’s crucial to apply flux to the circuit board. Flux is typically available in liquid or paste form. The liquid flux is popular for beginners due to its ease of use. It often comes in a bottle with a brush applicator, making it easy to apply where it’s needed.
Step 1: Clean the Circuit Board
Ensure that the circuit board is clean and free from any contaminants or residues before applying the flux. You can use isopropyl alcohol and a lint-free cloth to clean the board thoroughly. This step is important as it allows the flux to work more effectively.
Step 2: Apply Flux
Start by shaking or stirring the flux to ensure that it’s well-mixed. Then, dip the brush or applicator into the flux bottle, ensuring that it has an adequate amount of flux. You don’t need to apply a lot; a thin, even layer is sufficient.

Apply the flux to the areas where you’ll be soldering, like the solder pads or component leads. Make sure that the flux covers the entire area that will be heated during the soldering process. Be careful not to apply too much flux, as excess flux can cause soldering issues.
Once you’ve applied the flux, you’re ready to move on to the soldering process. The flux will help improve the solder’s wetting ability and ensure a good connection between the components and the circuit board.
Soldering the Components
Now that you have prepared your circuit board by cleaning it and tinning the pads, it’s time to start soldering the components onto it. Here’s a step-by-step guide on how to solder a circuit board with a soldering iron:
- Start by identifying the component you want to solder onto the circuit board. Ensure that it matches the corresponding footprint on the board.
- Apply a small amount of solder to the tip of your soldering iron to help with heat transfer.
- Hold the component in place with a pair of tweezers or a component holder, aligning the leads with the corresponding pads on the board.
- Using your other hand, touch the tip of the soldering iron to the pad and lead simultaneously to heat them up.
- Once the solder melts, apply a small amount of solder to create a good electrical and mechanical connection between the lead and the pad. Be careful not to apply too much solder, as it can cause a short circuit or bridge adjacent pads.
- Continue soldering the remaining leads of the component, applying solder to each connection.
- Inspect each solder joint to ensure it is shiny, smooth, and without any solder bridges or cold solder joints. If necessary, reheat the joint and add more solder.
- Repeat the soldering process for each component on the circuit board.
Remember to let the solder joints cool down before touching or moving the board to avoid damaging the connections. It’s also a good practice to clean the board with isopropyl alcohol and a brush after soldering to remove any flux residue.
By following these steps and practicing proper soldering techniques, you can confidently solder your circuit board and ensure reliable connections between the components.

Testing the Soldered Circuit Board
After soldering the components onto the circuit board, it is crucial to test the connections and ensure that everything is functioning correctly. Testing the soldered circuit board helps identify any issues or errors that might have occurred during the soldering process and provides an opportunity to fix them before using the board in a project.
Visual Inspection
The first step in testing the soldered circuit board is performing a visual inspection. Examine all the solder joints to ensure they are neat, shiny, and properly formed. Look for any solder bridges or cold solder joints, which can cause connectivity issues. Also, check for any missing or misplaced components. Use a magnifying glass if necessary to get a closer look at the solder joints and components.
Continuity Test
Once the visual inspection is complete, perform a continuity test to check for proper connections between different points on the circuit board. Use a multimeter set to the continuity mode and touch the test probes to the appropriate solder pads or component leads on the board. A beep or a low resistance reading indicates a good connection, while no sound or a high resistance reading suggests a potential problem.
Create a table to record the continuity test results, noting down the solder pad/component tested and the corresponding readings. This will help keep track of any potential issues and make it easier to troubleshoot if needed.
If any solder joints or connections fail the continuity test, it is necessary to rework them. Use a soldering iron and the appropriate soldering technique to fix any faulty connections. Remember to apply heat for the right amount of time and use the correct amount of solder to achieve reliable joints.

Functionality Test
After ensuring the connections are correct, it is important to test the functionality of the circuit board. Connect the soldered circuit board to the intended power source and any necessary input/output devices according to the circuit design or project requirements.
Check if the circuit board is functioning as expected by observing any visual indicators, such as LED lights, and verifying the desired output or response. Use a multimeter or any relevant testing equipment to measure voltages, currents, or other parameters to ensure the circuit board is operating within the desired specifications.
Record the functionality test results in a table, noting down the expected outputs and the observed values. Compare the expected and observed results to identify any discrepancies or issues that need to be addressed.
If the circuit board is not functioning correctly, double-check the components, solder joints, and connections to troubleshoot and fix the problem. Measure voltages and currents at different points on the circuit board to identify potential problem areas.
Once all the necessary tests have been performed and any issues have been resolved, the soldered circuit board is ready for use in the desired project or application.
Remember, proper testing and verification of the soldered circuit board ensure its reliability and functionality, reducing the chances of failures or malfunctions in the final project.
Questions and answers
What is soldering and why is it important in circuit board assembly?
Soldering is the process of joining two or more metal parts using a filler metal (solder). It is an important step in circuit board assembly because it allows for the permanent connection of electronic components to the board, ensuring electrical continuity and mechanical stability.
What tools do I need for soldering a circuit board?
You will need a soldering iron, solder wire, flux, a soldering stand, soldering sponge, and tweezers. It is also recommended to have a magnifying glass or a microscope for better visibility.
What are the steps involved in soldering a circuit board?
The steps involved in soldering a circuit board are as follows: 1. Prepare the circuit board and electronic components. 2. Clean the soldering iron tip and apply flux. 3. Heat the soldering iron and apply it to the joint to melt the solder. 4. Feed the solder wire into the joint to create a good connection. 5. Allow the joint to cool and solidify. 6. Clean the soldering iron tip after each joint.
What are some common mistakes to avoid when soldering a circuit board?
Some common mistakes to avoid when soldering a circuit board include overheating the components, applying too much solder, not using enough flux, not properly cleaning the soldering iron tip, and not allowing the joint to cool before moving or touching it. It is important to practice proper soldering techniques and work in a well-ventilated area.


Meet Harrison Clayton, a distinguished author and home remodeling enthusiast whose expertise in the realm of renovation is second to none. With a passion for transforming houses into inviting homes, Harrison's writing at https://thehuts-eastbourne.co.uk/ brings a breath of fresh inspiration to the world of home improvement. Whether you're looking to revamp a small corner of your abode or embark on a complete home transformation, Harrison's articles provide the essential expertise and creative flair to turn your visions into reality. So, dive into the captivating world of home remodeling with Harrison Clayton and unlock the full potential of your living space with every word he writes.


