How To Remove Smd Chip With Soldering Iron
If you are working with electronic circuits, you may come across the need to remove a surface mount device (SMD) chip from a circuit board. This can be a delicate task, but with the right tools and techniques, it can be done without causing any damage to the circuit.
One of the most commonly used tools for removing SMD chips is a soldering iron. A soldering iron is a handheld tool that uses heat to melt solder and allows you to remove or attach components to a circuit board. When using a soldering iron to remove a chip, it is important to be careful and precise to avoid damaging other components on the board.
To begin, make sure you have a clean work area and all the necessary tools. You will need a soldering iron with a fine tip, solder wick or desoldering braid, and a pair of tweezers. It is also recommended to have a magnifying glass or a microscope to help you see the small details.
Start by heating up your soldering iron and allowing it to reach the appropriate temperature. A temperature of around 350-400 degrees Celsius is usually suitable for SMD chip removal. Once your iron is heated up, apply it to the solder joints holding the chip in place. Gently touch the iron to the joint and the surrounding area, being careful not to apply too much pressure or heat for too long, as this can damage the board.
What is Smd Chip?
A surface-mount device (SMD) chip, also known as a surface-mount component, is a miniature electronic device that is soldered directly onto a printed circuit board (PCB). It consists of a small, flat package that contains one or more integrated circuits (ICs) or other electronic components. SMD chips are commonly used in various electronic devices, including smartphones, laptops, televisions, and more.

The main advantage of SMD chips over traditional through-hole components is their small size. This allows for greater component density on PCBs, resulting in more compact and lightweight devices. SMD chips also have better electrical performance due to shorter trace lengths and reduced parasitic capacitance and inductance.
SMD chips are typically soldered onto the PCB using reflow soldering, which involves heating the entire board to melt the solder and create a solid connection. Removing an SMD chip requires careful heating of the solder joints using a soldering iron and gently prying it off the board. It is important to use the correct techniques and tools to avoid damaging the chip or the surrounding components.
Overall, SMD chips have revolutionized the field of electronics by enabling the production of smaller, more advanced, and more efficient devices. Their widespread use has led to advancements in various industries and has made electronics more accessible to the general public.
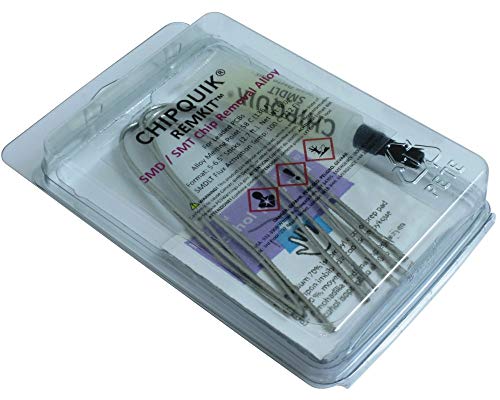
Tools Required for Removing Smd Chip
Removing a surface mount device (SMD) chip requires precision and the right tools to avoid damaging the chip or the surrounding components. Here are the essential tools you will need:
Soldering Iron: A temperature-controlled soldering iron is essential for safely removing the SMD chip. Make sure the tip of the soldering iron is fine and suitable for SMD work.

Soldering Station: A quality soldering station with adjustable temperature control is recommended for SMD chip removal. This allows you to set the temperature accurately and maintain a consistent heat during the process.
Solder Sucker: Also known as a desoldering pump, a solder sucker helps you remove excess solder from the SMD chip and its surrounding pads. It creates a vacuum that sucks up the molten solder, making it easier to remove the chip.
Desoldering Braid: Desoldering braid is an alternative method to remove excess solder. It is a thin copper braid that absorbs the molten solder when pressed against it. Desoldering braid is useful for precision work and removing small amounts of solder.
Tweezers: Fine-point tweezers are indispensable for handling and removing SMD chips. Look for tweezers with sharp, angled tips to provide a firm grip and precise control.
Flux: Flux helps improve solder flow and increases the effectiveness of soldering. Applying flux to the solder joints before removal can make the process smoother and help prevent damage to the chip.

Hot Air Rework Station: In some cases, an SMD chip may require hot air to remove it properly. A hot air rework station is a versatile tool that can provide controlled hot airflow to heat the entire chip evenly, making it easier to remove.
Anti-static Wrist Strap: When working with SMD chips, it is crucial to eliminate static electricity to prevent damage. An anti-static wrist strap, connected to a grounding point, helps discharge any static buildup in your body to protect the sensitive electronic components.
Magnifying Lamp: A magnifying lamp with adjustable lighting can greatly enhance your view of the SMD chip and its surroundings, making it easier to work with and avoid mistakes.
Having the right tools for removing SMD chips is vital for successful and safe removal. With these tools and proper techniques, you can confidently work on repairing or replacing SMD components in various electronic devices.
Step-by-Step Guide to Remove SMD Chip with Soldering Iron
Removing a surface mount device (SMD) chip can be a delicate process that requires careful attention and the right tools. One of the most common tools used for this task is a soldering iron. Here is a step-by-step guide on how to remove an SMD chip with a soldering iron:

Step 1: Prepare the work area. Make sure you are working in a well-ventilated space with good lighting. It is also a good idea to have a small tray or container nearby to hold the removed chips.
Step 2: Gather the necessary tools. You will need a soldering iron with a fine tip, solder wire or solder wick, and tweezers or a chip removal tool.
Step 3: Heat up the soldering iron. Plug in the soldering iron and turn it on. Allow it to heat up for a few minutes until it reaches the desired temperature.
Step 4: Apply flux. Apply a small amount of flux to the solder joints on the SMD chip. Flux helps to remove oxidation and promotes the flow of solder.
Step 5: Heat the solder joints. Using the heated soldering iron, carefully heat each solder joint on the SMD chip. Apply gentle pressure with the iron to loosen the solder and make it easier to remove the chip.

Step 6: Remove the chip. Once the solder has melted, use tweezers or a chip removal tool to gently lift the SMD chip from the circuit board. Be careful not to apply too much force or twist the chip, as this can damage the surrounding components or the board itself.
Step 7: Clean the area. After the chip has been removed, clean the area with a brush or compressed air to remove any remaining solder or debris.
Step 8: Repeat if necessary. If you need to remove multiple SMD chips, repeat steps 4 to 7 for each chip.
Step 9: Inspect the board. Once all the chips have been removed, inspect the circuit board for any signs of damage or other issues. Make any necessary repairs before proceeding.
Step 10: Dispose of the removed chips properly. Place the removed chips in the tray or container designated for electronic waste disposal.

Following these steps will help ensure a successful removal of SMD chips using a soldering iron. Remember to always exercise caution and work slowly to avoid damaging the board or other components.
Tips and Precautions for Successful Removal of Smd Chip
Removing a Surface Mount Device (SMD) chip with a soldering iron requires precision and care. Here are some tips and precautions to ensure a successful removal process:
1. Gather the necessary tools and equipment
Before starting, gather all the necessary tools and equipment such as a soldering iron with a fine tip, soldering flux, solder wick or solder sucker, tweezers, and safety goggles. Having everything ready will make the process smoother and safer.
2. Prepare the work area
Ensure you have a clean and well-lit work area that is free from any flammable materials. Consider using a heat-resistant mat or pad to protect the surface where you will be working.
3. Wear safety goggles
Always wear safety goggles to protect your eyes from any potential hazards like flying solder or chip fragments.

4. Heat the soldering iron
Heat the soldering iron to the appropriate temperature for the type of solder you are using. It is crucial to maintain a consistent and controlled temperature to avoid damaging the chip or surrounding components.
5. Apply solder flux
Apply a small amount of solder flux to the area around the SMD chip. This will help the solder flow more easily during the removal process.
6. Heat the solder joints
Using the soldering iron, carefully heat each solder joint that connects the SMD chip to the PCB. Apply heat evenly to avoid overheating or damaging the surrounding components.
7. Use solder wick or solder sucker
Once the solder joints are heated, quickly and gently remove the molten solder using a solder wick or solder sucker. Be cautious not to apply too much force that could damage the chip or the board.
8. Lift the SMD chip
With the solder joints cleared, use a pair of tweezers to gently lift the SMD chip off the PCB. Avoid applying excessive pressure to prevent any damage.
9. Inspect and clean
After removing the chip, carefully inspect the board for any remaining solder or damaged solder pads. Clean the area if needed using isopropyl alcohol and a cotton swab.
10. Dispose of the chip properly
Dispose of the removed SMD chip in an appropriate manner, following the local regulations for electronic waste disposal.
Remember:
- Practice on scrap or unused PCBs before attempting to remove chips from valuable or critical components.
- Handle the soldering iron with care, avoiding contact with bare skin or flammable materials.
- Never rush the removal process, as it requires patience and precision.
By following these tips and precautions, you can successfully remove SMD chips using a soldering iron without causing any damage to the chip or the PCB.
Questions and answers
Is it possible to remove an SMD chip using a soldering iron?
Yes, it is possible to remove an SMD chip using a soldering iron. However, it requires some skill and caution to avoid damaging the chip or the surrounding components.
What tools do I need to remove an SMD chip with a soldering iron?
To remove an SMD chip with a soldering iron, you will need a soldering iron with a fine tip, soldering flux, solder wick or solder sucker, tweezers, and isopropyl alcohol for cleaning.


Harrison Clayton
Meet Harrison Clayton, a distinguished author and home remodeling enthusiast whose expertise in the realm of renovation is second to none. With a passion for transforming houses into inviting homes, Harrison's writing at https://thehuts-eastbourne.co.uk/ brings a breath of fresh inspiration to the world of home improvement. Whether you're looking to revamp a small corner of your abode or embark on a complete home transformation, Harrison's articles provide the essential expertise and creative flair to turn your visions into reality. So, dive into the captivating world of home remodeling with Harrison Clayton and unlock the full potential of your living space with every word he writes.


